All posts by Jordan Charbonneau

How to Save Tomato Seeds

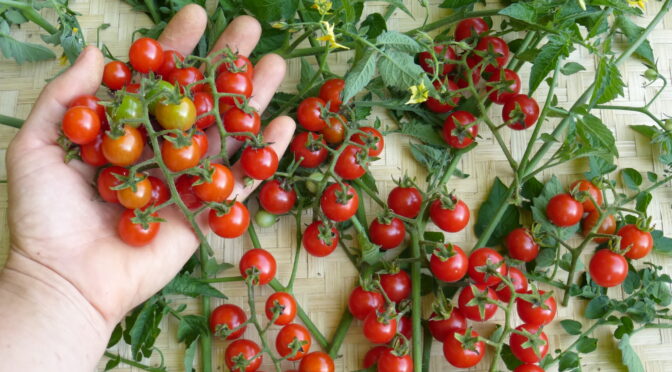
Homegrown tomatoes are one of summer’s highlights. Storebought tomatoes just can’t compare! After a few years of gardening, many of us have a tomato variety that earns a special place in our hearts, whether it’s a giant slicer like Radiator Charlie’s Mortgage Lifter or a tiny cherry tomato like Coyote. One way we can all help ensure that these precious open-pollinated and heirloom varieties remain in circulation for generations to come is to choose a variety to steward. Tomatoes are a great crop for beginner seed savers. Here’s how to save tomato seeds properly to ensure good germination and healthy plants in the coming seasons.

Select an Open-Pollinated Variety

Odds are, you’ve already completed this step if you’ve purchased seeds from us. However, if you have seeds that you’ve picked up at your local store or another seed company, you may want to ensure that they’re an open-pollinated variety and not hybrids. Open-pollinated seeds are established varieties, while hybrids are a cross between two different parents. Hybrids may not produce true-to-type. 

Read more about types of seeds in our past post, What’s in a Seed: Open-Pollinated Vs. Hybrid Vs. GM.

Isolate Varieties

Generally, we recommend that you isolate tomato varieties from each other by at least 10 feet (for modern varieties) or 35 feet (for heirloom varieties). This distance means that pollinators are less likely to spread pollen between different varieties. Here at Southern Exposure, we have higher standards for pure commercial seed and isolate varieties by a minimum of 150 feet.

However, a little cross-pollination isn’t the end of the world in a home garden, and in many places, it is still the norm. 

Watch and Select Plants

Ideally, throughout the season, you’ve been able to spot plants that are performing particularly well. Maybe they transplanted better, grew faster, produced earlier, or seemed less susceptible to blight. When you go to save seeds, aim to use tomatoes from these high-performing plants. 

Pick Overripe Tomatoes

To ensure all the seeds inside are mature, select tomatoes that are as ripe as can be. Don’t worry if they’re soft, split, or damaged. Underripe tomatoes will result in lower germination rates. You can leave tomatoes out to ripen for a few more days if necessary.

Process the Tomatoes

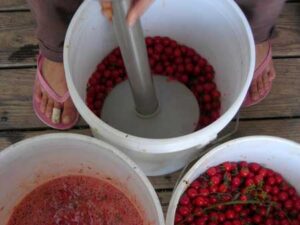
The easiest way to process tomatoes is just to blend or mash them up. This is especially true if you’re working with a large amount of tomatoes as we do. We often use a five-gallon bucket and an immersion blender.

However, if you’re working on a smaller scale and want to save as much of the tomatoes as possible, just cut them open and scoop out the gelatinous, seedy pulp. Place this material into a bucket or jar. You can use the rest of the tomato for making sauce, dehydrating, or canning.

Ferment the Seeds

It may sound weird, but you’ll get better results if you let your tomato 
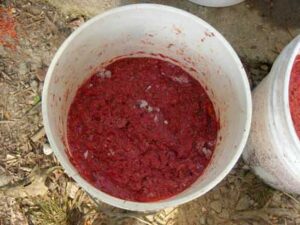
seed mixture ferment for 2 to 3 days. Tomatoes seeds have a gelatinous coating. In the wild, tomato seeds would fall to the ground, and this coating would slowly rot off until it was time for them to sprout. 

To ferment your seeds, place them into a bucket or container with a lid or cover. This lid should keep out flies, but you don’t want it to be airtight as air pressure could build up as the tomatoes ferment. Stir this mix about every 12 hours. A little mold will probably form on the surface. Don’t worry it won’t hurt the seeds; just mix it in.

Wash Your Tomato Seeds

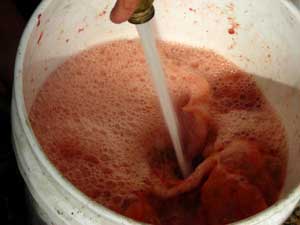
After your tomato seeds have fermented, you’ll want to add some water. For the large batches we process, we like to use high water pressure, which helps to dislodge the seeds from the pulp you can also give the mixture a good stir. Once you’ve added the water, the pulp, and any bad seeds will float to the top, while good, viable seeds sink to the bottom.

Pour off the pulp and most of the water. Add more water and pour the pulp off again. Repeat this process until you’ve removed as much pulp as possible. Lastly, strain your seeds and rinse them in a mesh colander or similar screen.

Dry Your Tomato Seeds

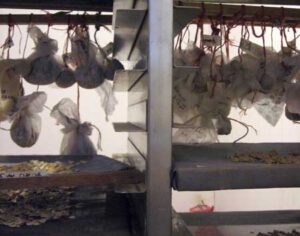
Dry your tomato seeds so that they’re out of direct sunlight and get good air circulation for three weeks. You can lay them flat on screens, pieces of paper, or paper towels. Don’t put them in a dehydrator; it can damage the seeds. You can also hang small bundles in pieces of cloth.

Label and Store Your Seeds

It’s best to store your seeds in an airtight container somewhere cool and out of direct sunlight. An airtight container in the freezer works well for tomato seeds and many other seeds. 

Always label your seeds well. Our memories are never as good as we think they are! Be sure to include the variety name and year of harvest on your label.

This winter, you don’t need to order seeds, and next spring, you can proudly plant your own! Following these simple steps, you can proudly save tomato seeds and steward a variety for years to come!
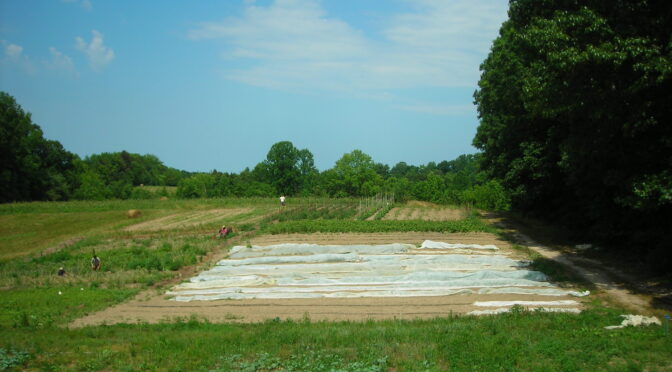
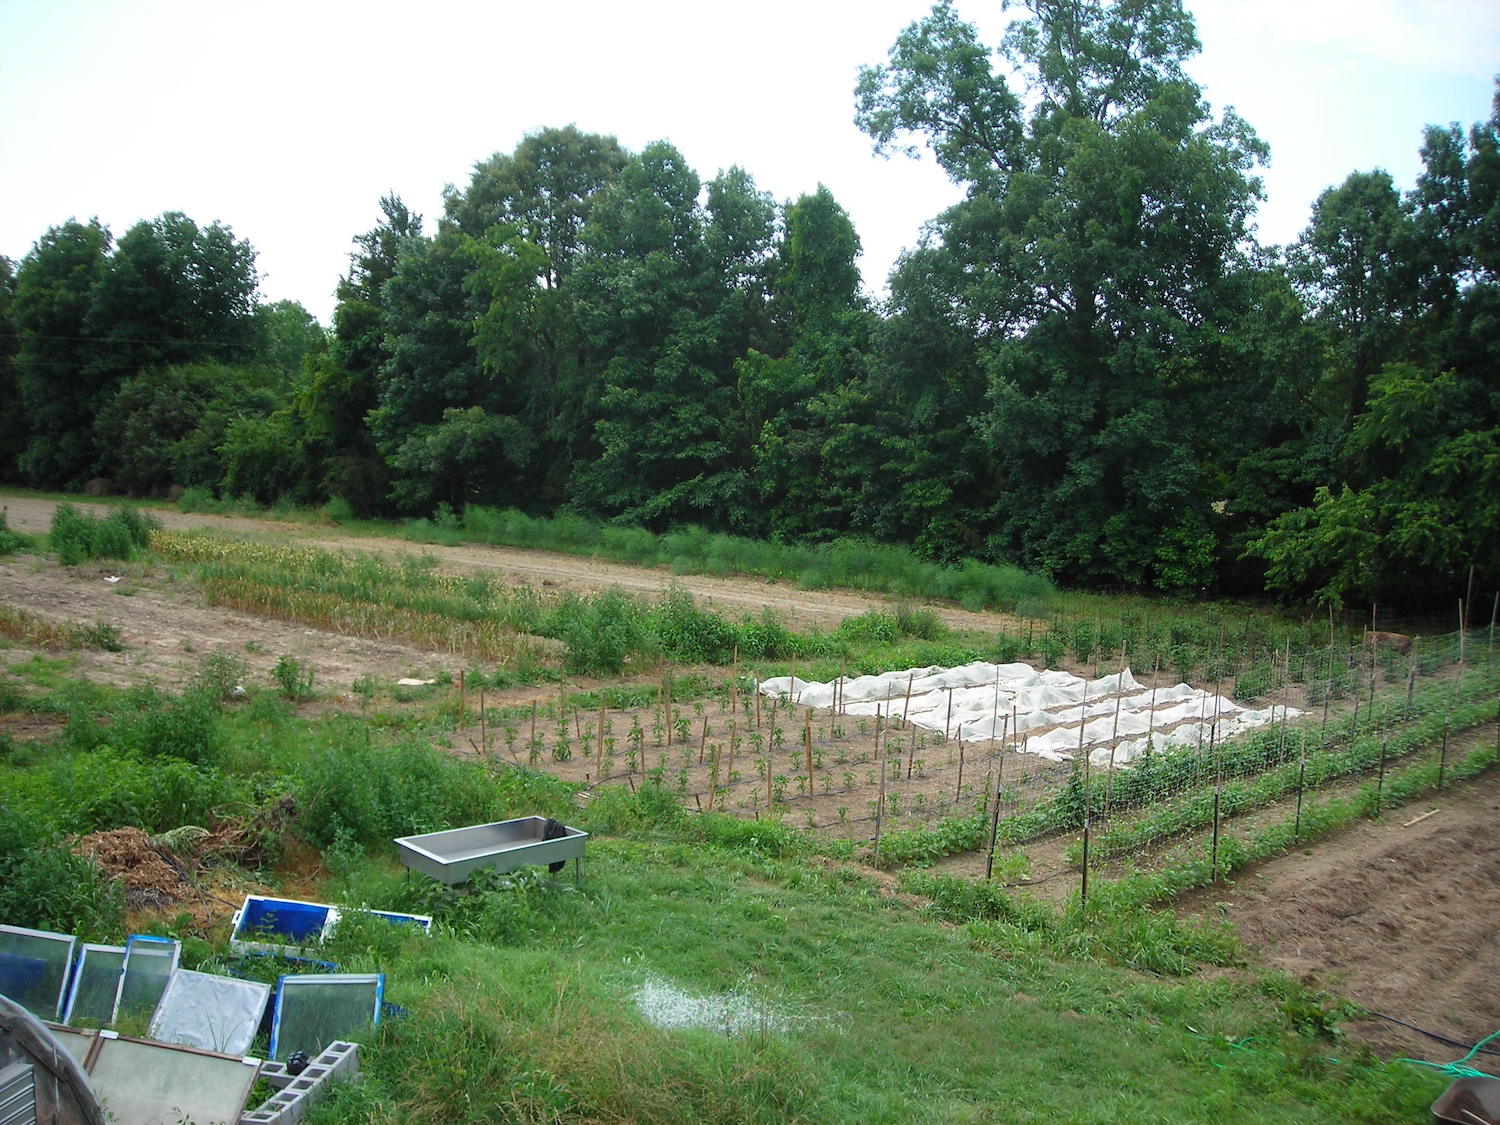
Choosing the Perfect Garlic for Your Garden

Garlic is a tasty, easy-to-grow, wonderful crop for beginners. While most crops in the vegetable patch are sown in spring, garlic is planted in the fall. While most of the grocery store garlic available is a single type, there are many types and varieties of garlic to choose from for your garden. Each garlic has its own traits, including the conditions it will thrive in. Learn how to select the best variety for your garden.

Types of Garlic

At Southern Exposure, we currently carry three basic types of garlic: softneck, hardneck, and elephant garlic. Unfortunately, we’re already out of stock of elephant garlic, but you may be able to find it from another small seed company or seed exchange.

Softneck

Softeneck Garlic is the favored garlic of southern regions. It thrives in warmer winters and does best from Virginia southward. It’s more domesticated than its hardneck cousin and lacks scapes (a type of flower stalk produced by hardneck). Its soft, bendable stems and leaves make it the ideal garlic for braiding. Softneck is also a prolific producer and great storage garlic.

Hardneck

Hardneck garlic, sometimes called rocambole garlic, does best in cooler climates, typically from Virginia northward. Hardneck varieties are beloved for their wide range of flavors, and tasty flower stalk called a scape. These scapes grow from the top of the plant and curl around, maturing for cutting in early summer. They share the bulb’s garlic flavor and make a tasty addition to pestos, stir-fries, and other dishes long before your bulbs are ready to harvest. 

Elephant Garlic

If you’re not sold on garlic’s intense flavor, elephant garlic may be the right choice. Its large cloves and mild, savory flavor have made it incredibly popular in recent years. 

Elephant Garlic gets its name from its large size and resemblance to garlic, but it’s not actually a true garlic at all. Elephant Garlic is a type of bulb-forming leek, which is why it’s milder than the true garlics. 

Elephant Garlic is suitable for USDA Hardiness Zones 3 through 9, making it a viable choice throughout most of the US.

Inchelium Red Softneck GarlicChoosing a Variety

Once you’ve narrowed down the type you’d like to plant, it’s time to pick a variety! All of our garlic varieties offer their own advantages, but these are a few choices you may want to get started with. 

Opt for a cold-tolerant variety in northern areas with German Extra Hardy.

This super cold-tolerant variety produces large cloves with a purplish blush. The cloves have a strong flavor when eaten raw, but it mellows some when they’re cooked. German Extra Hardy is a good storage variety, too!

Grow an excellent storage variety with Silver Rose Softneck Garlic. 

This is a great variety for Southern growers. Silver Rose is great for braiding and keeps up to a year under ideal storage conditions. It produces rose-colored cloves with a smooth, mild flavor that is perfect for your favorite recipes. 

Try out our best baking variety, Chesnok Red Hardneck Garlic.

Chesnok Red comes from the Republic of Georgia, near Shvelisi. The cloves are more numerous and elongated than most hardneck types and very aromatic with an abiding flavor.

Start with something simple with California Early Softneck Garlic.

California Early Softneck Garlic is probably the most widely grown garlic in the US and is very easy to grow. California Early has a mild flavor and excellent storage capabilities. 

Still can’t decide? Grab a Garlic Sampler.

If you can’t narrow down your choices or just want a surprise, we offer two sample packages. The Beginner Sampler includes a hardneck and softneck, while the Garlic Garden Sampler includes four different varieties.

Use this guide to consider what you want your garlic for and what will perform the best in your area. In the next few days, we’ll begin shipping out garlic and perennial onion orders and will continue into November. We ship garlic based on location, starting with northern areas first. Be sure to get your order in soon to get your garlic planted on time!

Protect Your Crops with Row Cover

If you’ve ever visited an organic vegetable farm, you’ve probably seen large sections of field blanketed in white cloth. Sometimes, it’s laid directly over the crops, and sometimes it’s held above them over small hoops, giving it the appearance of a long caterpillar sleeping in the garden. This gauze-like white fabric is called row cover. It’s typically made from woven or spun-bonded polyester or polypropylene and is designed to be permeable to air, light, and water. Farmers and gardeners can use this fabric to help protect crops from pests, cold temperatures, too much sun, and windburn.

Protect Your Crops From Wind

Wide open fields may be many gardeners’ dream, but they can be windy places! High winds can be tough on plants, especially tender transplants. Constant winds pull moisture from the soil and plants’ leaves. They can also tear leaves and damage limbs, leaving plants more susceptible to pests and disease. Using row cover in windy areas, especially as plants are getting established, can mitigate these issues.

Protect Your Crops From Sun

Shade cloth is similar to row cover but is generally used to protect plants from intense sun and heat. It’s often used to extend the growing season of greens, delaying bolting by keeping temperatures a bit cooler. It can also be used in extreme heat over crops like peppers and tomatoes, which may abort flowers or develop sun-scald.

If you can’t purchase shade cloth, you can hang old torn pieces of row cover or other thin fabrics over crops to provide some shade.

Protect Your Crops From Frost 

As we plan our fall gardens, we think about the dwindling light and drop in temperatures that fall will eventually bring. Row cover increases the temperature and humidity beneath it and can be used to increase growth and protect crops in the spring and fall.

How much protection your row cover provides will depend on the weight. Some thinner row covers only provide about 2°F of frost protection, while others offer 6° to 10°F of protection.

Garden beds with row cover
Row cover protecting White Beauty Eggplant from flea beetles.

Protect Your Crops From Pests

Keeping crops pest free can be challenging without resorting to some form of pesticides. Even those OMRI (Organic Materials Institute) certified pesticides can have unwanted adverse effects, harming beneficial insects in the area along with pests. Row cover allows you to block out pests, no sprays needed.

Row cover works with many crop and pest scenarios, including keeping brassicas like cabbage and broccoli free from cabbage loopers, preventing flea beetles from destroying young eggplants, stopping bean beetles from defoliating your bush beans, and preventing pesky vine borers, squash bugs, and cucumber beetles from ruining your cucurbit harvest.

Isolating Crops with Row Cover

Finally, growers can use row cover to isolate specific varieties. Just as it keeps out pests, it keeps out pollinators. While this is unnecessary for most home-scale seed savers, seed companies and plant breeders sometimes use row cover to block out pollinators and hand pollinate crops. This method allows breeders only to cross desired plants, helping keep varieties pure or creating new cultivars and hybrids.

Selecting Row Cover

As we’ve discussed above, many different types of row cover are available depending on what you need it for.

Frost and Cold Temperatures

If you’re looking to protect crops late into the fall or winter, choose a heavier row cover that offers greater protection from cold temperatures. However, heavier-weight row covers must be removed earlier in the spring as they can quickly hold in too much heat as temperatures rise and you head into summer.

Pest Protection

Lightweight options are generally all you need to protect crops from pests and allow you to keep them on without overheating your plants and soil.

Shade Cloth

Shade cloth also comes in varying options with densities ranging from 10% to 60% or more. It’s important to weigh the pros and cons of keeping crops cool while blocking sunlight which can ultimately slow growth.

When purchasing row cover, it’s worth checking with local garden centers as shipping can be pricey. If none is available, many online retailers carry it. You may see row cover listed under several common name brands, including Reemay, Agribon, Agronet, Agryl, Harvest Guard, and Typar.

If you can’t purchase row cover, we’ve found that tulle works as an excellent substitute. You can find it at most fabric stores, and they generally allow you to buy any length you need.

Row cover in kitchen gardenUsing Row Cover

In the spring, you can drape row cover directly over small, flexible transplants and seedlings. The edges should be weighted down, but leave slack for the plant’s to grow. If you’re using row cover for pest protection, bury the edges in the soil.

You’ll want to support the row cover for larger crops or sensitive plants like spinach, lifting it off the crops. You can form mini hoop houses or low tunnels. Many suppliers sell wire hoops to drape the row cover over, but you can also make your own with PVC pipe or other smooth, flexible material. Again, be sure to weigh down the edges of bury it in the soil.

Weeding and Watering

Especially if row cover is on hoops, it’s relatively easy to lift for weeding and watering. However, to keep your setup as low maintenance as possible, consider adding a water system like drip irrigation or soaker hoses before setting up your cover. You should also mulch well around your crops to keep the soil moist and help block weeds before placing your row cover.

Pollination

Just like row cover blocks out pests, it also blocks our bees, butterflies, and other pollinators. If you have row cover over insect-pollinated crops like the nightshades, including eggplants, tomatoes, and peppers, or cucurbits like cucumbers and squashes, you must remove your row cover when they flower. Removing the row cover will allow pollinators to do their jobs so that your crops will fruit! If you feel you still need row cover or shade cloth in place, you can remove it in the morning when pollinating bees are most active and replace it for the afternoon and evening.

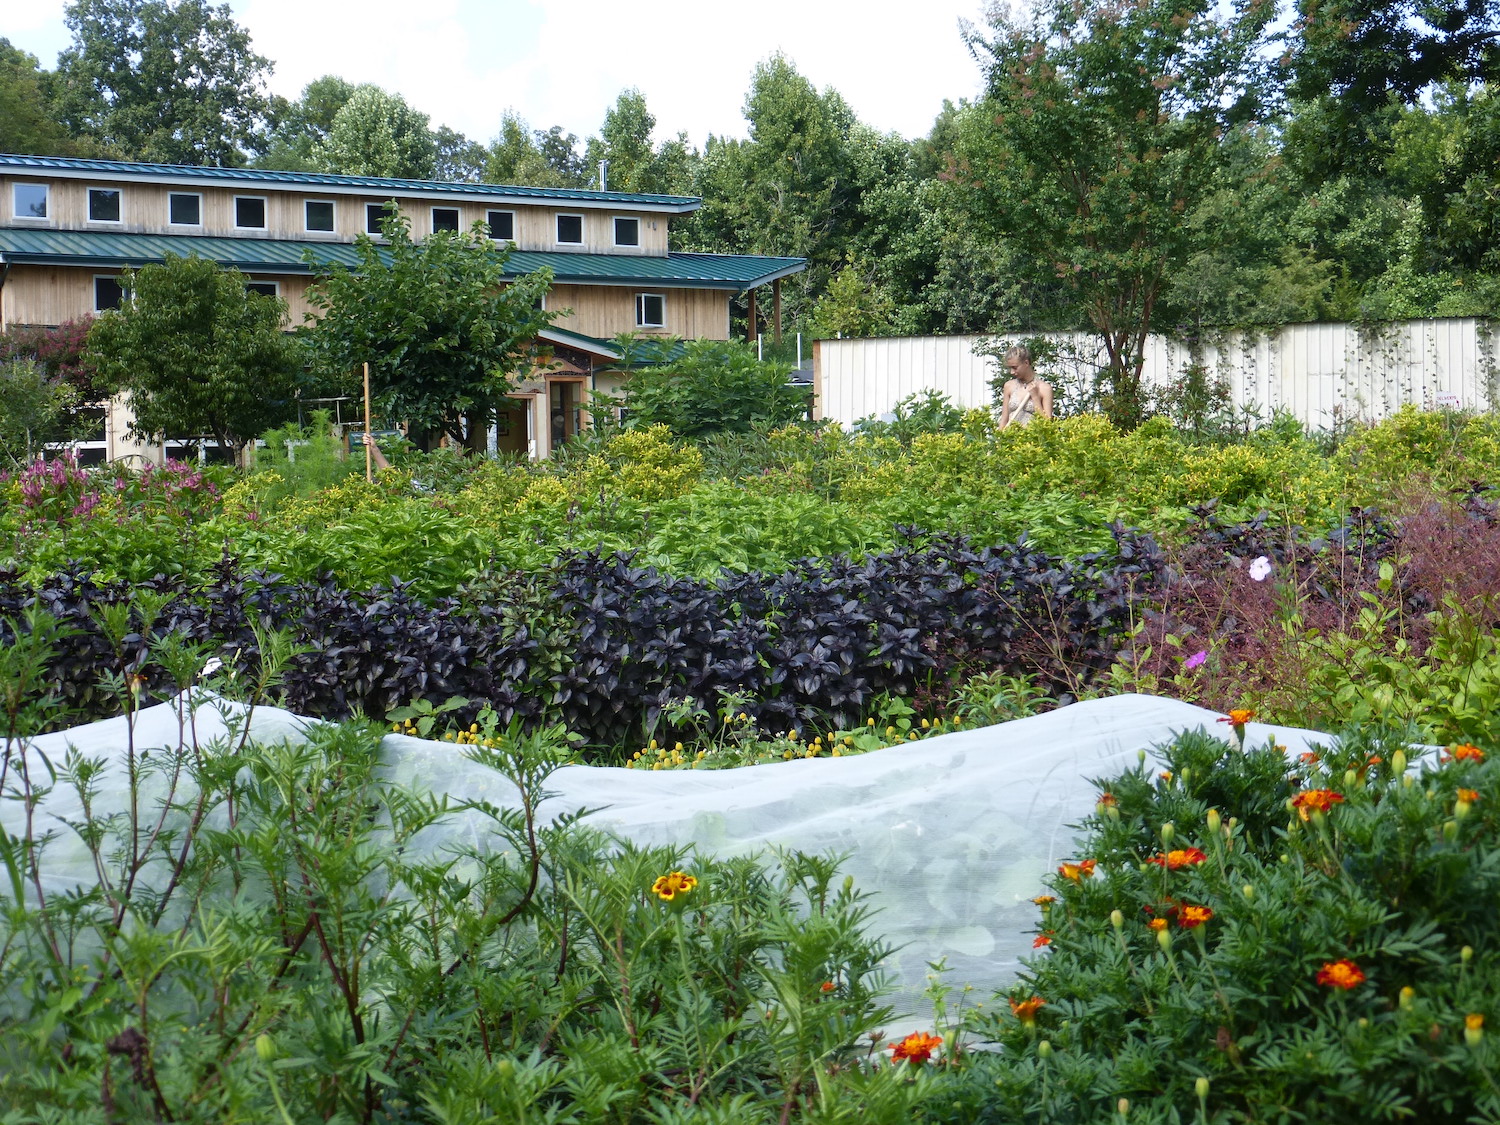
Maintaining Row Cover

Row cover isn’t super expensive, but costs add up, especially in large gardens. By making your row cover last, you can help re-coup the costs and be more environmentally conscious. If you care for it well, you’ll be able to use your row cover for several seasons before needing to be replaced. Roll up or fold your row cover and place it in sealed bags or containers when not in use. Make sure that mice and insects can’t get it and make homes out of it while it’s in storage.


Row cover isn’t the answer to all of a garden’s problems, but it is a helpful tool in the organic grower’s repertoire. Whether you’re tired of dealing with ragged heads of cabbage (hello, cabbage worms), are hoping to grow food year-round, or want to keep your lettuce from bolting a little longer, row cover may be a great way to achieve your goals.