Improving Heavy Clay Soils

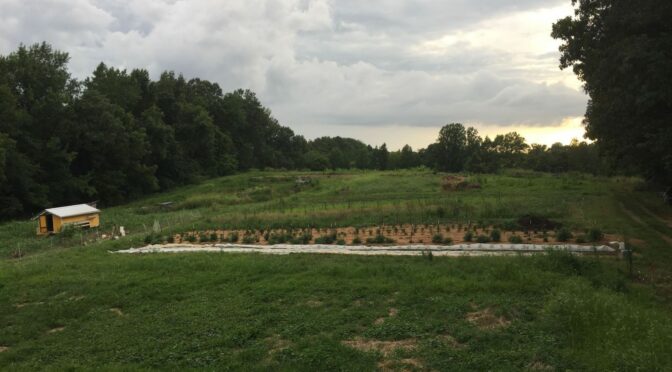
Gardeners rarely begin their journey with a plot of perfect soil, but it’s something we all dream about. In the Southeast, many gardeners have to work with heavy clay soils. While clay soil is rich in minerals and many nutrients, it’s prone to compaction, doesn’t drain well in wet weather, and doesn’t hold water well during droughts. Growing certain root crops like large carrot varieties can be especially tough.

Clay soils are a great foundation to improve on. Here are a few organic methods to improve your heavy clay soil. 

Practice No-Till (or minimal-till) Agriculture

It may sound counterintuitive, but tilling can make clay soils worse. Tilling increases soil compaction and kills beneficial fungi and micro-organisms. 

Cover Crops

Cover crops add nutrients and organic matter to the soil. Great choices for improving clay soils include buckwheat, clover, and wheat. Clover has the benefit of being a nitrogen-fixing legume, meaning that through a symbiotic relationship with bacteria, it captures nitrogen from the air and adds it to the soil.

You may also want to mix in large or deep-rooted cover crops like daikon radishes, lava beans, and alfalfa. These crops help break up compacted soil and create channels for air and water as their roots decompose.

Chop & Drop

You can also use a method commonly used by permaculturalists called “chop and drop.” This method involves growing crops like comfrey, pigeon peas, moringa, sun hemp, and sorghum. These crops are chopped and dropped on the soil to decompose. Comfrey is a popular choice for this in perennial gardens and fruit tree guilds.

Broadfork

Broadforking your soil is a great way to loosen soil without disturbing the layers or structure. It helps mitigate compaction and preserve beneficial organisms and fungi in the soil. 

Create Permanent Beds

Even just walking on your garden soil can cause severe compaction. Creating permanent beds that you don’t till, step on, or use machinery will help make light, fluffy soil. 

Use Terraces or Swales

If your property has heavy clay soil and a slope, you’ll probably deal with water issues. Planting in rows or terraces that are perpendicular to the slope of the land will help slow down the water in your garden and reduce erosion issues. Swales built on contours take this further and are a great way to catch large amounts of rainwater, allowing your plants to access it slowly, even on significant slopes. 

Spread Compost

Finished compost is the quickest way to beef up the organic matter in your soil. Adding a couple of inches of compost to each bed adds nutrients, improves water retention and drainage, and lightens the soil.

Use Mulch

Mulch helps block weeds, hold moisture, and keep soil temperatures cool. It also adds a lot of organic matter to your soil as it decomposes. Any organic mulch can help improve your clay soils, including straw, leaves, grass clippings, woodchips, and hay. Keep in mind that hay tends to have a lot of weed seeds.

Grow Varieties Adapted to Heavy Clay Soils

Improving clay soils isn’t something that happens overnight, especially in large gardens. If you’re planting in a garden with heavy clay soils this year, try some varieties that are adapted to these conditions.

  • Chantey Red Core Carrots
    This blocky, broad-shouldered variety with a blunt tip is well-suited to growing in clay. It was introduced from France in the 1800s.
  • Danvers 126 Carrots
    These carrots taper to a blunt point and are especially suited to growing in clay soil. The strong tops aid harvesting.
  • Everona Large Green Tomatillo
    These plants produce large, tasty tomatillos and thrive even in heavy clay soil and drought.  Seed collected by Barbara Rosholdt from tomatillos planted by Mexican workers at the Everona sheep dairy near Unionville, VA. Introduced in 2008 by SESE.
  • McCormack’s Blue Dent
    This beautiful dent corn makes delicious light blue flour and is especially suited to the eastern U.S., clay soils, and drought-prone areas. Introduced in 1994 by SESE. Bred by Dr. Jeff McCormack from a cross between Hickory King and an unnamed heirloom blue dent.
  • Oxheart Carrots
    A good carrot choice for shallow or heavy clay soils that most carrots don’t like. Dating to 1884, this variety produces thick, sweet “oxheart”-shaped carrots, 5-6 in. long and 3-4 in. wide, weighing up to a pound!
  • Pike Muskmelon
    Bred specially for growing in unirrigated clay soil, this vigorous melon has outstanding flavor and good disease-resistant. Introduced in 1935, Aaron Pike of Pike & Young Seeds; seedstock supplied to SESE by Aaron Pike’s niece.
  • Tennessee Red Valencia Peanuts
    This pre-1930 produces rich, sweet peanuts with red skins. It’s easy to grow without hilling, even in clay soils.
  • Texas Gourdseed Corn
    Originally brought to south Texas by German farmers who migrated from Appalachia during the late 19th century, this variety withstands drought and does well in clay soil. In south Texas, this is considered to be the best choice for tortilla flour.
  • Turga Parsnip
    This Hungarian heirloom produces short, stout roots that are good for heavy clay soils.
  • Southern Peas (Cowpeas)
    These productive peas are well-adapted to poor soils and drought. We carry 16 varieties at SESE.

Create a Kitchen Herb Garden

Kitchen herb gardens pack a lot of flavor and value into a small space. Growing herbs is a great way to make your meals more flavorful and save money. Herbs can be planted right into vegetable gardens and make great companion plants. However, you’re more likely to include fresh herbs in your meals if you can step out your door and clip a few while dinner is on the stove. 

Planning Your Kitchen Herb Garden

Herbs are good candidates for various planting styles, allowing you plenty of flexibility for designing a garden that works for you. As I mentioned above, selecting an easily accessible site for your herb garden is my biggest recommendation. Being able to grab a few quickly will encourage you to use them more.

Permaculture enthusiasts may be familiar with planning your property in zones to maximize efficiency. In this layout, zone 1 is the closest to your home and typically includes herb gardens.

You should also consider sunlight when choosing a location for your kitchen herb garden. While a few herbs will tolerate some shade, most herbs thrive in full sun. If you have a partially shaded spot, you’d like to try herbs in consider parsley, mint, or lemon balm.

Here are a few ways to incorporate a kitchen herb garden into your landscape.

Herb Spiral

Using soil and stones, bricks, or another similar material, you build a spiral-shaped bed with the center being the highest. These spiral beds are both beautiful and efficient. The key idea is that the design allows water to flow down from the top of the spiral. Herbs that love it hot and dry like rosemary, lavender, and thyme can thrive at the top, while herbs that need more moisture, such as lemon balm, cilantro, and parsley, are planted near the bottom.

The rocks or bricks of the soil also help retain heat. It also creates little micro-climates, with some spots being more sheltered or shaded than others. 

Knot Gardens

Knot gardens are formal herb gardens that were first established in England during the reign of Queen Elizabeth I. Herbs like rosemary, lavender, marjoram, thyme, and lemon balm are planted in intricate patterns to create beautiful designs. You can use whatever herbs you choose; remember that some like lavender will retain their shape more readily than those like mint, which will tend to spread. Try to create your own design or gather inspiration from the internet.

Raised Beds

Raised beds are often good for herbs because they tend to heat up quickly in the spring and drain well. Additionally, they can be set up on any soil type and are typically easier to keep weed-free. If you’re considering building raised beds, we’ve discussed the pros and cons in more detail in a previous post. 

Container Gardens

If you don’t have a lot of space, you can grow herbs in various containers. Even some window boxes will afford you a small herb garden. Herbs generally do pretty well in pots as long as they have proper drainage and receive full sun. Various pots or containers can be used, including ceramic, terracotta, or even upcycled plastic containers.

Soil

Most culinary and medicinal herbs will do best in well-drained, rich soil. Broad forking your garden and adding a couple of inches of finished compost each year can significantly improve your soil health and herb garden yields. 

You should also consider having your soil tested. Most herbs will thrive in neutral to slightly acidic soil. Amending your soil so that the pH is between 6.0 and 7.5 is ideal. 

If you’re growing in containers, it’s generally best to use a potting mix. These mixes are designed to hold moisture and avoid compaction in container conditions. Without any additions, ordinary garden soil doesn’t provide optimal conditions for plant growth in containers.

Selecting Varieties for Your Kitchen Herb Garden

There are many herbs to choose from, whether you want to make soothing herbal teas or make your favorite dishes a little more fresh and flavorful. If you’re struggling to make decisions, the best advice is to start with herbs you already use or know you will use and add a couple more experimental varieties each year. Here are just of few of the many culinary and medicinal herbs you may want to include in your kitchen herb garden.

Culinary Herbs

  • Basil
  • Thyme
  • Oregano
  • Chives
  • Sage
  • Parsley
  • Cilantro
  • Rosemary
  • Dill
  • Lemon Balm
  • Borage

Medicinal Herbs

Note that many of the previously mentioned culinary herbs also have medicinal uses and vice versa.

  • Astragalus
  • Feverfew
  • St. Johnswort
  • Chamomile
  • Echinacea
  • Calendula
  • Catnip
  • Horehound
  • Valerian

Starting Herbs from Seed

Like flowers and vegetable crops, the requirements for starting herbs from seed vary from species to species. Some herbs like borage require light while germinating and should be pressed lightly into the soil. In contrast, others like echinacea have to go through a cold stratification to germinate properly. Be sure to carefully read each variety’s requirements for best results starting herbs from seed.

If you have other friends or neighbors that garden, you can also barter for starts of perennial herbs. Some like lemon balm and chives are easy to divide and transplant, saving you the work of starting them from seed. 

How to Grow Zinnias

If you’re looking to add more color to your garden in 2022, you might want to add zinnias to your seed list! These colorful flowers are some of the easiest annual flowers to grow. They’re also an excellent nectar source for pollinators and are long-lasting cut flowers.

Most of the zinnia seeds you’ll find at local garden stores are Zinnia elegans. At SESE, we also carry a couple of varieties of Zinnia peruviana and Zinnia marylandica. Zinnias provide a lot of variety, so you’re sure to find something to suit your garden’s design, from the spiky-looking blooms of the cactus-flowered zinnia to the dark red double flowers of Red Beauty. 

Prepare a Bed

Zinnias are pretty adaptable, but they need a bed that receives full sun. Though they’ll tolerate a wide range of soil conditions, well-drained soil rich in organic matter is ideal. Spreading a couple of inches of finished compost over the bed and broad forking it can help your plants thrive.

Planting Zinnias

Here in the Southeast, the easiest way to plant zinnias is to direct sow them when all danger of frost has passed, and the soil is around 70°F. Sow the seeds about 1/4 inch deep. Sow a few every 1 to 2 weeks for several weeks to ensure a steady supply of blooms all season. 

Alternatively, you can start them indoors 3 to 4 weeks before your last expected frost. Zinnias should be transplanted when they’re still relatively small, and you should take care to disturb the roots as little as possible.

Zahara Starlight Rose Zinnia

These showy flowers make excellent companion plants for various vegetable crops, including squash and beans. They attract bees, butterflies, and other pollinators, ensuring good pollination and wasps and lady beetles that feed on pests.

Zinnia Care

Thin zinnias so that they receive good air circulation and sunlight. Depending on the mature size of the variety you select, you should thin your zinnias from 12 to 24 inches apart. Keeping your zinnia bed weeded and consistent watering will encourage your zinnias to bloom more.

Taller zinnias may need support to prevent lodging. You can stake individual plants, grow them along a fence, or let them grow through a suspended flower support netting, fencing, or other similar material. 

If you’re interested in bouquets, you can continuously harvest zinnias. Cutting flowers encourages them to bloom more. If you’re not harvesting cut flowers, deadheading also encourages blooming. You may want to let some spent flowers go to seed, especially towards the end of the season. 

Saving Seed from Zinnias

Zinnias self-seed well, but it’s also quite simple to save seed from them. You can use it to plant new beds the following year, share with friends, or join a seed swap. 

Wait until the flower heads are fully mature, brown, and dry to harvest them. If the petals are still colorful and pliable, the seeds may not have fully matured. 

Harvest the mature flower heads on a dry day. Bring them indoors and pull the flower heads open. The seeds are brown and arrowhead-shaped. 

Allow the seeds to dry on a screen out of direct sunlight for at least a week. When the seeds are fully dry they should snap cleanly in half and not bend. 

Store them in an airtight container, checking carefully for any signs of moisture for the first two weeks. If you see moisture, place them back on the screen and dry them for a longer period.  

Saving the Past for the Future