Garden Chores to Complete Before Spring

The weather might be dreadful outside, but the gardening season is right around the corner! Soon the crocuses and daffodils will be popping up! It’s time to think about garden preparations before we reach the height of spring planting. You can complete some of these chores at any time, and others will depend on your climate.

Stratify Seeds

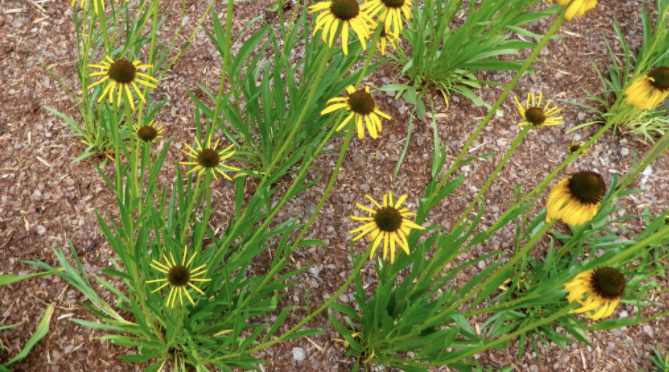
As we discussed in our last post, How & Why to Stratify Seeds, some seeds require or benefit from a process called stratification. Depending on the variety, this can be a long process, so it’s best to start early. For example, certain echinacea varieties require cold stratification in a refrigerator for 2-4 months!

Place Orders

Now’s a good time to make sure all your orders are in. Think about the vegetable, flower, and herb seeds you’ll want to plant for your summer and fall gardens. You might also want to consider adding fruit or nut trees and shrubs to your property, and early spring is a great time to plant these.

Organize Seed Starting Equipment

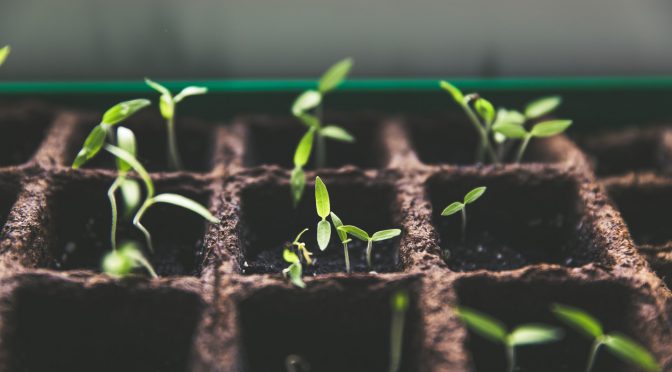
Depending on where you live, you’re probably already starting a few seeds. If you haven’t already, it’s a good idea to make sure all your supplies are in order. Purchase or make a DIY potting mix, get your containers or soil blocker together, check lights, heat mats, and other equipment.

Begin Starting Cold Hardy Varieties

No matter what your hardiness zone is, you should be able to begin starting seeds indoors by the end of February. Begin with cold-hardy crops like onions, cabbage, broccoli, celery, celeriac, and cauliflower. Here in zone 7a, you can start artichokes and tomatoes indoors this week.

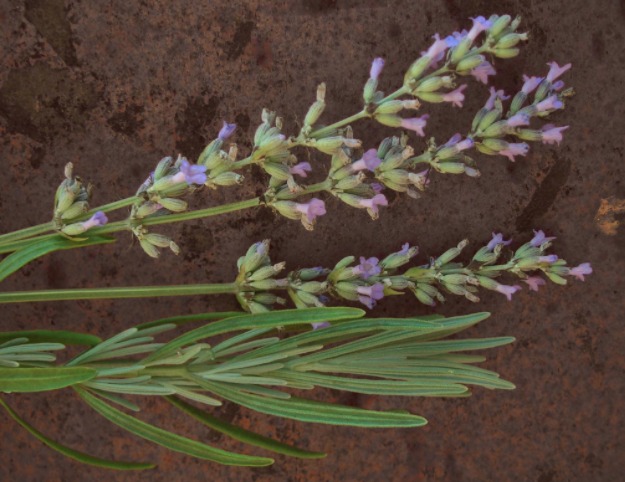
Start Flowers and Herbs with Long Germination Periods

You may also want to begin starting flower and herb varieties that have a long germination period. Examples include lavender, snapdragons, and rosemary. It’s a good idea to read all of your seed packets well ahead of time.

Create a Garden Layout

Creating a plan for your garden can help you make the most of your space. You can use a garden planner app or just paper and pencil. Though they can help efficient maintenance and harvest, you don’t have to stick to straight lines. Your garden should reflect you.

Tool Maintenance

Make sure all of your tools and equipment are ready to use. Sharpen them and replace broken handles. Take any mechanical equipment like tillers and mowers that need it in for service now ahead of the spring rush.

Create a Cold Frame

Having a cold frame can help you get a head start on the spring season. You don’t need any construction skills to make one. You can create simple cold frames from strawbales with an old window laid on top.

Plan Fruit Tree Guilds

If you’re planning on adding fruit trees to your property, consider creating fruit tree guilds. They’re a permaculture method where you make a mini-ecosystem around a tree to help deter pests and build healthy soil.

Start or Maintain Your Compost Pile

Compost is a gardener’s gold. Creating compost keeps food waste out of the landfill and is a free way to add nutrients and structure to your soil.

Get a Soil Test

A soil test can help you improve your soil and, therefore, your garden’s productivity. You’ll know exactly what nutrients your garden needs to thrive.

Mow Winter Cover Crops

At the end of February, southern gardeners can mow cover crops in beds that they’ll be planting soon. Just make sure your soil has dried out enough so that you’re not compacting it.

Spread Compost

Where temperatures are mild enough, late winter and early spring are good times to spread an inch or two of compost over beds you’ll be planting soon.

Spring will be here sooner than you think! Make sure you’re ready for it with these tips.

How & Why to Stratify Seeds

Most common vegetable crops don’t require stratification. However, if you’re getting into flower gardening or planting medicinal herbs, you may have noticed that some seeds require stratification. Some may not require it but will germinate better if they’ve been stratified.

Stratification is a process of treating seeds to mimic natural conditions. There are a few types of stratification, including dry stratification, moist stratification, and scarification. These methods can help improve or speed up the germination for many species.

Seeds that Require or Benefit from Stratification

  • St. John’s Wort
  • Echinacea (except Echinacea purpurea)
  • Milkweed
  • Rudbeckia
  • Soapwort
  • Larkspur
  • Delphinium
  • Poppies
  • Nasturtiums
  • Butterfly Weed
  • Sweet Peas

Cold Stratification

Many flower and herb species that are native to areas with cold winters benefit from cold stratification. In nature, the seed would mature in the fall and be exposed to winter conditions before breaking dormancy. The seeds don’t germinate until after they’ve been exposed to cold. This ensures that the seeds don’t germinate too early.

There are two methods to mimic this cold period. The first method of cold stratification is called dry stratification. This method works fine for many seeds. All you need to do is place your seed packets in a container in your freezer. The amount of time you should leave them is specific to the variety, but it’s generally a month or longer.

The second method is moist stratification. This method is when you expose the seeds to cold and damp conditions. It’s excellent for species that drop their seeds in the fall. Place your seeds in a container in the fridge (not the freezer!) on something that will hold moisture, such as sawdust, sand, vermiculite, or a cloth. Keep it moist but not soaked for ten days to three months, depending on the variety. Alternatively, you can sow these seeds in the fall.

Scarification

Scarification is the process of scratching the seeds’ coating to allow moisture in. This method can increase germination rates of large-seeded species such as sweet peas, nasturtiums, milkweed, and morning glories.

You don’t want to damage the seed too much, so it’s essential to do this carefully. Gently scratch the seeds coating with coarse sandpaper or a file.

This process can be used in combination with soaking the seeds before planting.

Planting

After you have stratified your seeds, they’re ready to plant! It’s important to follow the instructions for each variety. You also should keep the soil moist until your plants are established. Allowing stratified seeds to dry out can prevent them from growing.

Grow a Perennial Herb Garden

Having fresh herbs growing right out your door is fantastic for any food lover. They add so much flavor and save you money on expensive store-bought herbs.

Thankfully many great culinary and medicinal herbs are easy to grow perennials. Here’s how to start your own perennial herb garden.

Perennial Herbs

Here are a few of the perennial herbs you might consider adding to your garden.

  • Chives (Perennial in zones 3-10)
  • Sage (Perennial in zones 4-10)
  • Rosemary (Perennial in zones 7-10)
  • Lemon Balm (Perennial in zones 5-10)
  • Mint (Perennial in zones 5-10)
  • Oregano (Perennial in zones 5-10)
  • Anise Hyssop (Short-lived perennial)
  • Salad Burnet (Perennial in zones 4-10)
  • Fennel (Perennial in zones 6-10)
  • Bergamot (Perennial in zones 4-10)
  • Cranberry Hibiscus (Perennial in zones 9 and 10)
  • Lavender (Perennial in zones 5-10)
  • Sweet Marjoram (Perennial in zone 10)
  • Mexican Mint Marigold (Perennial in zones 8-10
  • Thyme (Perennial in zones 6-9)
  • Roselle (Frost-tender perennial)
  • Sorrel (Perennial in zones 4-10)
  • Echinacea (Perennial in zones 3-9)
  • Feverfew (Perennial in zones 4-10)
  • Catnip (Perennial in zones 4-10)
  • White Horehound (Perennial in zones 4-10)

Starting from Seed

You can start many perennial herbs from seed. However, some herbs can be trickier than vegetable crops. Be sure to read the growing instructions carefully. For example, lavender can take 30 days to germinate, echinacea requires cold stratification, and thyme germinates best between 55-60°F.

A few other tips:

  • For starting herbs indoors, be sure to use a well-draining potting mix.
  • To direct sow herbs, prepare your soil well. Add compost, fork, and rake the soil smooth.
  • Keep soil moist (a mister is great for small seeds) but not soggy.

Some perennial herbs are also easy to divide and transplant. If you know someone with a big patch of mint, lemon balm, thyme, chives, or oregano, ask if you can have a start.

Selecting a Garden Site

Generally, the best site for an herb garden is as close to your door as possible. Being able to quickly pop out to the garden and snag some fresh herbs will encourage you to use them.

Sunlight and drainage should also be considerations. Many herbs like rosemary and sage prefer full sun and well-drained soil. They may not thrive tucked away on the shady side of a home. However, some herbs like mint, bergamot, lemon balm, and chives will tolerate partial shade and thrive in moist soil.

Plant Care

While your herbs are getting established, it’s essential to water consistently. It’s best to water in the morning or evening. You should also keep them well-weeded. Even herbs as tough as mint can be overtaken by weeds when they’re first getting started. Mulching around them is a good idea.

Once your herbs start to take off, you may want to prune them a bit. When they grow above 8 inches, you can prune herbs’ tips like oregano, mint, rosemary, and sage to encourage root growth and bushier, fuller shape. Clip off the tops just above a set of leaves.

Harvest

Avoid harvesting until plants are displaying vigorous growth. They should be a least 6 inches tall and well established. You want them to become healthy plants for the long haul!

Never harvest more than 1/3 of a plant at a time and discontinue large harvests about one month before your first frost.

If you’re harvesting to dry herbs for storage, it’s ideal to do some around midsummer. This is when they’ll be the most potent and flavorful.

Check out these posts for advice on preserving and using medicinal and culinary herbs:

How to Properly Harvest & Preserve Herbs

5 Ways to Use and Preserve Herbs this Summer


Saving the Past for the Future