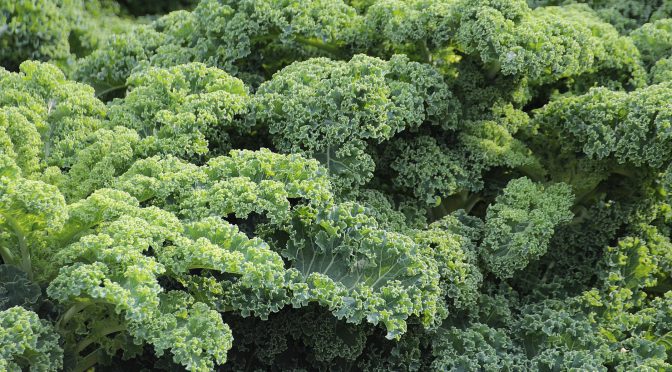
One of the best parts of gardening is all the fresh greens. Their grocery store counterparts just don’t compare! Unfortunately, they don’t stay fresh forever. If you’re growing fall greens this year, here are a few ways to preserve your harvest.
A quick note: for best results use freshly picked greens that are free from bad spots. Harvest in the morning or evening if possible and especially if it’s hot, dunk greens in cool water immediately after harvesting. You can use these methods for a variety of greens including collards, kale, chard, and spinach.
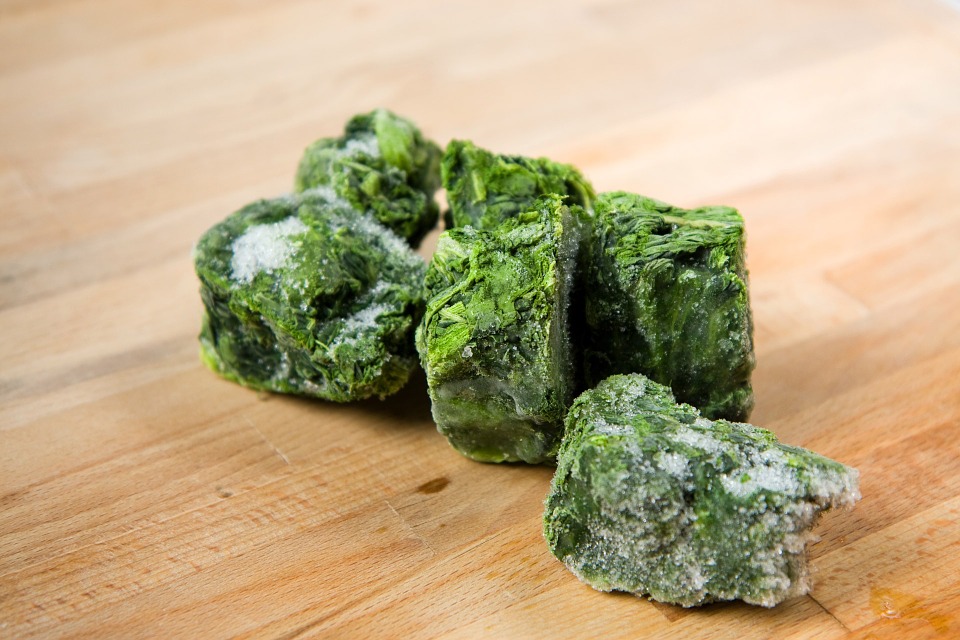
Freezing Greens
To begin, put a pot of water on to boil. While it’s heating, rinse off your greens and roughly chop them. Also, prepare a large mixing bowl or pot of cold water and ice. Once your water boils, blanch your greens in it, about 1 pound at a time, for one 1 minute.
Strain them out and immediately dunk them in your ice water. Then squeeze as much water out as possible. Place them in containers to freeze. Alternatively, spread them out as best you can on a cookie sheet to freeze and move them to containers later so that they don’t freeze together as much.
Dehydrated Greens
Dried greens may sound odd but they can be surprisingly good. Some “heartier” greens like kale, make great snacks when dried with a bit of salt and seasoning. Others like spinach or even lettuce, are great for drying and powdering to add to soups and smoothies.
To dry your greens, rinse them off and lay them to dry on a towel. Then transfer them to a dehydrator tray, placing them in a single layer. Greens with minimal stems can be dried on the “herb” setting or at about 95°F. Green with larger stems may need to be dried at a warmer temperature, between 105°F and 110°F. Your greens may take anywhere from 4 to 12 hours to dry.
When they’re completely dry and brittle, pack them in airtight containers and store them out of direct sunlight. You can also powder them in a blender or food processor first.
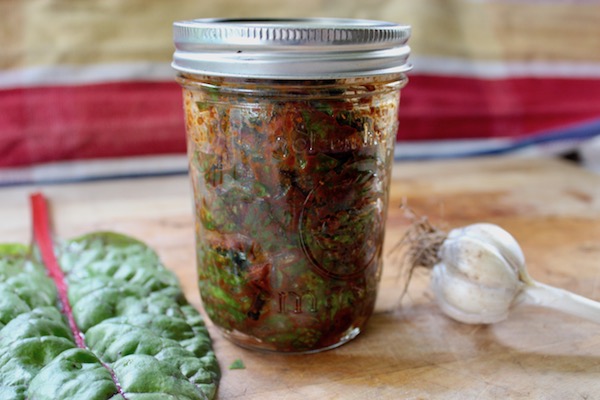
Fermented Greens
Fermented foods are excellent for gut health and are easier to make than you’d think. Try our simple recipes for kimchi or sauerkraut and experiment substituting other greens that are available to you such as kale or collards.
Pressure Canned Greens
Many people don’t love this method but if you like canned food, it is possible to pressure can greens. Just like for freezing you’ll need a pot of boiling water and clean, roughly chopped greens. Blanch your greens 1 pound at a time for 3-5 minutes or until well wilted.
If desired add 1/2 tsp of salt to sanitized jars. Loosely fill jars with hot, blanched greens and cover with boiling water leaving 1 inch of headspace. Place your lids on and process pint jars for 70 minutes or quarts for 90 minutes. Use the correct PSI for your canner and elevation.
Pests can be the bane of many gardeners’ existence and can be especially difficult to cope with if you’re new to gardening. Three pests that commonly make an appearance on a variety of plants include aphids, scale insects, and mealybugs. While they’re three different insects they all attack plants the same way, by feeding on its sap. You’ll find them along the stem and underside of the leaves where they suck the plant’s sap and drain it of important nutrients. They also secrete a substance called “honeydew” which can cause sooty mold to grow on your plants in severe cases.
You may have one of these insects feeding on your plants if you notice wilted, curled, yellow, or misshapen leaves, and water and nutrient issues aren’t the cause. You may also notice “honeydew” a sticky substance on the stem or leaves or the sooty mold that sometimes grows on it. These insects can also spread diseases between plants.
Aphids
Aphids are tiny, pear-shaped insects with long antennae. Different species are a variety of colors including green, brown, black, pink, white, yellow, and gray. They’re typically wingless though as populations increase many species have a form with wings that can be used to spread and create new colonies.
Scale Insects
Like aphids, scale insects are small and come in a variety of colors in eluding green, brown, tan, yellow, orange, and black. Unlike, aphids they lack antennae and just look like a tiny rounded shell. Their shell means that they’re hard to eliminate as adults because it protects them from most natural pest control methods. However, they’re much easier to eliminate at their “crawler” or nymph life stage before they’ve developed their hard shell.
Mealy Bugs
Mealybugs are white and fluffy and sometimes look like little tufts of cotton or mold. They may look larger when they’re all together in a clump.
How to Prevent/Eliminate Them
Attract or introduce their predators.
As mentioned in a previous post, ladybugs feed on these insects. Ladybugs also need to feed on pollen to reproduce. Including flowers like coreopsis, cosmos, and yarrow in your garden can help attract them. You can also let some of your vegetables and herbs like basil, dill, and lettuce go to flower for them. Ladybugs can also be purchased commercially and released into your garden.
Avoid over-fertilizing.
These insects are all much more likely to infest plants that have high nitrogen levels. Especially if you use chemical fertilizer, be judicious with the amount you use because it may do more harm than good!
Spray them off with water.
Especially if you catch an infestation early, you may be able to get rid of these insects by spraying them off with water.
Use a little soap.
Spraying your plants with a mixture of 1 tsp of dish soap in 1 quart of water is often effective. You should reapply the spray every 2-3 days for 2 weeks, ensuring you get all the surfaces of the plant.
Try neem oil spray.
Neem oil is a non-toxic, organic pesticide. Most neem oil products come with instructions for mixing (ie. 2 tbs of neem oil per 1 gallon of water). Try spraying all the surfaces of your plant once a day for 7-14 days.
Dab them with rubbing alcohol.
If the infestation is small you can remove these insects with a bit of rubbing alcohol on a cotton swab or rag.
Dust your plants with diatomaceous earth.
Diatomaceous earth is a powder made from the crushed remains of diatoms, tiny, fossilized aquatic organisms. It cuts through the exoskeleton of many insects and causes them to dehydrate. Just remember, it can harm beneficial insects as well. Avoid using it when plants are in bloom as it can harm pollinators.
Prune off the affected areas.
If you caught the infestation quickly you may be able to prune off the affected branches and burn them to prevent the insects from spreading.
In our climate zone (7), with an average first frost date of October 14, the first half of August is the last chance to sow several vegetables and get crops from them before winter. Depending on your zone, your dates might be earlier or later. Planning and timing are crucial – if germination fails, you may not get a second chance with that vegetable. Planting now provides fresh harvests, storage crops and possibly some crops to overwinter.
There are three categories of vegetable crops to plant at this time of year:
Warm weather crops, now or not until next year.
Cool weather crops that grow well in spring and fall, but don’t thrive in the summer.
Cold-hardy crops to grow during the winter.
Warm Weather Crops
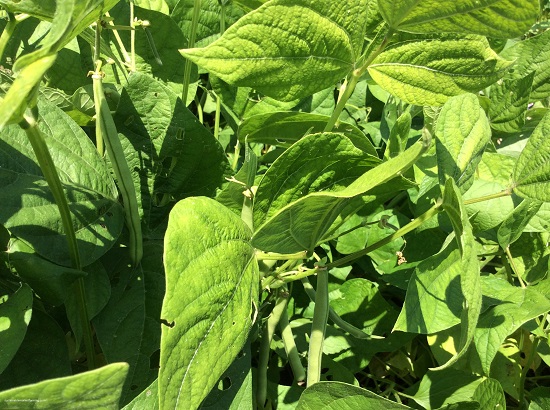
Provider beans. Photo Pam Dawling
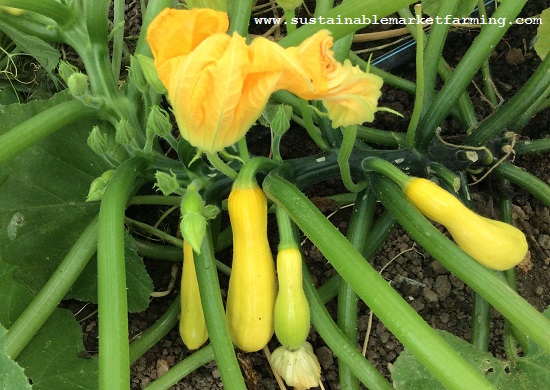
Give yourself a reasonable chance of success! We sow our last edamame 7/14 and our last sweet corn 7/16. We sow our last beans 8/1-8/3, and zucchini, summer squash and cucumbers by 8/5 at the latest.
In many parts of the country, a frost or two will be followed by a few more weeks of warm weather, so getting past the first few frosts is worth the effort. It’s easy to get extra harvests for a month or two from mature plants you already have. See my blog post on Succession Planting for working back from your frost date to determine your last worthwhile planting date. Pay attention to the weather as you approach your average first frost date, and be ready to harvest mature crops and protect plants with rowcover.
Cool Weather Spring and Fall Crops
Tatsoi. Photo Kathleen Slattery
The flavor of crops produced during warm sunny days and cool nights can be a delightful combination of sweetness and crunchy succulence. Some cool-weather crops mature in 60 days or less. Mostly these are greens and fast-growing root vegetables.
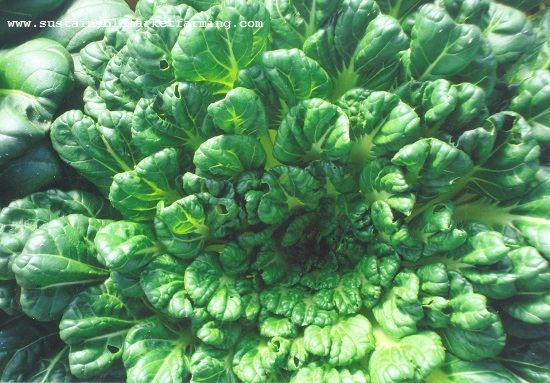
Tokyo bekana. Photo Twin Oaks Community
Ready in 30–35 days:
kale, arugula, radishes,
many Asian greens: Chinese Napa cabbage, Komatsuna, Maruba Santoh, mizuna, pak choy, Senposai, tatsoi, Tokyo Bekana and yukina savoy.
spinach, chard, salad greens (lettuce, endives, chicories) and winter purslane.
Ready in 35–45 days:
corn salad, land cress, sorrel, parsley and chervil.
Ready in 60 days:
beets, collards, kohlrabi, turnips and small fast cabbage (such as Early Jersey Wakefield)
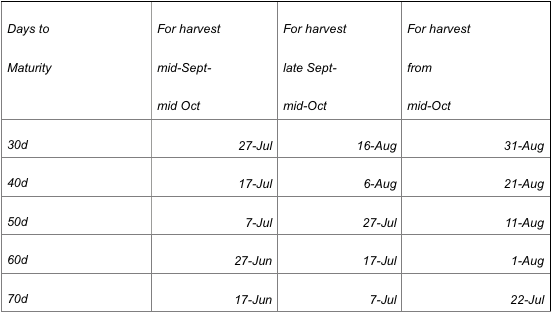
We have a chart for fall harvest crops so that we don’t have to calculate each time. It helps us ensure we don’t sow too late to get a decent harvest.
Sowing Dates for Fall Crops with Various Days to Maturity
Early Purple Vienna Kohlrabi takes only 60 days from sowing to harvest in spring. Allow for the slowing rate of growth in fall (unless you will use rowcover). Kohlrabi is hardy to maybe 15°F (-9.4°C). When is it likely to get that cold? Not before the beginning of November here, so counting back 31 days in October, plus 30 in September, plus 31 in August – that’s 92 days already, more than enough. We could sow kohlrabi in early August and get a crop at the end of October.
We sow beets on 8/1, dry or presoaked for 1-2 hours in a little water – not too much, as they need to breathe, or could drown. We sow them 1/2″-1″ deep, tamp the soil, and keep the surface damp with daily watering for the 4-6 days they take to emerge. Beets prefer 50°F–85°F (10°C–29°C). I like the Cylindra beet. The shape is long (good for slicing), the skins come off easily, and the flavor is very sweet and the texture tender.
Very early in August, we sow our fall carrots, enough to store and feed us all winter. Danvers 126 is our workhorse carrot. We use an EarthWay seeder, which is light, easy to use and to empty, and comes at a reasonable price.
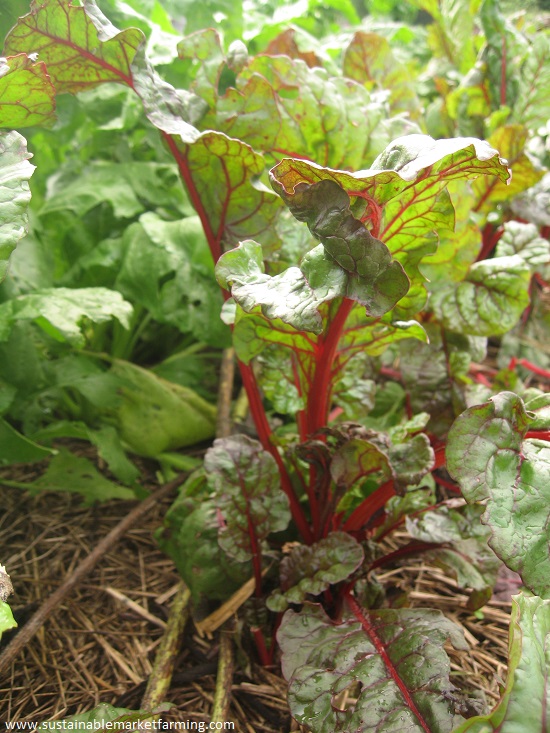
Ruby Red chard. Photo Kathryn Simmons
Swiss chard can also be sown here in August, for a nice fall harvest. It germinates best at 85°F (29°C). It grows big leaves within 50 days of sowing, and smaller ones after only 35 days. We sow scallions outdoors on 7/25 and 8/23. Peas can make a god fall crop if started early enough to mature before frosts. 85°F (29°C) is optimum, 95°F (35°C) maximum. Peas are easy to pre-sprout. Mature pea plants are more easily killed by frost than seedlings.
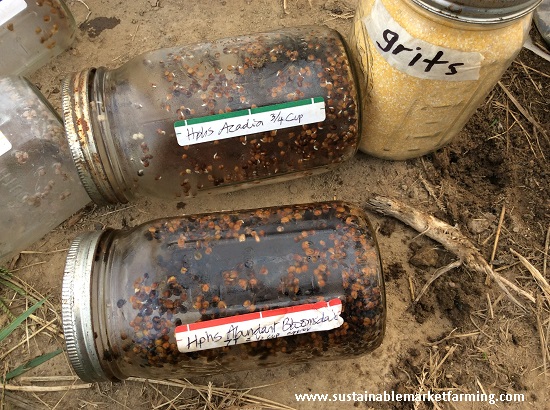
Spinach is a challenging crop in hot weather! Its optimum germination temperature is 70°F (21°C), maximum 85°F (29°C). To get around the problem of hot soils, you can wait until the soil temperature drops. The germination of purple dead nettle, henbit and chickweed are good phenology signs that it has cooled enough to sow spinach. Or you can pre-sprout seeds indoors as we do, and sow for on 9/1.
Pre-sprouted spinach seeds and grits to mix in to make sowing easier. Photo Pam Dawling
Lettuce likes soils of 40°F–80°F (4°C–27°C) with 75°F (24°C) best. The maximum germination temperature is 85°F (29°C). For best emergence, wait until late afternoon or nightfall to sow lettuce. I put ice on top of hot weather lettuce sowings, and cover with shadecloth. Jericho romaine and the Batavian varieties are very heat-resistant. Sow: every 6-7 days in June and July; every 5 days in early August; every 3 days in late August; every other day until Sept 21; and, if you have a coldframe or hoophouse to plant them in, every 3 days until the end of September.
Most brassicas will germinate fast at 86°F (30°C). The challenge is keeping the soil moist. For fall crops, we use an outdoor nursery seedbed and bare root transplants, because this fits best with our facilities and our style. Having the seedlings directly in the soil “drought-proofs” them to some extent; they can form deep roots and don’t dry out so fast. Other people might prefer to sow in flats.
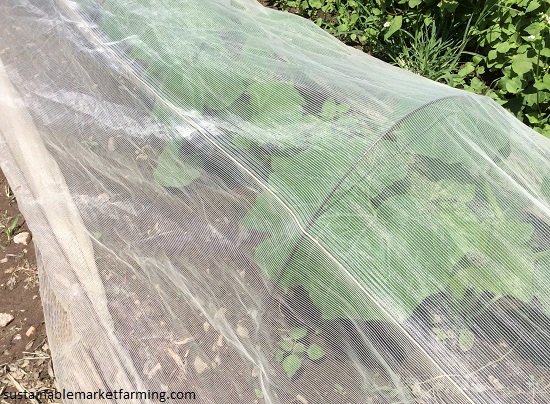
Young squash plants under ProtekNet insect mesh. Photo Pam Dawling
To avoid flea beetles and harlequin bugs, we cover the beds until the plants are big enough to stand up for themselves against “pest bullying”. We like ProtekNet insect mesh on wire hoops. Overly thick rowcover or rowcover resting directly on the plants can make the seedlings more likely to die of fungal diseases in hot weather – good airflow is vital.
Radishes have no trouble germinating at high temperatures. We sow winter storing radishes 8/4: Misato Rose, Miyashige Daikon and Shunkyo Semi-Long. We also sow Easter Egg small radishes.
We aim to transplant most brassicas at four true leaves (3-4 weeks after sowing). In hot weather, use younger transplants than you would in spring, because larger plants can wilt from high transpiration losses. If we find ourselves transplanting older plants, we remove a couple of the older leaves to reduce these losses.
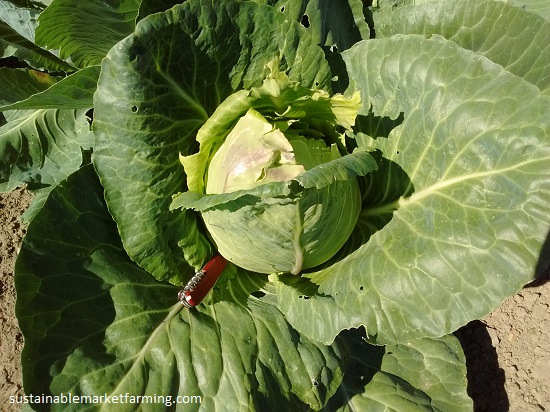
Large Early Jersey Wakefield cabbage with Swiss army knife for scale. Photo Pam Dawling
We sow broccoli and cabbage in June and July. August is too late for us to start those. Our main broccoli harvest period is 9/10 – 10/15. Among the Asian greens, we grow Blues Napa cabbage and sometimes Tokyo Bekana or Maruba Santoh for fall harvests. Komatsuna, senposai, yukina savoy and tatsoi are cold-tolerant greens we like for early winter harvests. We sow these to transplant mid-late July.
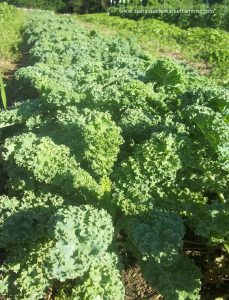
Vates kale. Photo Nina Gentle
We sow 6 beds of kale, two each every 6 days, (8/4, 8/10, 8/16, 8/24) until we succeed in getting enough established. Often we’ll get patchy emergence and end up transplanting plants from one bed or one end of a bed to fill out the blank areas.
We sow our turnips 8/15 or up until 9/15 (our absolute latest). Turnips can be up the next day, even at 95°F (35°C). Rutabagas need longer than turnips, and need sowing in July. See Root Crops in July on my website for more about rutabagas.
Find the winter-kill temperature of your desired crop, and choose hardy varieties. Be clear about whether you intend to harvest outdoors all winter (kale, spinach, leeks, parsnips, collards for us), or whether you want to have small crops going into winter so you can rest during the winter and be first out the gate in early spring, with crops waiting for you. We sow a couple of beds of spinach between 9/20 and 9/30 to overwinter small (under rowcover) and grow fast in the spring.
We have had some success with over-wintered carrots (sown 8/14) and cabbage transplanted 7/13 (Deadon is especially hardy).
Pam Dawling has grown vegetables at Twin Oaks Community, central Virginia for 27 years, feeding 100 people from 3.5 acres.She has written two books: Sustainable Market Farming and The Year-Round Hoophouse. She blogs weekly at https://www.sustainablemarketfarming.com