Starting a Garden From Scratch Without a Tiller

Starting a garden from scratch isn’t always easy especially if you don’t have access to a lot of tools. These methods can be done with little or no tools and a perfect for beginner gardeners or experienced gardeners looking to expand their growing area this season.

Lasagna Garden

The lasagna or layer garden method has recently gained popularity and is a fairly easy way to start a brand new garden if you’ve got easy access to a good amount of organic materials.

To start you’ll need to lay down brown cardboard in the shape you want your garden. Don’t use shiny cardboard. It doesn’t decompose as well and may contain harmful chemicals and/or plastics.

Cover your cardboard shape with a thick layer of hay, straw, and leaves. Some food waste, sawdust, and/or shredded paper can also be incorporated into this layer. Follow this with a layer of compost or manure.

The last layer which you’ll be planting into should be soil or well-aged compost. You’ll want it to be fairly thick to give your plants a good starting medium while the lower layers begin to break down.

Hugelkultur Mounds

Similar to lasagna gardens, hugelkultur mounds are a no-till option built of layers of organic material. However, hugelkultur mounds typically include much larger material like branches or even logs.

These materials break down more slowly meaning hugelkultur mounds may not be ready to support large, deep-rooted plants during the first couple of years. However, this slow decomposition will provide nutrients and moisture retention for years to come.

To learn more about hugelkultur mounds and how to build them check out our post How to Build a Hugelkultur Garden Bed.

Hand-Tilled Garden Beds

Long before the advent of rototillers or even plows, humans were gardening. Even if all you have is a shovel you can turn over a garden by hand.

Decide where you want your garden bed. Laying it out with stakes and string can be helpful for visualizing your design.

If desired you can solarize your soil at this point. You’ll need clear plastic, something to weigh it down, and a few weeks of patience at minimum. Lay the plastic over your plot, pulling it as tightly as possible so it’s flat against the soil. You’ll need to leave this in place for at least a few weeks depending on your weather, but this will kill grass, weeds, and even pests in the soil.

Otherwise, start turning over the soil one shovelful at a time. You want to get all the grass and roots but don’t dig too deep. You don’t want soil layers that aren’t suitable for growing (subsoil) ending up on top.

If you have one, a garden or broad fork can help you loosen deeper layers of subsoil. Use the fork to lift the soil but not turn it over.

At this point, it’s ideal to let your plot sit for a couple of days to kill the grass if you’d didn’t choose to solarize your bed.

Next, rake out your soil. Depending upon your soil type you may need to chop it up a bit with your shovel or a hoe before raking it out. Remove any large plant material and add it to your compost. If the area has lots of leaves falling from the surrounding trees,  you can use a leaf blower to efficiently clean the area.  There are recommended cordless leaf blowers for quiet clean ups available in the market that you can check out.

Ideally, you want to add a few inches of compost on top of your soil. You should also add a scoop of compost to each transplant hole.

You may be wondering what is the most important tool for gardening? We have come to the conclusion that having a pole pruner will allow you to remove branches from trees that cannot be reached from the ground, you can use it with a blade or saw. Also, it helps you reach fruits from any height you need.


Traditional Raised Beds

Raised beds can help you get started gardening quickly and are perfect for utilizing places that lack quality (or any) soil like rooftops, driveways, or contaminated ground. If you’re using them on contaminated ground, be sure to build them with a bottom so roots don’t grow into the contaminated soil below.

However, they also come with some downsides like that they can be expensive if you don’t live somewhere with ready access to free material like lumber, logs, compost, etc. Before building raised beds, check out our post, The Pros and Cons of Raised Beds.

Thankfully, if you don’t care what they look like, there are many materials you can use to create raised beds. Logs, boards, stones, bricks, even woven sticks (like wattle fencing) can be used to create the sides. Just avoid pressure-treated lumber or other treated materials like railroad ties

Fill the inside with good quality compost or garden soil.
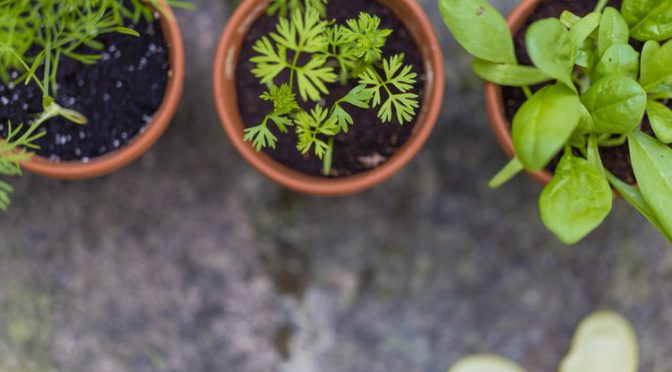
Container Gardens

Anyone can start a container garden, even if you only have indoor space! You don’t need actual plant pots, you can make a container garden from nearly anything. Plastic totes, five-gallon buckets, even old shoes all work. Some people just cut open bags of soil and plant right into them. Just remember that larger plants typically grow deeper roots and will need larger containers to thrive.

To ensure your garden drains well, you should drill a few holes in the bottom of your planter. If this isn’t possible, I like to add some woody material like broken up sticks or a few handfuls of wood chips to the bottom to help absorb excess moisture.

It’s best to use potting soil for container gardens because it drains much better than regular garden soil. You can also use a mix of potting soil and compost.

Check out the 12 Varieties Perfect for Container Gardening!

Additional Resources

Seeds, Small Farms, and Resiliency: The Story of SESE Seeds

Neighboring seed farmer Edmund Frost (Common Wealth Seed Growers)

As most of you probably know, we’ve been inundated with orders this last month. We’re thrilled that folks are looking to our seeds during this challenging time but we’ve also had trouble keeping up. We’ve had to suspend taking new orders several times now while working to get seeds packed and shipped. We thought this would be an appropriate time to take a look behind the scenes at Southern Exposure.

The graph below compares the number of daily orders for some days in March and April from 2013 to 2020. Not shown in this graph is that we also saw an increase in order size. Folks that maybe would normally purchase just a few packets ordered more packets and larger packets (bulk sizes) this year.

The graph below compares some of the 2019 and 2020 sales by category.

Our Network of Growers of Small Growers

Did you know SESE gets approximately half of our seeds from our network of small growers? These are the seeds you see marked with a purple “S” on our website and in our catalog.

That’s a really high percentage of seeds!  Most larger seed companies buy most of their seeds from wholesalers – it’s a ton of work to fill all the seed orders that come in, and directly contracting with seed growers adds a lot of extra work on top of all that order fulfillment.

Each year about 60 small farms grow seed for us. Most are family farms with few if any employees. Some grow as little as one variety while others grow as many as 40.

Before each growing season, we make a list of seeds we need and send it out to our growers. We include a price per pound or ounce of seed and a range of how many pounds/ounces we’d like. The lower end of this range is estimated to be about 1 year worth of seed and the higher side is about 2.5 to 3 years of seed. The range may be different depending upon the crop type and how well it stores.

Almost all of our farmers, aim for the high end of the range. Different varieties need to be isolated from one another, so it benefits farmers to get the most they can out of each isolation plot. For the most part, we provide the option for growing one year of seed to avoid penalizing farmers who have a bad crop due to pests or weather.

Small Growers and the Pandemic

As far as the pandemic is concerned, we see a few benefits from our network of small growers. The first is that we purchase more than 1 year of seed. This helps us be prepared for years like this year when we received more and larger orders than expected. Also, on small family farms with few employees, we don’t see workers crowded into tight conditions that you see with larger industrial-scale operations.

However, many of our seed growers are older folks who would be considered at relatively high risk of experiencing serious side effects from COVID 19. We love our seed growers and are hoping they all have a healthy, happy, and successful growing season.

Wholesale Seed

We also purchase wholesale seed. These seeds don’t have the purple “S” in our catalog and on our website that seeds from small growers do.

We strive to work with companies that value organic agriculture as we do. Terra Organics, Seven Springs Farm, and A. P. Whaley Seeds are great examples of our wholesale sources.

SESE Seed Storage

Seed Storage

SESE Seed Freezer

Partially because of the quantity of seed we purchase at a time, we have a lot of seed storage. We keep our seeds in a walk-in freezer and climate-controlled storage room.

Seeds can remain viable for many years if properly harvested and stored. As we only want to provide our customers with quality seed with high germination rates, we only store for a few years at a time and test our seed each year.

What does the future bring?

  • If sustained, our unusually high sales mean that we might sell out of half of the varieties grown by our small growers. First, we’d run out of seed grown and then shipped to us in the fall of 2018, which we sold in 2019 and 2020. The seed grown in 2019 is expected to last through 2020 and 2021.
  • We expect our wholesale seeds already on hand to last until the fall of 2020 (some until late 2021).
  • We may sell out of certain varieties but we won’t sell out of whole crops.
  • Beans and southern peas were most affected by the sales surge. Pole beans in particular are difficult for growers because they require trellising which involves extra work and expense.
  • We had a few crops that were removed from the 2020 catalog due to lower sales that may be back for 2021 if we run out of other varieties.
  • We’ll be asking our growers if they’re interested in increasing their production by 10% this year.
  • You might see a change in the size of our seed packets to make things easier on our supplier, Cambridge-Pacific.

While not all of our seeds come from small growers, we feel supporting these farms goes a long way to making our company more sustainable and resilient. Thanks to all of our customers for joining us in supporting family farms each year.

The Indoor Garden

We always say that anyone can grow a bit of there own food but what if you have no outdoor space? There are a few vegetables and herbs that you can grow indoors like houseplants. Plus a few alternatives to indoor growing even if you don’t have so much as a balcony.

Natural Light

If you’ve decided to start an indoor garden the first thing to consider is your home’s natural light. Here in the northern hemisphere south-facing windows provide the most natural light. East and west-facing windows will also provide some direct light. In most situations, north-facing windows will not provide enough light for vegetables.

If you live close to neighbors or another building, be mindful that this could block your direct light. Trees shading your windows are also something to consider.

Indoor gardens are also generally more successful in the summer months when the days are longer.

Grow Lights

Proper grow lights can significantly increase your yield and allow you to grow vegetables and herbs you otherwise couldn’t indoors.

While you can use shop lights, as many do for seed starting, these are generally rather inefficient. They produce less of the light that plants need than grow lights do and put out more heat. This means you’ll have a higher electric bill which may make the purchase of proper grow lights worth it.

Many new LED grow lights are also designed to fit in better in your home. You can find a variety of styles and sizes online.

What to grow?

To have the best results, start with plants that are the most shade tolerant. These include leafy greens like lettuce, kale, spinach, and cress. You can also try more shade-tolerant herbs like cilantro, parsley, and mint. These plants are also “cut and come again” plants allowing for multiple harvests.

These vegetables and herbs also stay fairly small and aren’t heavy feeders, allowing you to grow them in small containers.

If you want to grow fruiting vegetables like tomatoes indoors you’ll probably need to learn about tree trimming for small trees and invest in a grow light.

Potting Up

Unlike transplants for your garden, you may not have to transplant indoor plants at all. However, there are a few benefits to starting in a small pot or flat.

Many plants do best when started in smaller pots. Small pots allow you to easily provide optimum growing conditions including ideal moisture and fertility.

If you started plants like greens and herbs in smaller pots you’ll probably need to pot them up in 2-3 weeks. You should try to pot them up once they’re roots are well-developed but not so far along that they’re root bound.

Fertilizing 

Occasionally you should feed your plants. Watering with homemade compost tea or liquid kelp is great for this.

For low feeders like greens and herbs, once a month should be plenty. You may need to increase this if you’re growing in small containers or for a long time.

If you’re growing larger, heavy-feeders you may want to fertilize twice a month.

Sprouts

One simple way to grow a bit of food without a big set-up or commitment is to grow sprouts. All you need is a glass jar, water, some seeds, and cheesecloth or a fine strainer.

Soak about 1-2 TBS of seeds like alfalfa, mung bean, or broccoli in a glass jar full of water for 24 hours.

After 24 hours, drain and rinse your seeds. Repeat rinsing and draining every day until your seeds are as sprouted as desired. Then they’re ready to be added to salads, sandwiches, stir-fries, and other dishes.

Your jar can sit on your kitchen counter. Sprouts don’t require direct light, just a warm place.

Alternatives

Another option to gain a bit of outdoor growing space is mounting a window box. This can still be problematic for some vegetables if your window doesn’t get much direct sunlight. They’re also small which isn’t optimum for larger veggies.

If you’re desperate to garden you should also check into community gardens in your area or try to start one yourself. Some CSAs (community supported agriculture) also trade work for part (or all) of the price of a share. Check with farmers near you!

Saving the Past for the Future