The Wonderful Leek: Planting, Harvesting, & Storage

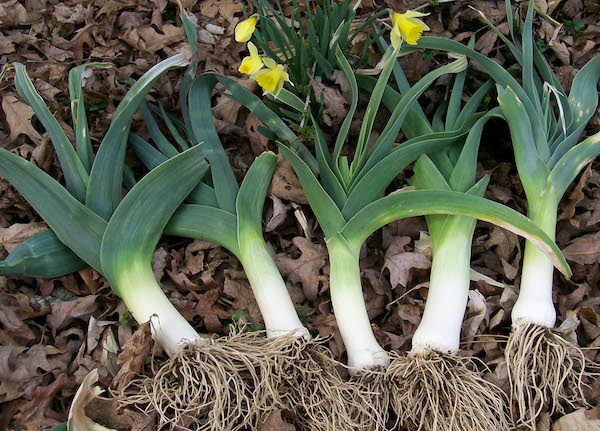
Leeks have a long and cultured history. Some of the earliest records of leeks come from Egypt. There dried leeks were found in archeological digs as well as in carvings and drawings. They were also consumed in ancient Rome and are said to have been a favorite of the emperor Nero.

Later leeks were brought to Wales where they gained impressive notoriety. According to legend, a monk named David suggested to the Welsh that they wear leeks on their helmets to distinguish themselves from the enemy in their famous fight against the Saxons in the battle of Heathfield in 633 AD. Later that monk became St. David. To this day the Welsh still wear leeks on St. David’s Day and the leek is a Welsh national emblem.

Planting

Leeks are surprisingly easy to start from seed and plant. To start from seed you’ll need a tray full of good quality potting soil. You don’t need separate cells for leeks though they’ll do fine in cells if that’s easiest for you. Generously spread seed in the tray, lightly cover it with soil, and water them in.

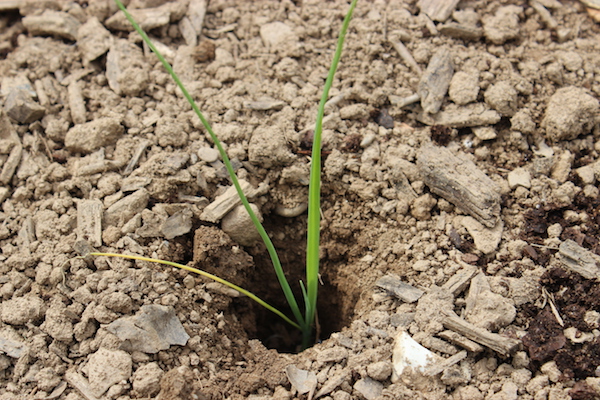
Once your leeks are 6-12 inches tall, you’re ready to plant them out. To prepare your bed for leeks you’ll want nice loose soil. You can broadfork and then rake it smooth if you practice no-till. Then take a tribble (basically a handle or stick about 1 inch in diameter with a slightly pointed end) and make holes for your leeks. Generally, the farther you plant them apart the larger the leeks will grow. Aim for about 9-12 inches between each plant and row or 2-6 inches between each plant and 18 inches between each row.

Once your bed is ready, gently tease the plants apart. You don’t need to worry about keeping soil with each plant just try to avoid damaging the roots. Then place one leek in each hole, making sure the roots are touching the bottom. Do not fill the holes in. The deep holes create nice blanched, white stems and by filling them in you can get dirt between the leaves.

Once they’re all planted you should carefully water them in. Watering will stir up enough soil to cover the roots at the bottom but you should do so gently as to avoid filling in the entire hole. Once they’re established you can mulch around them with hay, straw, leaves, or grass clippings to cut down on weeds and keep the stems white.

Harvesting

Harvesting leeks is a bit like harvesting carrots. It’s best to loosen the soil with a garden fork before you pull them to avoid breaking them. Try to avoid spearing any, of course.

You should chop off the long roots and outer, tough leaves into a ‘V’ shape. If you’re harvesting quite a few it’s best to place them, base down in a bucket with a bit of water to help them stay fresh.

If you’re harvesting leeks from frozen ground our friend Pam Dawling recommends pouring boiling water on the base of the plants if you’re harvesting a few for immediate use.

Storage & Eating

One of the best ways to store leeks is by just leaving them in the garden. Winter varieties of leeks are very cold tolerant, handling temperatures down to 10°F. In many areas, they can be overwintered in the garden providing fresh produce when little else is coming in.

If you must harvest your leeks you can store them fresh in the refrigerator or in wet sand in a root cellar. Leeks can also be dehydrated or frozen. To dehydrate you want to slice them into thin pieces and dry them in a single layer in a dehydrator. You can freeze leeks the same way on a cookie sheet before transferring them to a container for easy use.

Potato and leek soup is an obvious classic but leeks are incredibly versatile. They’re milder than a regular onion and are excellent for galettes, pasta dishes, or just sauteed with some fresh greens or cabbage.

Pin it for later!

How to Properly Harvest & Preserve Herbs

Growing your own herbs is a great project for any gardener. Fresh herbs are so much better than storebought at a fraction of the price. They’re also easy to grow and take up little space making them ideal for container gardening or just those who are too busy for a full garden.

Herbs to Grow

If you don’t already have an herb garden, these are a few great herbs to start with:

  • Basil
    This heat-loving annual can really make homemade pizza or pasta great.
  • Lemon Balm
    A member of the mint family, lemon balm is vigorous and perennial. It’s most commonly used to make a relaxing, lemony tea.
  • Thyme
    Another perennial, thyme is quite easy to grow and useful. We’ve actually got a whole post about why you should grow thyme.
  • Cilantro
    If you love to cook, a few cilantro plants are a must have. The leaves and seeds are used in Chinese, Indian, and Mexican cuisine.
  • Parsley
    Fresh parsley is so much more flavorful and it’s beautiful and nutritious too! It doesn’t mind cool weather so it can be direct sown in early spring.
  • Chives
    Easy to grow and perennial, chives are a great choice for new gardeners.
Dark Opal Basil

Harvesting 

There are a few general tips that can help you capture the best flavor and aroma when it’s time to harvest your herbs.

  • Harvest your herbs before they flower as leaf production typically declines after flowering and some plants lose flavor after flowering.
  • Harvest in the morning just after the dew dries but before the heat of the day. This is when the plants’ oil content is highest so they’ll be the most flavorful and aromatic.
  • Harvest your herbs right before you need them if you can. They lose flavor quickly.
  • Avoid washing your herbs if possible.

If you’re harvesting from a perennial plant like lemon balm or chives there are a few additional things to consider.

  • Stop harvesting at least 1 month before your last frost date. This gives the plant time to recover, store energy for winter, and avoids encouraging young shoots that could be harmed by a frost.
  • For most plants, you should avoid harvesting more than 75% of the plant’s growth.

Preserving

Air Drying

Herbs that have low moisture content, like thyme, can be dried in bundles. Simply cut several stems and tie them together with string. Then hang them upside down in a dark, well-ventilated room. To avoid dust you can place a paper bag upside down over each bundle. Your herbs should be dry in 2-3 weeks and you can remove the leaves and place them in an airtight container for storage.

Herbs with high moisture content like lemon balm and cilantro may need to be dried more quickly, especially in humid climates. You can pull off the leaves and lay them in a single layer to dry on a screen.

Dehydrating

If you have a dehydrator you can preserve a lot of herbs quite quickly. It’s probably easiest to dry whole leaves and then brake them up for storage in an airtight container. When drying herbs be sure to use a low temperature to preserve their flavor best.

Freezing

Herbs are surprisingly easy to freeze and there are several ways to freeze them. The simplest way is to just chop them up, spread them on a cookie sheet, and freeze. You can then move them to a container so they’re easy to grab a pinch when you’re making dinner.

Alternatively, you can freeze them in ice cube trays. Herbs like lemon balm can be chopped up and frozen in water in ice cube tray, excellent for making iced lemon balm tea! Others like basil can be frozen in ice cube trays in broth or butter for adding to meals.

Adding herbs to your garden is well worth the effort especially if you know how to properly harvest and freeze them. Keep these tips in mind this summer as you use your garden fresh herbs for great meals and maybe even a few cocktail garnishes!

Heat Tolerant Greens to Try This Summer

Summer brings a bounty of garden produce but it can be a tricky time for greens production. Many leafy greens do best in the cool weather of spring and fall. When the midsummer heat hits they bolt and turn bitter. If you appreciate having greens in your garden as long as possible consider trying a couple of these heat tolerant varieties this summer.

A great tip to help you preserve your plants during difficult weather is getting air conditioning repair Columbia SC to fix or install new HVAC in your garden and house.

Green Glaze Collards

Perfect for southern and warm coastal states this collard is heat-resistant, slow-bolting, and non-heading. It was introduced by David Landreth in 1820 and is easily recognized by it’s uniquely smooth, bright green leaves. It’s also great for those who struggle with pests because it’s resistant to cabbage worms and loopers.

Magenta Magic Orach

This deep red orach is a great addition to any salad mix. It has a slightly spicy flavor and tender leaves. It tolerates heat well and leaves may be eaten even as plants go to seed.

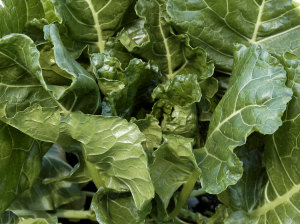
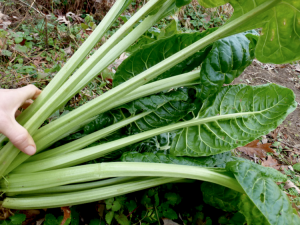
Perpetual Spinach (Leaf Beet Chard)

This European heirloom dates back to 1869 and is an excellent summer substitute for spinach. Though not quite as sweet as spinach it produces all summer long!

Jewels of Opar (Fame Flower)

A relative of purslane, Jewels of Opar offers mild succulent leaves as well as beautiful flowers and seed pods. Read more about this awesome plant here.

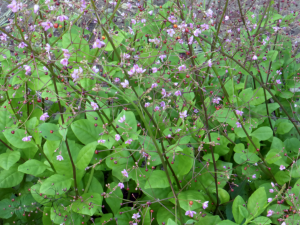
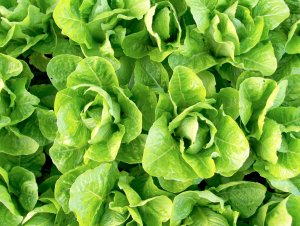
Jericho Romaine Lettuce

Introduced from Israel, this variety is bred for the desert heat. Jericho has good tip-burn resistance and retains its sweetness when other varieties have gone bitter.

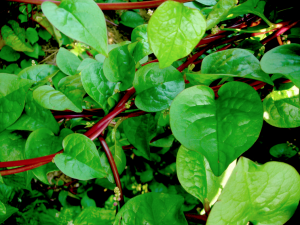
Red Malabar Summer Spinach 

These Asian greens are a great heat-tolerant substitute for spinach. They’re good for salads and stir-fries but they do require trellising. This season our grower has been having trouble but we have conventional seed available here.

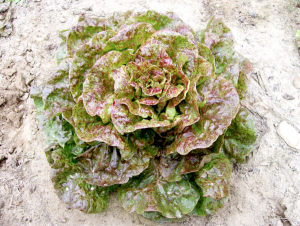
Speckled Bibb Lettuce

Speckled Bibb is a great tasting and attractive variety for any season. It holds longer in the heat without bolting than other varieties like Slo-bolt and Buttercrunch in hot weather.

Tips for Hot Weather Greens

This summer keep a steady supply of greens coming in from your garden with one of these vareties.

Saving the Past for the Future