Category Archives: Uncategorized

Ground Ivy

Life has been pushing me in the direction of herbal medicine lately. A gentle nudge, some not-so-subtle hints, a full-on shove. So at last I am resisting no longer and taking advantage of the wealth of knowledge and opportunity laid before me to begin this journey of discovery.

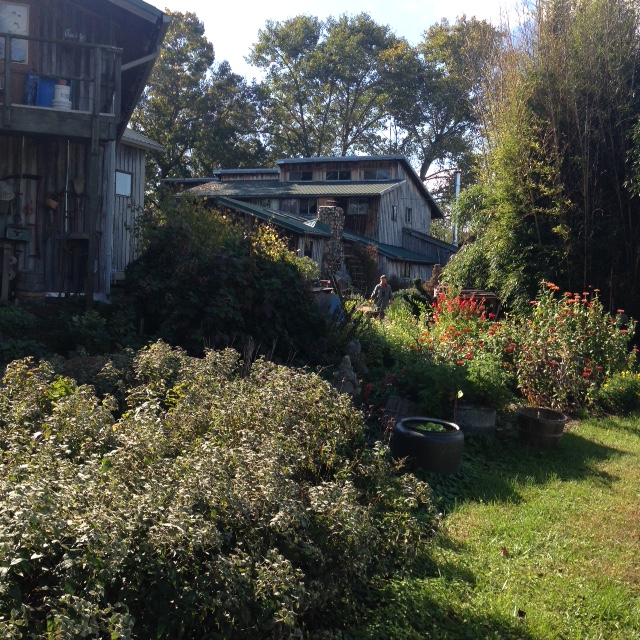
At Twin Oaks, the community just up the road from and parent to Acorn, where I now live, the beautiful, sprawling herb garden has been run by the wise and knowledgeable Hildegard for many a year. And so I have thrown myself at the feet of Hildegard as a student to absorb all that she might be willing to teach me. In this blog I intend to document my lessons, that I might better cement them for myself and also share them with you, gentle reader.

Just a small part of Hildegard’s magnificent herb garden
Just a small part of Twin Oaks’ magnificent herb garden

In our first class, we learned about Ground Ivy, also known as Creeping Charlie, and a host of other names.

Heart shaped leaves and pretty purple flowers

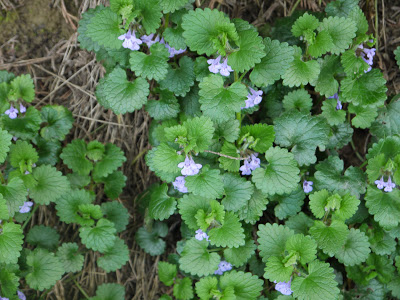
Hildegard was full of praise for this pretty ground cover. Native to Europe and Southwestern Asia, it grows enthusiastically in most of North America and can be very effective in keeping out other weeds. It clings to the earth but lightly, making it easy to rake up and compost, and Hildegard said she was able to make an equal volume of rich soil out of a pile of it. It thrives in shade, but also handles sun well, so you can put it just about anywhere – but be careful in woodlands as this invasive can choke out native wildflowers.

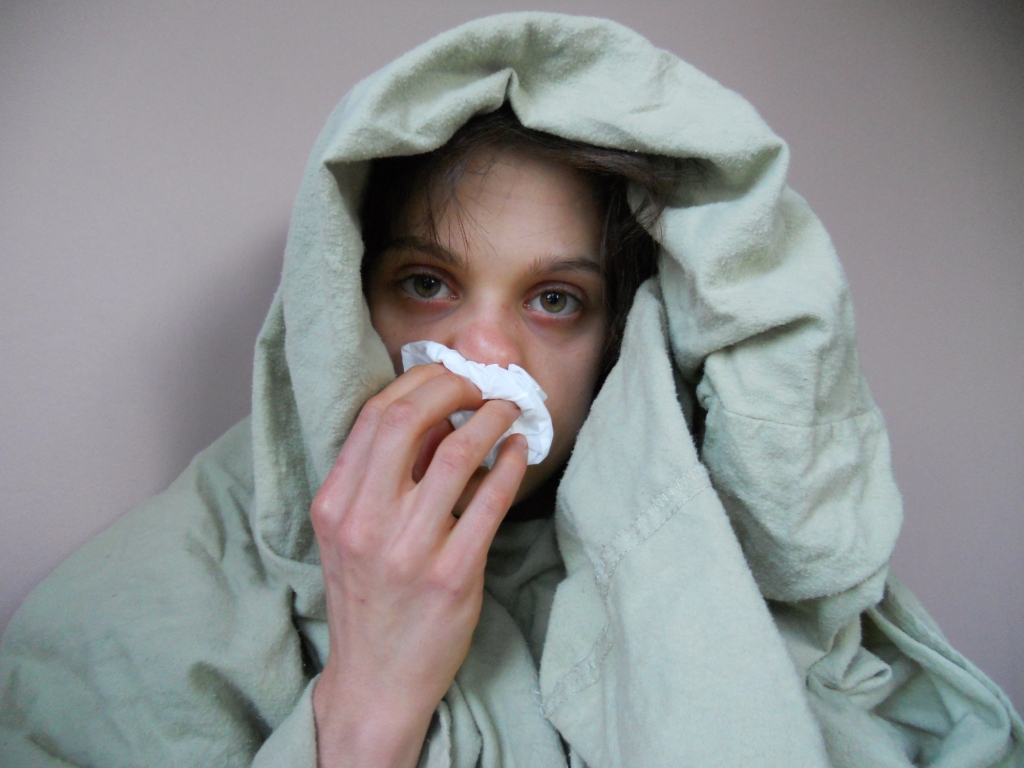
Ground Ivy has been used medicinally and culinarily for thousands of years. It’s full of vitamin C and Hildegard told me she recently made a tea with loads of fresh ground ivy, elderberries, and holy basil and fed copious amounts of it for three days straight to a visitor with bad cold, who then made an astonishing and speedy recovery.

We’ve all been there - yuck!
We’ve all been there – yuck!

We wandered around the garden looking at many patches of Ground Ivy to pick the very nicest. Recent rains had the plants in lower lying areas looking a little yellowish. Finally we settled on a big patch on higher ground. Hildegard showed me how to snip the leaves with scissors rather than tearing or pinching them up, which traumatises the plants more. We filled up a basket and then headed back to the tiny room she uses for processing tinctures.

Here we stuffed the leaves tightly into a small mason jar, to about an inch from the top, reaching in with scissors to cut them up a bit. Then we poured in vodka nearly to the top, put a piece of plastic over the mouth of the jar, and screwed on the lid. (The plastic is there to keep the alcohol from being in contact with the metal of the lid.) Now it will sit for at least six weeks, drawing out the valuable compounds from the ground ivy to make a tincture which will allow us access to their medicinal properties whenever we feel the need of them.

Hildegard mentioned that whenever possible she likes to use medicinal herbs fresh, so when I got home I harvested another jarful of ground ivy and made myself a tea from the fresh leaves. I, however, found its taste odd and slightly nauseating, so I think I’ll stick with adding the tincture to other things.

A little more research on my own told me that besides being chock full of vitamin C (it proved useful in curing scurvy), ground ivy can be used as a substitute for animal rennet in cheese making, and that the Saxons used it in brewing beer before hops were introduced. The 16th century herbalist John Gerard called it the most excellent medicine in the world for eye ailments, and also recommended it for sciatica, back pain, as a diuretic, an astringent, and a stimulant. While these claims are not perhaps all able to be substantiated, it certainly seems like this prolific little creeper is an excellent addition to one’s herbal medicine cabinet.


Summer Sowings: Continuous Harvests all Summer and into Fall

With summer’s intense heat in full swing, it can be hard to remember to sow cool season crops, but some fall crops need to be started as early as June, and many need to be started in July.

On our farm in central Virginia our average first fall frost falls in late October, but even where frosts come later or not at all you should start fall crops during the summer. Later plantings will struggle with fall’s low light levels, and won’t produce before growth slows to a near standstill in early winter (the “Persephone Days,” November 21-January 21).

To make sense of all the seeds we’re sowing during the summer months, I divide our summer plantings into three types:

1. Warm-season, slow growing summer successions: these are the bonus crops that many gardeners forget. A second round of tomatoes, summer squash, sweet corn, or cucumbers can keep you harvesting all summer long without interruption.

2. Fast growing summer successions: these crops require frequent, regular sowing all through summer. Because we’re sowing so often, these can be easier to remember. We sow beans, carrots, salad greens, beets, and radish seeds weekly. Be ready to baby your summer sowings: we water daily to keep them from drying out before sprouting. Lettuce needs the soil temperature to be below 80 degrees F, so you may need to sow in flats indoors, or even in the refrigerator, or sow in the evening and cool the soil with crushed ice.

3. Cool season, slow growing crops for fall harvest. We sow the Brassicas first: Brussels sprouts in June, and then broccoli, cabbage, and cauliflower in July. By mid-July we’re sowing fall greens: collards, Swiss chard, leaf beet, and kale, plus winter radishes. We sow Chinese cabbage in late July. Sow thickly in nursery beds and keep up with your watering; we protect these young plants from summer’s insects with spun polyester row cover or the new more durable and temperature neutral “proteknet.”

For further resources on planning your summer sowings, check out: Brett Grohsgal’s article Simple Winter Gardening, our article on Summer Succession Plantings, and our Fall and Winter Planting Guide.

Successions can be overwhelming, so we have some tricks that help extend harvests with fewer plantings:

1. Plant indeterminate varieties of tomatoes and cucumbers, and pole-type beans and peas. We still find we need a late tomato planting, because our earliest plantings taper down toward the end of summer (and our Heritage Harvest Festival at Monticello needs lots of tomatoes for the Tasting Tent).

2. Select heirlooms bred to provide extended harvests: many modern farms want concentrated harvests that can be harvested with one or two passes; but for more traditional growers an extended harvest was the ideal way to manage the bounty. Look for roots that hold well in the ground. Lutz beets are one of our favorites: they can be spring planted and will hold all summer without turning woody. However, they will be very large, so this only works if you’re happy cooking with multi-pound beets (try slicing cross-wise for beet burgers). Open-pollinated broccoli provides extended side-shoot harvests. Choose bolt-resistant greens and harvest by the leaf before before taking whole plants.

3. Choose seasonally appropriate salad greens: we want salads all year-round, but this can be tricky both when it’s hot and when it’s cold! Mustards and brassicas are more mild in cold weather, so get adventurous by adding young kale and tatsoi to winter and early spring salads. Choose cold-tolerant lettuce: red varieties tend to hold up better in frost. For hot weather, choose fast-growing summer crisphead lettuce like Sierra, or heat-ready greens like Red Malabar spinach or Golden purslane.

4. Set up a root cellar or similar storage system. Ultimately, some of your crops will ripen all at once, or you’ll be faced with a glut of produce when frosts threaten. Be prepared: have a proper storage area ready to go for your carrots, parsnips, turnips, cabbages, winter squash, and more. Be ready to finish ripening the last fresh tomatoes indoors. For fresh produce through till spring, we need good systems for storing and slowly working through the harvest. Nancy Bubel’s Root Cellaring is an invaluable resource if you’re looking to improve your winter storage system, and has lots of low-cost and little-time options, if you haven’t blocked off your whole summer to dig a cellar.

Growing Rhubarb from Seed

by Ira Wallace

Many gardeners are familiar with growing rhubarb from divisions or crowns, but if you want to start a large rhubarb patch quickly, without spending a lot, growing rhubarb from seed is the answer. The stems of rhubarb grown from seed will not all have that intense red color you might be used to. Some stems will be red, some green, and some in between. But they will all taste the same, perfect for your home-cooked pie. If you want all red stalks, get divisions from a friend or neighbor or buy crowns from your local nursery.

When starting your seeds, remember that rhubarb is a cool-weather crop.

  • In climate zones 6 and cooler, it’s an easy-to-grow perennial (traditionally planted where there used to be an outdoor privy). The stalks and leaves die back with first frost in the fall, but the plants will come right back in early spring.
  • In zones 7 to 8, growing rhubarb is tricky. but it can be grown as a short lived perennial. You will need to be careful to shelter your rhubarb plants from extreme summer heat. Choose a location with afternoon shade in the summer. The north side of a grape arbor, raspberry patch, or asparagus ferns would work well.
  • In areas with very hot summers, where winters are mild (zones 9 to 10), rhubarb can be grown from seed as a winter annual. ECHO ("Educational Concerns for Hunger Organization") in Florida has had good luck with planting rhubarb seed in August and harvesting in March-May. The variety Victoria is noted as a productive late summer/early fall started annual from almost subtropical Florida to semi-arid northeast Texas. Read how to do this in “Growing Rhubarb from Seed as an Annual” below.

Starting Rhubarb Seeds

Rhubarb seeds are encased in a large paper-like shell. To speed germination, soak your seeds in water for 1-2 hours before planting. If you’re starting indoors, plant the seeds in screened compost or other suitable organic planting mixture, 2 seeds per 2 to 3 inch pot. Using peat pots or cow pots makes transplanting easier. For spring plantings a heating cable or mat will speed the germination if the room temperature is below 70°F. Rhubarb seeds germinate quickly when planted in the warmth of late August or early September. Keep your seedlings evenly moist but don’t over-water (the seedlings can die from root rot if the ground is too wet).

Growing Rhubarb from Seed as a Perennial

To start rhubarb in the spring (zones 8 and lower), sow seed in pots or flats under cover 8-10 weeks before your average last frost. Transplant the young plants out into the garden about two weeks before your average last frost, into an area amended with compost or well rotted manure and plenty of organic matter. The plants should be about 4 inches tall. Mulch your seedlings to maintain even soil moisture and keep the roots cool. Harden plants off before transplanting or protect the new transplants with row cover until danger of frost has passed.

Choose a location protected from the heat. The warmer your climate, the more important it is to provide afternoon shade (on the west and south) during the hottest months. A row of tall annual plants (your late summer tomatoes or pole lima beans), shade cloth, or a temporary structure can provide adequate shade that you can remove when the weather cools. Always remember to maintain even moisture. Letting your young rhubarb plants dry out in hot weather is the kiss of death.

Growing Rhubarb from Seed as an Annual

To grow rhubarb as an annual in the fall and winter (zones 9 and higher), start the seeds in a cool location (a bright indoor spot or a shady outdoor place) from late August to early October. Transplant into the garden when the seedlings reach about 4 inches tall. The plants will be ready for harvest in March through early May. Intense summer heat will kill the plants, so harvest all the leaves in late spring. This technique only works where winters are very mild, or if you can protect the plants from damaging frost with a cold frame or row cover.

Harvesting Rhubarb

Harvest rhubarb either by cutting or pulling off the leaf stalks at soil level. When your plants have 10 stalks you can harvest 3 or 4 stems at a time per plant.  If you are growing your rhubarb as an annual harvest the entire plant. Harvest stalks only! DO NOT eat the rhubarb leaves as they contain high levels of toxic oxalic acid.

For perennial plantings let some leaves remain on the plants during summer to generate energy and reserves for the following year. We recommend harvesting a few stems at a time, in spring and fall only. It’s best not to stress the plants during the summer, so avoid harvesting at this time. Frost will kill all the leaves, so harvest all the leaves when frost threatens in the fall.

Break off and discard any flowering stalks at ground level. (The flowering stalks don’t make good eating, and breaking them off prevents the plant from putting energy into flowers and seeds.)

It’s best not to harvest during the first year if you are establishing a perennial bed. For annual beds, harvest all remaining stalks when the weather begins to get too hot in the summer.

Ira Wallace lives and gardens at Acorn Community Farm, home of Southern Exposure Seed Exchange, where she coordinates variety selection and seed growers. Southern Exposure offers 700+ varieties of non-GMO, open-pollinated, and organic seeds. Ira is a co-organizer of the Heritage Harvest Festival at Monticello. She serves on the board of the Organic Seed Alliance and is a frequent presenter at the Mother Earth News Fairs and many other events throughout the Southeast. Her first book, “The Timber Press Guide to Vegetable Gardening in the Southeast,” is available online and at booksellers everywhere.