Growing Turmeric and Ginger

 You can pre-order spring-shipped Turmeric plants and rhizomes and Ginger plants from Southern Exposure Seed Exchange.

By Ann Codrington of Nisani Farm.

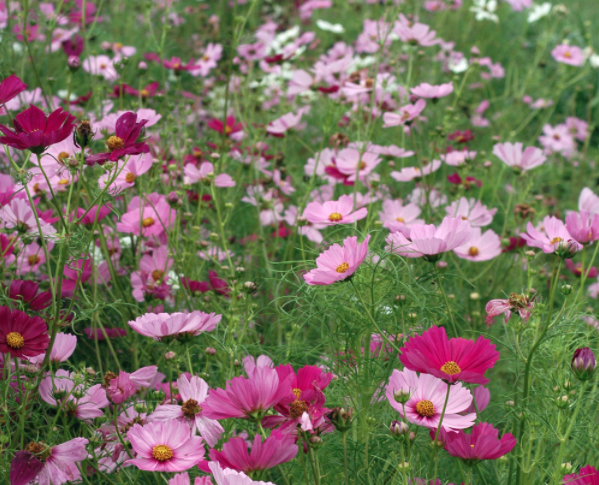
Nisani Farm is owned and operated by women of color across three generations. Our Belizean roots flavor the feel of the farm in such a way that you find yourself in the tropics without having to leave Southside Virginia. In this forested 50-acre farmstead there is everything from turmeric and ginger to papayas and moringa trees, from medicinal herbs and mushrooms to cut flowers and purple vegetables, from rain garden plants and orchards to bitter melons and leafy greens, and all grown with Certified Naturally Grown practices.

While we grow and make a number of things – many continuously changing through experience and experimentation – what remains consistent is a focus on growing ginger and turmeric.  Here is a peek into how we grow our turmeric!

Starting Turmeric and Ginger From Rhizomes

By far the hardest part of growing turmeric and ginger is getting rhizomes to sprout early enough in the season for them to put on good growth before late Summer.  It takes good planning, or pre-sprouted plants to get a good crop in the Fall.

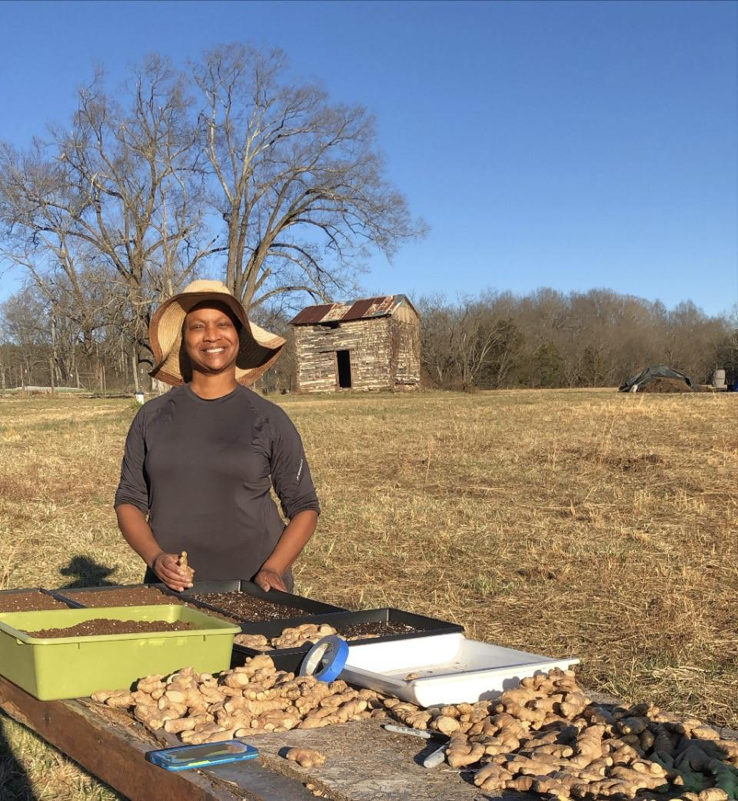
Planning for the growing season actually begins on November 1st of the previous year, when we place our order for new organic seed stock from Hawaii.  Although the rhizomes won’t arrive until February, they must be secured in the fall to ensure the best selection. 

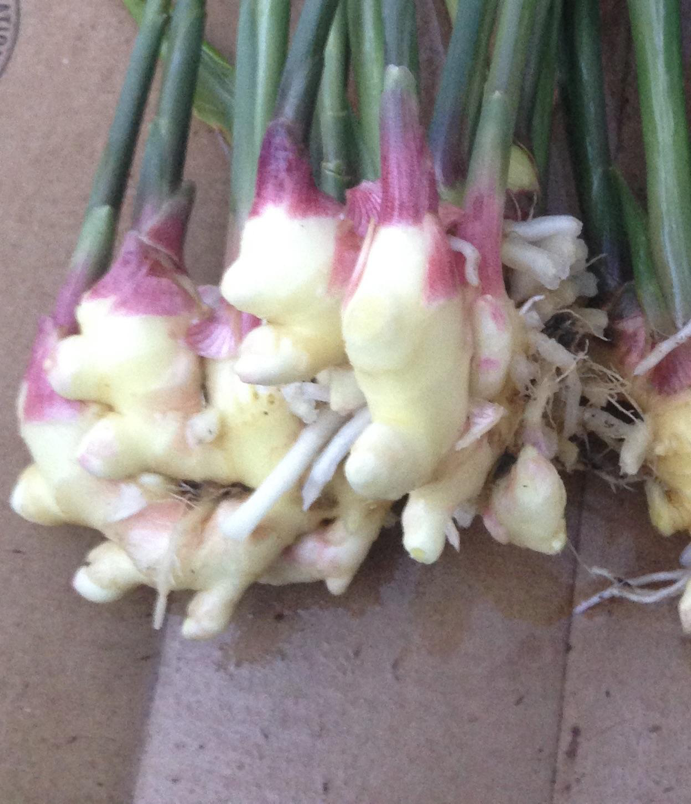
In February, while temperatures are still cold in Southside Virginia, the organically grown rhizomes (also called “seed”) arrive and are prepared for planting. We sort and prepare rhizomes in a way that is likely to prevent disease and ensure survival. Then we place the flats onto temperature-controlled heat mats in our propagation room where they will stay until they sprout. 

It can take anywhere from four to six weeks of keeping the rhizomes warm and moist before we begin to see sprouts. Once most of the rhizomes in a flat begin to sprout, we move the sprouts to a warm area in our high tunnels to continue to grow.

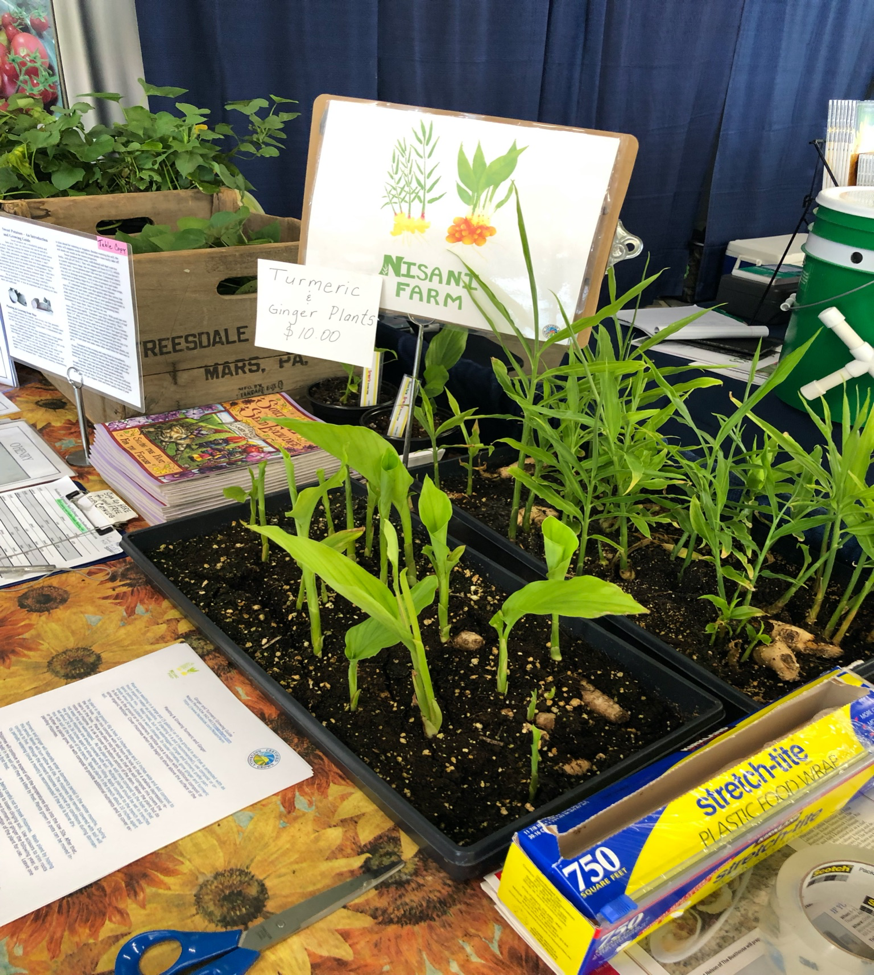
By April, all of the rhizomes will have sprouted.  Once the seedlings are a few inches tall, we prepare them for shipping to SESE customers.  We also give lectures to explain how to grow and use turmeric and ginger, and by May we are ready to plant our crop in Southside Virginia.

We recently added blue turmeric to our collection. It is a medicinal rhizome with camphor overtones and known for its anti-fungal and anti-inflammatory properties.  It is mainly used in parts of South and Southeast Asia. We’ve brewed it in teas, dried and powdered it, and put in our bath and body products.

Planting Turmeric and Ginger for the Best Possible Crop

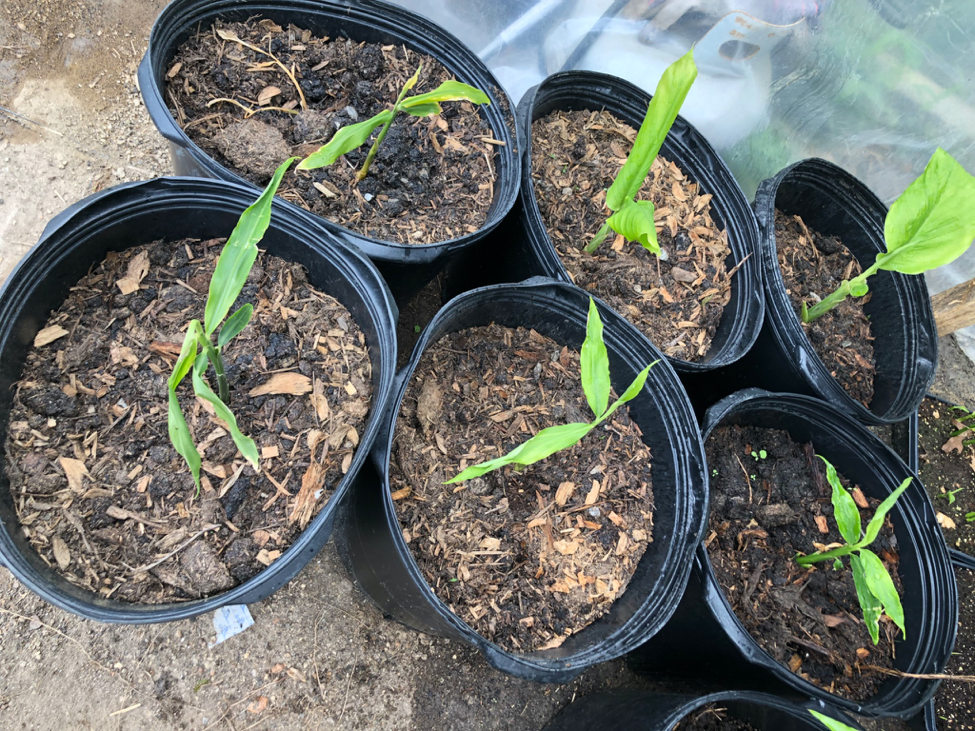
Once the last frost has passed, it’s time to plant your seedlings.  While it is possible to grow turmeric and ginger directly in the ground, here at Nisani Farm we prefer to grow our plants in large pots.  We find that we can manage soil disease better this way by removing any plants that show signs of disease before it spreads. Also, using pots makes it easy to move the plants indoors when the weather turns cold. 

To plant your seedlings, place each one in a large pot (5 gallons or more) containing organic potting mix or compost mixed with wood chips. Cover the roots and rhizome with planting medium and press the soil down to remove air pockets near the roots. Keep moist, but not waterlogged. Although turmeric and ginger are tropical plants, they grow well in part-shade. In cooler climates, you can grow ginger and turmeric in full sun. Fertilize once a month with additional compost or other organic fertilizer. Cover rhizomes when they begin to show above the surface of the soil.

To plant in the ground, dig a hole 12 inches deep and 12 inches wide, add compost to the hole and mix with soil. Place a plant into the hole so that the soil-compost mix covers the roots and rhizome and press the soil down to remove air pockets near the roots. Water the plant but do not keep the soil waterlogged. You can plant multiple plants in trenches set 24 to 36 inches apart to allow space for hilling. Add compost to the trench, mix with soil and space plants 12 to 18 inches apart.  As plants grow, hill with compost to provide additional nutrients and to cover expanding rhizomes. 

Your plants should put on significant growth by September.  Don’t be surprised if they grow as tall as five feet or more!

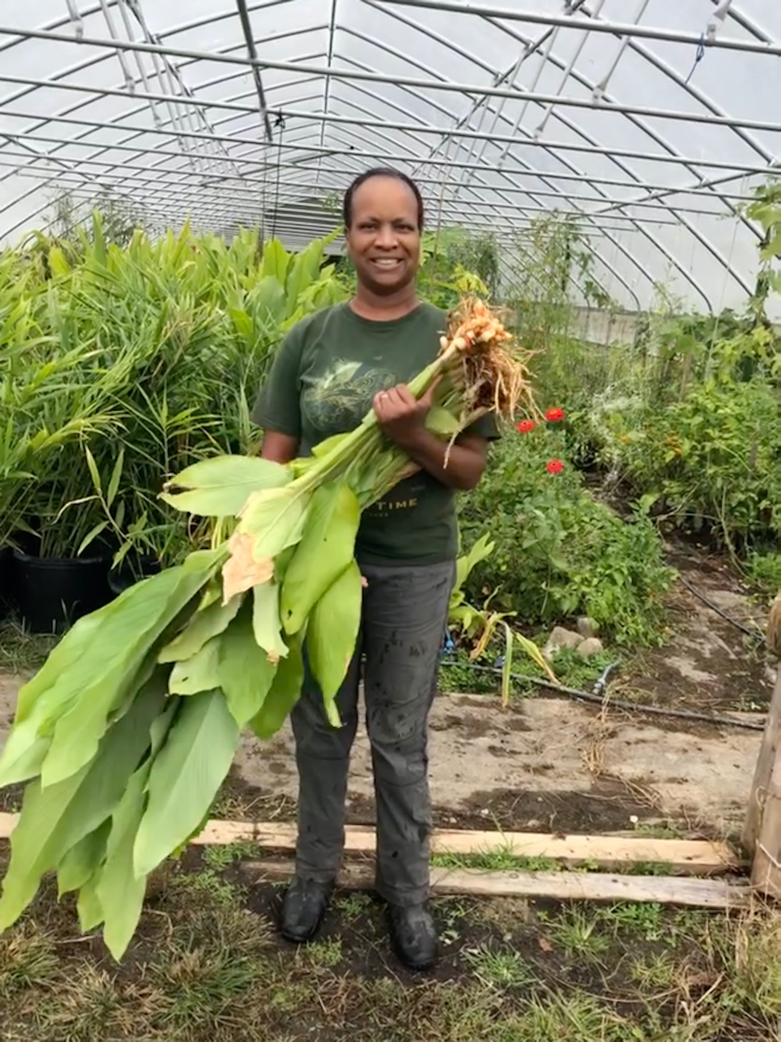
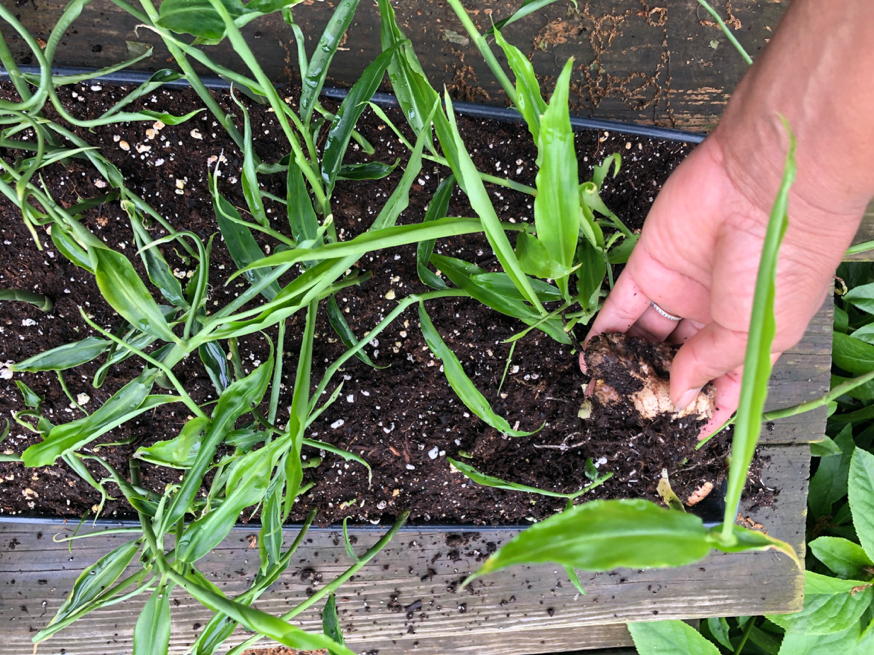
The shorter days of fall signal the formation of rhizomes.  Start checking your turmeric and ginger to see if there are harvestable rhizomes in October.  You can expose the soil around the stem to see if your crop is ready.  If you have several plants, you can harvest plants over the course of fall to enjoy an extended crop.  The longer you wait to harvest, the larger your harvest will be. Just be sure to harvest your crop before the weather drops below freezing.

Harvest by digging up the plant, cutting roots off and rinsing under a water hose.  You can store your ginger in the refrigerator, or you can freeze it for use all winter.  If you don’t harvest your crop, it will naturally enter a dormancy period in the winter months. During this period, leaves will turn yellow and die. Many people store their potted plants indoors for the winter. The rhizomes that remain covered with soil and protected from freezing will resprout in the spring. Although the dormant rhizomes can survive dry conditions during dormancy, periodic watering (once a month) is recommended if the soil is bone dry.

The last frost is just a few weeks away, and before you know it, you’ll be wanting to plant your ginger and/or turmeric patch.  If you haven’t already started sprouting your ginger, we have the pre-sprouted plants you need to get growing!

Grow a Cut flower garden

Having fresh flowers on the table can help make a home feel pleasant and inviting. Store-bought flowers can be expensive, but growing your own may not be as hard as you’d think. Gardeners can grow and create their own cut flower bouquets with surprisingly little time and space.

What Types of Flowers Should I Grow?

There are many flowers that are suitable and easy to grow as cut flowers. These include:

  • Sunflowers
  • Celosia
  • Zinnias
  • Cosmos
  • Sweet Peas
  • Snapdragons
  • Tulips
  • Yarrow
  • Poppies
  • Daffodils
  • Asters
  • Amaranth
  • Bachelor’s Buttons
  • Ageratum
  • Echinacea (coneflowers)
  • Lavender
  • Sweet William

Especially if you’re new to flower gardening, we recommend growing zinnias and cosmos as they produce tons of flowers over a long season. The more you cut and deadhead, the more they produce.

Soil Preparation

Just as you need healthy soil to produce a good vegetable crop, you need healthy soil to grow quality cut flowers. Forking your flower bed, adding compost, and testing your soil before planting can help ensure that you get a great harvest.

This image has an empty alt attribute; its file name is Screen-Shot-2021-03-16-at-1.47.31-PM.png

Plant Early & Plant Successions

Many flowers need to be started indoors weeks before your last frost. Be sure to read the growing instructions for your chosen varieties well before the season begins and stay on top of spring planting.

You can also use the fall to do some extra-early planting. Tuck in bulbs like daffodils and tulips and sow self-seeding flowers like poppies. Visit our post, Fall-Sown Flowers for Spring Blooms, for more ideas.

Throughout the beginning and middle of the summer continue sowing, if you have space. Some quick-growing flowers like zinnias can be sown every 2-3 weeks until midsummer. For more details on how to succession plant flowers, check out our post, Succession Planting Flowers.

Keep the Weeds Down

Keeping the weeds at bay, especially while plants are getting established, is essential. Plants won’t produce as many flowers if they’re competing with the weeds for nutrients and space.

Water Consistently

Consistent watering is key to good flower production. Soaker hoses or drip irrigation are an ideal low maintenance way to keep flowers watered. They’re also more efficient!

You can also mulch around flowers once they’re up. Mulch will help block weeds and keep the soil cool and moist.

Harvest & Deadhead Regularly

It may seem counter-intuitive, but for many “cut flower” varieties, the more you harvest, the more they will grow. The same goes for deadheading. Not letting flowers go to seed will encourage them to keep producing. So even if you don’t need another bouquet, cut your flowers and give them to a friend.

Harvesting

There are a few things you should know when harvesting cut flowers. The first is that your flowers will last the longest and look the best if you harvest them in the morning after the dew has dried, but while it’s still cool.

Always use clean cutting tools. Cut stems at a 45° angle and bring flowers into the shade as soon as possible. When arranging flowers, remove all foliage that’s below the waterline.

Grow Lavender From Seed

Lavender is a terrific addition to any perennial garden. It’s fragrant, beautiful, and can be used medicinally or to discourage moth damage and musty odors in woolens and linens. If you’re gardening on a budget, it can be much more cost-effective to start lavender from seed rather than purchasing plants. This advice will help you have success.

Starting Your Seed

Note that not all lavender cultivars will come true from seed. Select one that will like English Munstead.

You can use trays commonly used in vegetable gardening to start lavender. It’s best to use a light, slightly alkaline sterile, and well-draining potting medium. Lavender can be prone to rot if it stays waterlogged.

Lavender can take up to 30 days to germinate, so starting your plants early is key! Place your seeds in your tray and lightly cover them with soil. It germinates best in soil that is around 70°F. To ensure your soil is warm enough, keep your trays in a warm area of your home and use seedling heat mats if available.

Water your lavender regularly, especially as the seed is germinating but avoid overwatering and constantly wet soil. Use lights if you’re starting indoors.

Planting Out

After all danger of frost has passed and your plants have a couple of sets of leaves, you can transition your seedlings out to the garden. Harden them off, bringing them outdoors for just a little bit longer each day.

Plant seedlings in a bed with well-drained soil that receives full sun. Lavender is sensitive to wind. Depending on your garden, you may need to provide wind protection during the winter. Covering your plants with a breathable fabric like burlap is a good option.

Once mature lavender plants make excellent borders and are great for achieving a cottage garden style.

Lavender grows very slowly, especially in the first year. Your garden bed may take a while to look full and impressive.

Harvesting

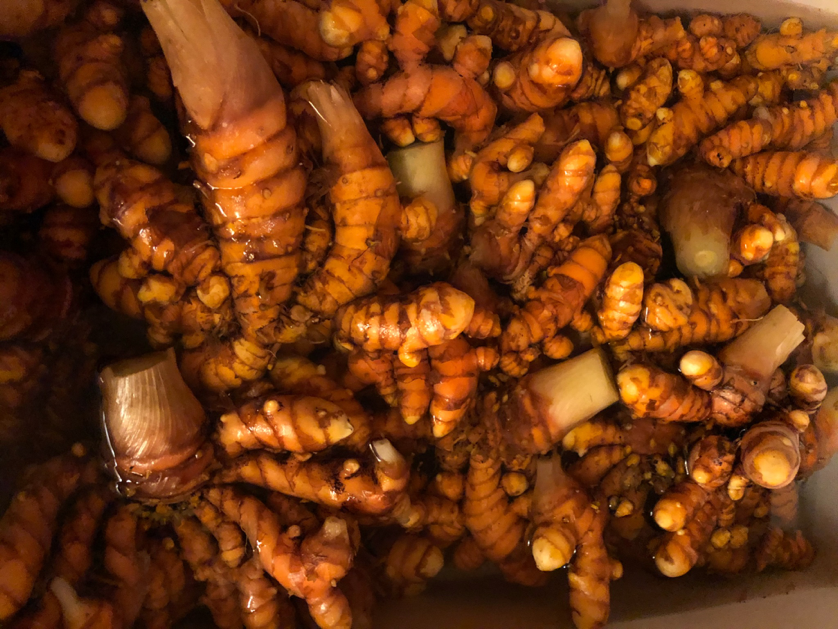
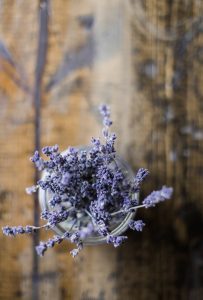
During the first year, it’s best to let your lavender grow without cutting any. By year two, your plants should be larger and flowering. During the second year, you should be able to begin harvesting, if desired.

The best time to harvest lavender is when the buds have formed, but the flowers haven’t opened yet. Harvesting at this time will ensure the best color and fragrance once the lavender is dry.

Use sharp, cleans scissors or pruners to harvest your lavender. Always leave at least one set of leaves growing on the stem below your cut.

Bundle your stems into small bunches and hang them upside down somewhere out of direct sunlight to dry.

Using Your Lavender

After your lavender has dried, in about 2-4 weeks, you can use it for a variety of projects. Use your lavender to make wreaths or simply enjoy the bundles hanging or in vases throughout the house.

You can also easily strip the buds off the stems with your fingers. The buds can then be sewn into satchels for keeping with clothing or under pillows to help with sleep.

Use the buds for herbal tea and adding to lemonade. Lavender is a traditional herbal remedy used for stress-related headaches and as a carminative, antidepressant, and calming tonic for the nervous system.

Lavender buds can also be used to create infused oils for soap or salves or in bath salts for their pleasant, soothing fragrance.

Saving the Past for the Future