8 Common Mistakes When Starting Seeds

Starting seeds indoors is one of the best parts of gardening. You can finally get your hands in the soil after a winter break. A gardener’s shelf full of tiny seedlings is a sure sign that’s spring is on its way! Unfortunately as with everything in gardening growing transplants from seeds has its challenges. If you want to have awesome seedlings this year be sure to avoid these common mistakes.

Not providing supplemental light.

Unfortunately, setting your seedlings by a window probably isn’t going to give them enough light to become strong and healthy seedlings. Odds are they’ll become tall and spindly, reaching towards the light. You’ll have to provide them with some form of supplemental light. You don’t need to buy actual grow lights, simple garage or shop lights will do. You want the lights to be as close as possible to the tops of the plants without burning them. Setting up your lights so you can easily adjust their height as the plants grow is a great idea.

Not addressing a variety’s specific needs.

While many seeds are pretty simple to grow, just push it some dirt and water, others require a bit more care. Some seeds need to be soaked overnight before planting, some need light to germinate, while still others need to scarified. Always check package directions and do research as needed. 

Not hardening off your seedlings.

As your seedlings are accustomed to a climate controlled life indoors, they could succumb to shock if you decide to set them out without first acclimating them to their new environment. Start by setting them outside for just a few hours per day slowly adding time over the course of two weeks. This will allow them to adjust the intense sunlight, temperature, and wind. You can take this a step further by transplanting your seedlings on an overcast day so they don’t have to struggle with intense light on top of the shock of transplant.

Over or under-watering.

Seedlings should always be kept moist but they’ll rot if they’re just sitting in water. Whatever you plant your seedlings in should a hole or holes in the bottom and a tray underneath to catch any excess water. You also need to ensure that they don’t dry out completely which can happen surprisingly quickly as seedlings grow larger.

Not putting them somewhere noticeable.

Unless you’re a full-time market gardener it’s easy to forget about and neglect your seedlings. Setting up your shelf somewhere you walk by often will help you remember to care for them and make it easy for you to spot problems as soon as they arise. 

Not keeping them warm enough.

While some plants like spinach and lettuce germinate and grow well in cool weather, others like tomatoes and peppers like things pretty warm. If you notice that your seeds are taking a long time to germinate, are slow growing, or you live in a cool or drafty home you may want to invest in a heat mat. These can be placed underneath seedling trays and will help the soil stay at an optimum temperature. 

Using garden soil instead of a proper potting medium.

You don’t necessarily have to buy a potting mix but you do need something other than plain old garden soil. Potting mixes always include something like peat moss to hold some moisture but are also light so that they drain well. You can find many DIY recipes for potting soil on the internet. If you’re purchasing soil and want it to be organic look for something that’s OMRI (Organic Materials Review Institute) certified.

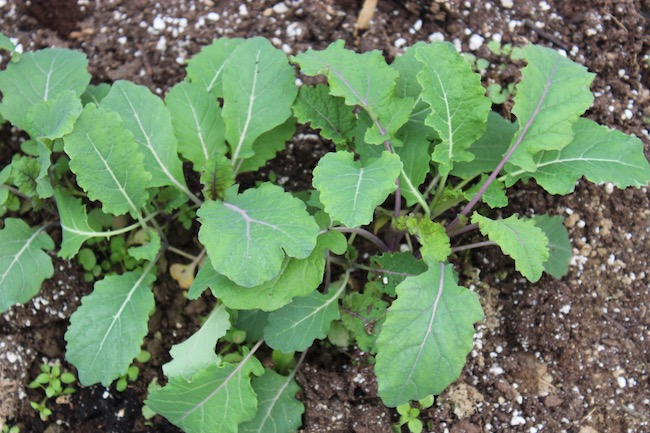
Starting them too early and/or not potting them up.

If you start your plants too early they can outgrow your pots before your ready to plant them out. In this case, you’ll need to pot them up. If you don’t do this they can become root bound which may stunt their growth and weaken them.  

If you’ve struggled with growing your own transplants in the past being careful to avoid these common mistakes can help you have a productive garden this year. 

Pin it for later.

Everything You Need to Know About Plant Hardiness Zones

Photo of the USDA Hardiness Map (https://planthardiness.ars.usda.gov/PHZMWeb/#)

One concept that’s often brought up in gardening literature and rarely fully explained is hardiness zones. While they are a simple concept, to a new gardener it can be helpful to know exactly what a hardiness zone is and how to find theirs.

What’s a Hardiness Zone?

A hardiness zone is a geographic area that has similar climatic conditions that affect plant growth. In the United States, the most commonly used hardiness zones are those 13 zones found on the USDA Hardiness Zone Map. The USDA map is based on the annual minimum winter temperature.

History of Hardiness Zones

Starting in the 1920s people and organizations in the U.S. began making efforts to create a system of hardiness zones. However, it wasn’t until 1960 that the system we use today was created by the National Arboretum in Washington.  Over the years the map has been revised by the American Horticultural Society, the Arbor Day Foundation, and the USDA. Many other countries employ the USDA hardiness zones or a similar system.

The Current Map

The current hardiness zone map was created by the USDA in 2012. The USDA based the map on temperature recordings that were taken between 1976-2005. It’s digital and interactive, allowing users to enter their zip code or click on their location to find out more about their zone. In the future, this map will no doubt need to be updated. In fact, some believe that it already is incorrect due to climate change. Certain zones may have experienced warmer than average winter temperatures in the past few years.

You can find the current map here: https://planthardiness.ars.usda.gov/PHZMWeb/#

How Accurate Are Hardiness Zones?

First, it’s important to note that though winter minimum temperatures are what hardiness zones are based on they are not the only factor that determines a plants survival in a specific area. Some areas within the same zone may experience low winter temperatures for months on end while others within the same zone will only reach anywhere near the minimum temperature for a couple of days.

Snowfall is another big factor. Snow acts as insulation and if plants are consistently covered it can help them survive temperatures they otherwise wouldn’t. Wind is another important consideration. Think about the areas referred to as “above treeline” in certain sections of the Appalachian mountains (particularly the northeast) even though it may be colder farther north where trees are still present, extreme winds play a huge role in limiting growth in the mountains.

What if I Want to Grow Plants Not Suited to My Zone?

While greenhouses and high tunnels are typically used in modern agriculture to extend the growing season of annual plants you can use them to grow perennials as well. Planting in a shelter like this can allow you to plant species that would need a whole hardiness zone warmer than your area.

Some people have also had good luck planting against large rocks or buildings. These features shelter plants from wind and can absorb the sun’s heat during the day and release it slowly as nighttime temperatures fall.

Lastly, some perennials can be grown like annuals or brought indoors during the winter. Keep in mind if you bring a perennial in during the winter that is typically found in warm climates it probably won’t be quite as productive. You may also need to provide supplemental light unless you have large, south-facing windows.

Pin it for later.

Caring for Winter Greens

January in the garden can be a slow month depending on your gardening zone. This time of year, unless your gardening in the far south, greens, garlic, and perennials are probably the only things you’ve got in the garden. While soon it will be time to start planting seeds for spring right now you can focus on keeping any hardy plants you’ve got alive and well.

Fall planted hardy greens can provide a bounty over the winter months. However because of limited daylight and cold temperatures caring for them will be a little different than caring for your garden during the summer.

Water

For the most part, you won’t need to water during the winter months. Even if your plants are under cover where they don’t get any precipitation they’re unlikely to need watering because they aren’t growing quickly.

However, during periods of active growth like the fall and spring you may still need to water them even if the temperatures are relatively cool. As it gets closer to spring be sure to monitor their needs.

Protection

For most areas, if you still have greens growing in January you probably have grown them in a protected environment whether it’s a cold frame or greenhouse. As temperatures continue to reach winter lows you may still need to offer them further protection to keep your garden growing strong.

For cold hardy greens like kale, lettuce, arugula, collards, spinach, and cress a simple layer of frost cloth can keep them growing strong even in an unheated greenhouse when temperatures dip into the low teens and even single digits.

Frost cloth can be placed on hoops or laid directly but gently onto your greens. Remember to remove the cloth as the temperature warms up in the day though! If you have to thin cloth like burlap or an old sheet will also work. Just make sure it’s not so heavy that it will crush your plants.

Harvesting

You can harvest your greens the way you normally would during the spring or summer months. Do note that because of the shorter days and colder temperatures greens will take much longer to come back after harvest but this doesn’t mean they’ve died or something is wrong. Once things warm up and the days get longer in the spring they’ll speed up quickly.

Venting

Don’t forget that sunny days can quickly heat up a cold frame or even greenhouse. Thermometers that come with an outdoor sensor and indoor display can help you monitor the temperature of your garden space without having to go out and check. Venting your structure when it heats up is very important to prevent scorching your plants.

Additional Resources

If you’d like more tips for winter growing, check out some of our other posts below.

Fresh Greens to Harvest from Fall through Winter

Easy Season Extension For Fall

Easy, Affordable Hoop House Options

Fresh Food in Winter

Tips for Growing Awesome Fall Greens

Pin it for later.

Saving the Past for the Future