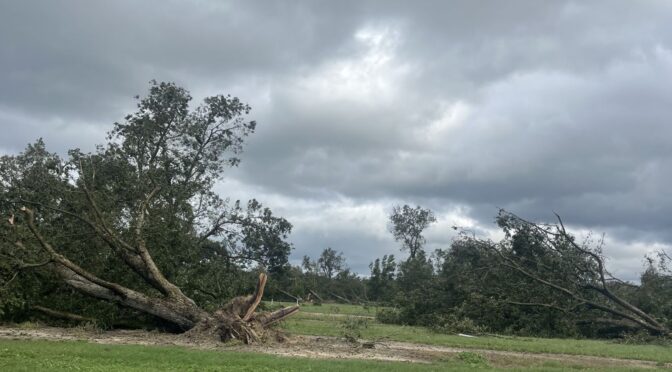
Category Archives: Garden Advice

8 Steps to Save Lettuce Seed

Lettuce is an excellent crop for beginner gardeners, but it’s also great for beginner seed savers! Lettuce is an annual crop that it completes its entire life cycle and produces seed in one season. Lettuce is also self-pollinating, doesn’t require huge isolation distances, and just a few plants in a small garden can produce viable seed. There’s also an incredible myriad of lettuce cultivars to choose from! Here are the eight simple steps to saving lettuce seed.

1. Choose an Open-Pollinated Variety

You can probably find hundreds of lettuce varieties available on seed racks and websites today. You can save lettuce seed from whatever variety takes your fancy, as long as it’s open-pollinated.

Open-pollinated refers to how the seeds are bred. In an open-pollinated system, plants are pollinated by other plants of the same variety, creating seed that will produce “true to type” or display the same characteristics each season. This type of seed makes up most of the seeds we carry at Southern Exposure. 

All heirlooms are open-pollinated, but not all open-pollinated seeds are heirlooms. Heirloom refers to the age of a variety. We consider heirlooms to be those open-pollinated varieties bred before 1940.

2. Plant Your Lettuce

Lettuce germinates well and thrives in the cooler temperatures of spring or fall. Sometimes we plant in spring, and sometimes, we plant in fall and overwinter crops. Lettuce bolts, meaning it goes to flower in the warm temperatures of summer. You can direct sow or transplant your lettuce.  

When planting your lettuce for seed, you should isolate different varieties by a minimum of 12 feet for home use. For pure seed, isolate varieties a minimum of 25 to 50 feet.

Sow seed 1/4″ deep and thin to 10 to 16 inches apart for fresh eating or about two feet apart for seed saving, depending on the variety. You can plant loose-leaf varieties more closely for fresh eating but try to maintain good air circulation around the plants. Soil should be cool and moist during the germination period.

While it isn’t strictly necessary here in Virginia, with rain about every 1-3 weeks in the summer, it’s easiest for us to grow lettuce seed under cover in high tunnels.

3. Tend Your Lettuce

Lettuce grown for seed should be watered and weeded like lettuce grown for fresh eating. You’ll also want to watch your lettuce for signs of pests and disease. Spray off aphids with the hose and treat other pests as needed. At the first signs of disease, remove any infected plants.

When the plants bolt, they get quite tall and sometimes lodge and tip over. Use stakes and twine to keep plants upright and ensure good quality seed.

4. Save an Appropriate Number of Plants

If you’re growing some lettuce for fresh and eating and some for seed, allow enough plants to bolt and form seed. For viable seeds, you only need seeds from one plant. However, to maintain seed over generations, save seed from five to ten plants. If you’re trying to save a rare variety, it’s best to save seed from at least twenty plants if you can.

5. Allow the Seeds to Mature

Lettuce seed develops and matures on each branch over a period of time. We often have to harvest lettuce seed from a crop every week or so for a few weeks as it matures. When the lettuce seed “feathers,” when the parachute-like pappus emerges, it’s time to harvest the seed.

6. Harvest the Seeds

There are several ways to harvest the seeds. You may shake the seed heads into a paper bag. When dealing with just a few plants, you can clip a mature branch, hand-pull the seeds, and place them into a container. 

In the photo above, Ken holds a large baking tray to catch the seeds that Irena massages off the seedheads. It’s sticky work! Lettuce sap contains latex, so we pick up a lot of sticky residue and seeds.

7. Clean and Process Your Lettuce Seed

After harvesting, the seed needs to be dried and cleaned. You can gently rub the seeds between your hands or against a light screen material to detach them from their pappus and any other loose debris.

Depending on the chafe you’ve got in your seeds, you’ll probably need to screen and winnow your seeds. You’ll need a much gentler breeze than you would for larger seeds like beans; lettuce seed is tiny. Take care not to lose it!

The seed should be fully dry when you store it. If you try to bend a seed in half, it should break rather than flex. 

8. Store Your Lettuce Seed

Store your lettuce seed in dry airtight containers somewhere cool and dark. When stored properly, lettuce seed may last for up to six years.

Growing lettuce and saving seed from your crop is a great project for beginner gardeners and seed savers. Following these steps, you can help steward an open-pollinated lettuce variety and have seed for years of gardens to come! 

Biochar 101

Spend enough time reading about sustainable agriculture, and you’ll inevitably run into the word biochar. In recent years it has seen a surge in popularity and is often touted as an amazing, organic garden amendment. But what is biochar, and is it great for the garden? Today, we’ll dig into what biochar is, what it does to soil, how it’s made, and how indigenous farmers have utilized it for thousands of years.

What is Biochar?

Biochar is a type of charcoal made from biomass or plant material that has been burned or decomposed in a controlled, hot, low-oxygen process called pyrolysis. 

In other words, wood chips, leaf litter, twigs, dead plants, or other similar materials are burned in a container that allows very little oxygen to enter. This process produces little to no contaminating fumes.

Biochar is lightweight, highly porous, and has a large surface area. Biochar is approximately 70 percent carbon but contains nitrogen, hydrogen, and oxygen, among other elements depending on the materials. Its exact composition depends on the plant material and temperature and the time it was processed. The University of Tennessee Extension Service has some wonderful charts on Biochar effects and macronutrient contents.

The Benefits of Biochar

You can use biochar as a soil amendment or conditioner in your garden soil or containers. Biochar proponents recommend biochar for its benefits in the garden and the larger environment.

Biochar’s Soil Benefits

  • Biochar may increase cation exchange capacity (CEC), a measure of the soil’s ability to hold positively charged ions. CEC influences soil structure, nutrient availability, soil pH, and soil’s reaction to fertilizer and other amendments. 
  • Biochar may enhance water-holding capacity.
  • Biochar may increase soil surface area. 
  • Biochar may increase plant nutrient availability.
  • Biochar increases soil pH.

Biochar’s Environmental Benefits

  • Biochar sequesters carbon in the soil.
  • Biochar may increase agricultural productivity.
  • Biochar may help improve soil water filtration.

Biochar Origins: The Amazon Basin

Agriculture is one sphere where some of the greatest minds, particularly those of BIPOC folks, have never gotten the credit they deserve. Biochar is likely one of those cases.

When the Portuguese first began to explore and colonize the Amazon Basin, they were surprised to find sections of dark rich soils surrounded by common, less fertile Amazonian soil. They called these soils terra preta de índio or “Indians’ black earth.”

Unsurprisingly, Europeans did not immediately attribute these high-quality soils to the work of indigenous farmers. Instead, many Europeans thought they resulted from natural causes such as ash fall from Andean volcanoes or sediment from long-ago lakes and ponds.

Today, the content of these soils, which commonly includes tiny pottery shards, fishbones, and other residues from cooking and habitat, tells us otherwise. The indigenous peoples that called these lands home undoubtedly improved these soils with biochar and other amendments, probably beginning between 450 BCE and 950 CE. Through carefully crafted management, once-infertile soils had been made suitable for large-scale agriculture. 

Sadly, the descendants of these careful farmers were forced to give up their more agrarian lifestyles, probably in the 16th and 17th centuries, as they faced the effects of colonization. The peoples of this region were hard hit by introduced European diseases and violence, including Bandeirante slave-raiding.

To escape colonization, many likely took up a more nomadic lifestyle. Slash-and-char style agriculture may have been an adaptation of older farming techniques to cope with their migratory lifestyle. 

Each year, the soils in the Amazon basin are exposed to warm tropical temperatures and about 80 inches of rainfall. The fact that these incredible soils still exist today, after about 500 years, is a testament to the power and knowledge of indigenous farmers. 

A hand holding a piece of biochar in front of a barrel full of it
Homemade biochar

Making Biochar

Today, you can purchase biochar, but with a little time and effort, you can also make your own.

One of the simplest methods for making biochar is to do it right in the garden. Dig a trench in your garden bed and fill it with brush and plant material. Light this material on fire, and once it’s burning well, cover it with an inch or so of soil to reduce the available oxygen. This method is easy but also the least efficient way.

A slightly more efficient method is to place your material in some sort of closed container in a fire. You can do this with an old metal barrel, pot, or pan. Place your material in your container, then build a fire beneath and around the container to heat it.

Pyrolysis equipment is the most efficient route and is available for those who would like to produce large-scale or commercial biochar. Biochar.co.uk has some great information and resources for any level of biochar production you may be interested in. 

If you run a wood stove in winter, Edible Acres, a permaculture-focused Youtube Channel, also has an excellent video on experimenting with making biochar in a wood stove. 

Please check your local laws and regulations before doing any burning. Stay safe, always watch your fires, and always have a good water source immediately at hand.

Biochar can be a great way to improve your soils without paying for expensive truckloads of topsoil, fertilizer, or other amendments. Its properties and benefits may vary with each batch of biochar and the garden you use it in. Let us know in the comments if you’ve had success with biochar!

Farmers Saving Water: Pulse Irrigation

As much of the world faces hotter summer temperatures and less rainfall, farmers and gardeners are trying to adapt their practices to a changing world. Recently, I listened to an episode of the No-Till Flowers Podcast where podcaster and grower Jennie Love interviewed Emma Horswill of Earthenry Farm, and they covered a technique called pulse watering or pulse irrigation. Love discussed making the switch to this method on her own farm. Though she didn’t believe it would work initially, she started to see positive results quickly after making the switch. While using less water, the soil stayed more moist, and her flowers looked healthier. I was immediately intrigued.

What is Pulse Irrigation?

In traditional irrigation setups, crops are watered infrequently for about one to three hours at a time. The thought is that this allows plenty of time for water to seep deep into the soil. The plants receive a good amount of water during this period encouraging them to send their roots deeper to access the water. In theory, this makes for healthier plants.

In a pulse irrigation setup, the irrigation comes on briefly for about 5 to 15 minutes, 5 to 12 times per day, providing the plants with just enough water as is necessary as they need it. 

The University of Kentucky has done some work studying this method. Richard Warner of the UK’s Biosystems and Agricultural Engineering Department found that when measuring watering on standard plots, even just 30 minutes of irrigation led to “…a significant amount of water and applied fertilizers that the plant did not use.” Alternatively, pulse irrigation should provide just enough water and fertilizers for the plant to take up at one time and can help eliminate this waste.

Just a small reduction in water usage can greatly impact growers. Timothy Coolong, a UK extension vegetable specialist, noted, “A 20 percent reduction in water usage could be substantial for vegetable farmers in Kentucky, as one acre of staked tomatoes on black plastic can use nearly 500,000 gallons of water a season.” In other words, that 20% reduction would lead to about 100,000 gallons of water saved on just a single acre, a tremendous benefit for farmers and the environment. 

A sand flower garden with sunflowers and pulse drip irrigation
This photo (not at SESE) shows a portion of a sand garden using the drip feed pulse system to operate a drip-line to water the entire garden. The total output is 1 gallon per hour going to 82 drip points (1/82 gallon per hour to each drip point).

Advantages

Reducing the cost of watering aside, it seems there may be several advantages to a pulse irrigation system. Here are a few of the possible benefits of pulse irrigation:

  • Reduced fertilizer use and expense.
  • Less fertilizer seeping into groundwater or running off in local waterways.
  • Less nutrient leaching, especially in sandy soils.
  • Less runoff, particularly in heavy clay soils.

Disadvantages

While it may sound great, there are, of course, a few disadvantages to these systems:

  • Growers must purchase a system or may need to modify an existing irrigation system.
  • Pulse systems usually require good water pressure.
  • Light watering may lead to salt buildup over time, so heavy watering may occasionally be necessary.

Pulse irrigation may not be perfect for every small farm or garden, but it is certainly interesting to see how growers can adapt their practices to cope with climate change. If you’re not ready for pulse irrigation but still want to build your garden’s resiliency, we encourage you to save seed and practice water-wise gardening techniques. When possible, water in the early morning or evening and mulch around plants.