Category Archives: Recipes

The Power of Fermented Foods: Making Sauerkraut

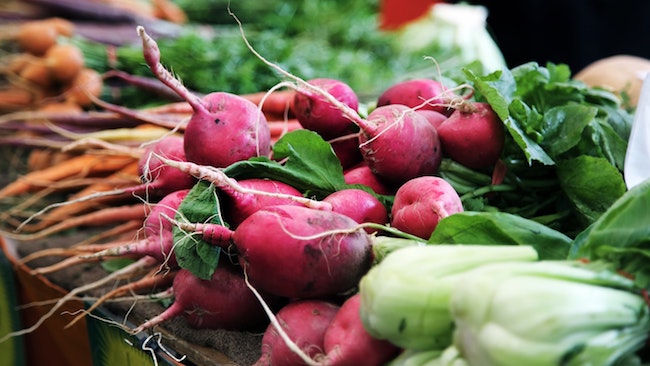
You may have heard  people talk about how good yogurt is for you because it contains probiotics. However there’s actually a variety of foods that are naturally fermented and contain these helpful organisms. When made at home, products like kimchi, certain pickles, kombucha, and even natural sodas are all chock full of probiotics. One of the easiest foods to ferment yourself is Sauerkraut.

Benefits of Sauerkraut

  • It’s great for gut health.
    The probiotics in sauerkraut helps keep your digestive system healthy.
  • Kraut is highly nutritious.
    The fermentation process makes the vitamins and minerals in cabbage more accessible to your body.
  • It’s good for your immune system.
    Many studies show having a healthy digestive system is important to having a healthy immune system.
  • It’s a  great way to preserve and use extra cabbage.
    It can last for months in the fridge or cold storage.
  • It may help improve your mood.
    Some recent studies have led scientists to believe that there’s a connection between gut flora and a person’s mood. Eating fermented foods like sauerkraut may help you feel better physically and emotionally.
  • It’s simple to make.
    Sauerkraut requires just 3 basic ingredients and there’s no fancy equipment needed!

Want to make your sauerkraut? Here’s what you’ll need to get started:

  • Cabbage
  • Kosher, pickling, or sea salt (non-iodized)
  • Knife and cutting board
  • Mixing bowl
  • Clean jar or jars with lids

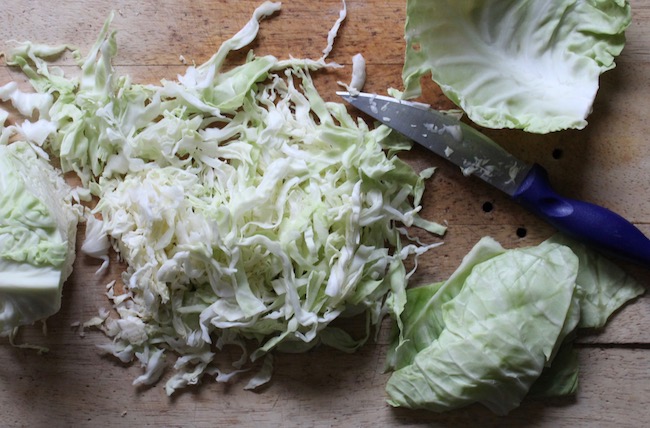
To begin rinse your cabbage and then set a few nice, whole cabbage leaves to the side (you’ll need one per jar). Then finely slice your cabbage. If you’re doing a lot of kraut you may want to use a mandolin vegetable slicer however I usually just use a knife.

If you were to read more on the most popular recipes on the internet, you’d know that a lot of recipes call for a specific amount of cabbage but you can use as much as you’d like to make and adjust your salt to the amount of cabbage you’re using. You should use approximately 1 1/2 tsp of salt for every quart of kraut you’re making.

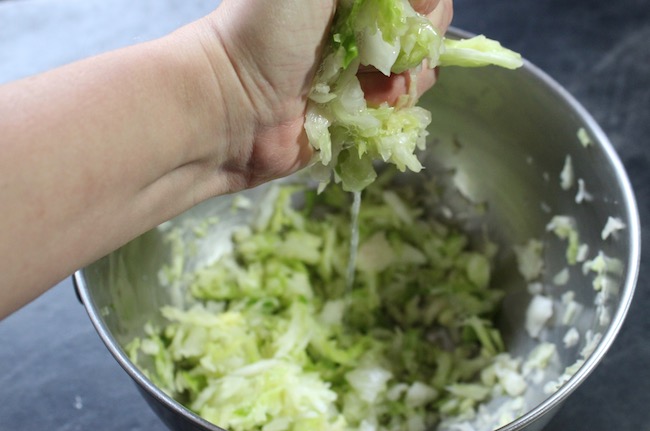
Once you’ve sliced your cabbage, place it in a mixing bowl. Slowly add the salt while squishing the salt and cabbage together with your hands. The cabbage will begin to look slippery and shiny. Eventually there should be a good bit of juice (called brine) in the bowl. You should be able to see it run out of a handful of cabbage when you squeeze it. If you taste your cabbage, it should be pretty salty but not disgustingly so.

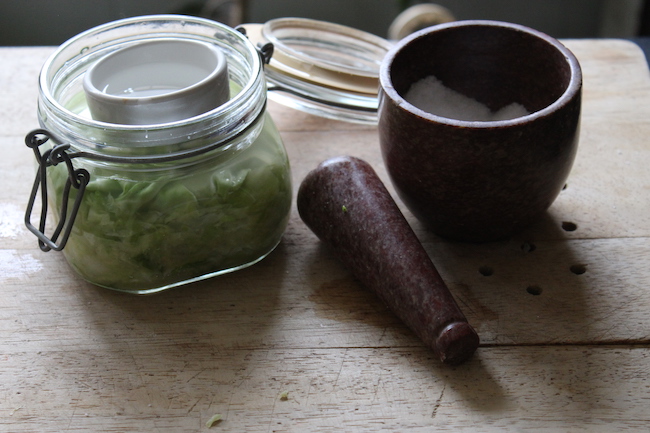
Then you can pack your cabbage into a clean jar. Start with a spoonful or handful at a time carefully packing each one into the jar to avoid any air pockets. You can use a clean spoon, your hand, a tamper, or a pestle. Leave at least an  1 1/2 inches of head space in your jar.

Use the cabbage leaf you set aside at the begin to cover the top of your kraut. You want all of your cabbage to be fully submerged. You can way your kraut down with a sterilized stone like I did for these pickles or if you have enough room you can use a little dish of water. You can also use a ziplock bag of water or a crock weight if you have one.

Place your jar or jars of kraut out of direct sunlight but somewhere you will remember to keep an eye on them. You kraut will need to ferment between 4-14 days. It will ferment faster in warmer temperatures. You should open your jar at least once per day to let out any gases that have built up. You don’t want your jar to explode. You may also need to pack the cabbage down if you notice any above the brine or any air pockets. If you notice a film on top of the brine you can just scrape it off. It won’t hurt you.

You’ll know your kraut is finished when it is more yellow than green and translucent. It’s flavor will get more intense the longer it ferments so how long you leave it is up to you. Once it’s finished you can store it in the fridge or a cool root cellar to stop fermentation.

Pin it for later.

15 Clever Ways to Reduce Food Waste & Get More From Your Garden

Don’t toss that! The USDA estimates that a staggering 30-40% of food in the United States is wasted. While you’re probably already more sensitive about using the produce out of your own garden we went ahead an compiled a list of ways you can reduce your food waste and make the most of your harvest.

Save Scraps to Make Broth

Many vegetable scraps can be turned into delicious vegetable broth. Save scraps like carrot ends and peelings, celery ends and leaves, onions ends and skins, broccoli leaves and stalks, potato peels, and more. If your not going to use them right away they can be collected in a container in the freezer.

Eat your Jack O’ Lantern

Sadly most jack o’ lanterns end up in the landfill which is an enormous waste of nutritious food. This year try to use your jack o’ lantern before it goes bad. The seeds can be baked for a delicious snack, the “guts” can be added to broth, and the shell can be baked and turned into delicious recipes like pumpkin pie, pumpkin waffles, or even pumpkin cinnamon rolls.

DIY Pumpkin Puree & Pumpkin Spice Waffles

Leave the Skin on Cucumbers, Apples, and Potatoes

The skin on cucumbers, apples, and potatoes is actually quite good for you. They’re full of vitamins and nutrients and tasty too. Try using these without peeling them first.

Make Corn Cob Jelly

Tennessee Red Cob Dent Corn

It may sound odd but corn cob jelly is actually really good and certainly makes good use of an otherwise waste product.

Eat Your Beet Greens

Beet greens are just as tasty as other greens and they come free with a beet! Don’t let them go to waste.

Pickle Your Rinds

Squash, pumpkin, and melon rinds can all be pickled. Just like corn cob jelly, pickled rind recipes used to be very common but fell out of use in modern cooking. They may sound a little odd at first but they’re actually pretty good.

Save Your Tomato Skins When Canning

Next time your canning tomatoes or making sauce set the tomato skins aside instead of in the compost. These can be dehydrated and powdered to be used in soups and stews. This tomato powder is wonderful for adding flavor and thickening.

Eat Your Broccoli Stems

The stems are just as good as the florets! They also contains slightly more calcium, iron, and vitamin C than the florets. If you really dislike them you can use them for stock or try searching for broccoli stem recipes.

Make Fabric Dye

From cabbage scraps to black bean water there’s many ways to dye fabric with just food waste!

Planning a Dye Garden: 15 Plants to Grow

Make Fruit Vinegar

Making your own vinegar is actually really easy and can be done with all fruit scraps like peels and cores after a canning or juice making day.

Use Soft Fruit in Smoothies or Baking

Fruit that’s soft but isn’t truly bad can still be delicious in smoothies or baked goods.

Toss Soft Veggies in Soups

Don’t throw out vegetables that aren’t truly bad. Use up produce like soft carrots and potatoes, limp celery, and wilted greens in homemade soups like this Vegetarian Tortilla Soup.

Dehydrate or Can Your Food Rather than Freeze It

While freezing garden produce is an easy way to preserve your harvest for winter it does come with one major downfall, the freezer requires constant electricity. If you live in an area that experiences a lot of storms and power outages it may be worth putting up your harvest in other ways. Canning and dehydrating food is a great way to ensure it stays good.

Feed Produce to Animals

If you truly can’t eat something consider animals. Backyard chickens eat a lot of scraps as do pigs. If you don’t have any yourself talk to your local animal rescue or farmer. They might be interested in produce scraps or even that old jack o’ lantern!

Compost

Produce scraps should never go to the landfill. Composting creates wonderful soil for your garden and keeps produce out of the landfill which releases methane.

Reducing food waste is so important. It helps the environment and your wallet. Let us know if you try any of these tips and how it works out.

Pin it for later.

Pumpkin Spice Cinnamon Rolls

Even though the temperature isn’t really saying “fall is here” in our area the garden certainly is. We’ve been harvesting pumpkins, winter squash, and popcorn and sowing fall successions of beets, lettuce, and cabbage. With this and my love of all things autumn in mind I decided it’s time to bring out the fall recipes.

These cinnamon buns are a delicious way to start enjoying the autumn harvest without breaking out the pumpkin pie. They’re delicious and fairly easy to make.

Ingredients

Dough

  • 2 1/2-3 C all purpose flour
  • 2 TBS sugar
  • 1 tsp salt
  • 1 tsp cinnamon
  • 1/2 tsp ginger
  • 1/4 tsp allspice
  • 1/4 tsp nutmeg
  • 2 1/2 tsp yeast
  • 1/2 C water
  • 1/4 C milk
  • 3 TBS vegetable oil or butter
  • 1 TBS molasses
  • 1/4 C pumpkin puree

Filling

  • 3 TBS butter
  • 1 C pumpkin puree
  • 4-5 tsp cinnamon
  • 2 tsp ginger
  • 1 tsp nutmeg
  • 1 tsp allspice
  • 1/4-1/2 C brown sugar

Icing

  • 1 C powdered sugar
  • 1 tsp vanilla
  • 2-3 TBS milk

Never made your own pumpkin puree? Check out this post.

Directions

Raised rolls ready for the oven.

Preparing the dough.

To begin combine the milk, oil or butter, molasses, puree into a microwaveable bowl or small saucepan. Heat these ingredients until they’re quite warm but not hot.

In a separate bowl combine the sugar, spices, salt, and yeast. Once the liquid ingredients are warm pour them into the bowl as well. Stir until well mixed and then begin adding the flour a little bit at a time. As the dough gets hard to mix you can turn it out onto a well floured surface and knead it with your hands.

You’ll know you’ve added enough flour when the dough forms a nice ball and is tacky but not sticky. Now allow the dough to rest for about 5 minutes.

Next roll the dough into a rectangle. I generally roll the dough between 1/4-1/2 inch thick though you can change this to suit your preference.

Dough with butter, pumpkin, puree, and spices. Still needs sugar.

Filling

Now you can spread the filling. First soften or melt the butter and mix it with the pumpkin puree and spread this in a thin layer on the dough. Then sprinkle the spices (alternatively you can use a pre-made pumpkin spice mix) evenly over the dough. Do the same with the brown sugar. I rarely measure the spices or sugar and just go by eye.

Roll the dough into a long tube and slice it into 8-12 pieces and place them into a greased, 9×13 inch baking pan. Place the pan somewhere warm and let them raise for 2-3 hours until they have doubled in size.

Bake at 350°F for about 25 minutes until they’re golden brown.

Icing

To make icing combine the powdered sugar and vanilla and stir in the milk a tablespoon at a time until it reaches your desired thickness. Icing should be added after the cinnamon rolls cool.