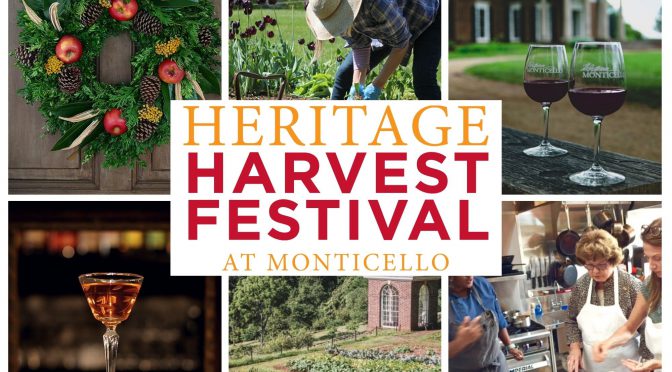
Colonial Gardens

Thomas Jefferson’s Monticello Gardens

Modern English or cottage gardens tend to favor the natural look. Somewhat untidy selections of flowers and vegetables, clustered together, following naturally curved lines are prominent features. However, English gardens of the past were quite the opposite. They favored neat and tidy, fenced rows of vegetables and flowers in rectangular or geometrically arranged plots. American colonists brought this affinity for order with them and this style of gardening persisted well into the 1800s.

In these gardens, colonists cultivated a mix of flowers and vegetables from the new world and old world favorites they brought with them. They used plants for food, medicine, brewing, and beauty.  Staple crops that required larger fields like maize, beans, pumpkins, wheat, and barley were typically grown separately. Sometimes people also had a small “kitchen” garden located near there door with frequently used plants. 

An introduction to growing diverse pest-free fruit trees like Quince, Persimmon, Paw Paw, Medlar, & Sea Buckthorn. For more information on proper tree care get in touch with the Tree Service Pros who can advise on the best solutions for both tree removal and maintenance.

Old World

Colonists brought with them seeds, bulbs, and roots of their favorite plants to start new gardens. Here are a few of the “old world” plants that you may have seen in a colonial garden.

  • Yarrow 
  • Daylily
  • Tulips
  • Cabbage
  • Leeks
  • Onions
  • Carrots
  • Peas
  • Turnips
  • Radishes
  • Lavender
  • Rosemary
  • Thyme
  • Parsley

New World

Colonists were also fairly quick to adopt plants from the New World, learning to cultivate corn, beans, and squash varieties that had been developed by Native Americans. They also quickly brought wildflowers like black-eyed Susans and asters into their gardens. They also adopted plants like tomatoes, potatoes, sweet potatoes, and peppers. Interestingly these South American plants passed from Native Americans to Spanish and Portuguese explorers who brought them to Europe and then to colonists who brought them to North America. Here are a few plants native to the Americas that you may have seen in a colonial garden.

  • Black-eyed Susans
  • Goldenrod
  • Asters
  • Echinacea
  • Maize
  • Beans
  • Squash
  • Pumpkins
  • Tomatoes
  • Potatoes
  • Peppers
  • Sweet Potatoes

Heritage Harvest Festival

If you want to know more about historical American gardens join Southern Exposure at this year’s Heritage Harvest Festival. This event, located at Thomas Jefferson’s Monticello celebrates his agricultural legacy as well as the contributions to American cuisine by enslaved workers. Come explore Jefferson’s 1,000 foot long vegetable garden and ornamental mountaintop landscape. Learn about organic gardening, seed-saving, southern recipes, and American history. We can’t wait to see you there!

Resources

Organic Pest Control: Japanese Beetles

A species of scarab beetle, these iridescent insects can be a nightmare for gardeners. Japanese beetles or Popillia japonica skeletonize the leaves of many plant species leaving just the veins. As the females eat throughout the early summer they lay eggs in the ground, eventually producing 40-60. Around midsummer, these eggs hatch into larvae which feed on grass roots until fall when they burrow 4-8 inches into the ground and go dormant for winter. In late spring they become pupae and eventually beetles which emerge from the soil and begin the cycle anew.

Solutions

If you struggled with Japanese beetles in your garden this summer, fall is the perfect time of year to take care of them. Here are a few ways you can control Japanese beetles in your garden.

Beneficial Nematodes

Beneficial nematodes or Steinernema feltiae are worm-like parasites that move through the soil and feed on Japanese beetle and other larvae. When beetles are in their larvae stage spreading nematodes on your lawn or around your fruit trees and garden can be effective.

Milky Spore 

Milky spore or Bacillus popilliae is a bacteria that attacks Japanese beetles in their larval stage. It can be spread on lawns and gardens. Apply before the ground freezes.

Chickens

If you have chickens giving them free rein of the garden or around fruit trees during fall and winter can help. Chickens actively forage for insects in the soil. While their incessant scratching can be a problem around your plants in the middle of summer it can be extremely helpful in the fall. They’ll dig up and eat the larvae. During the summer they’ll also enjoy eating the beetles but you’ll want to limit their time in the garden and fence off small plants that can be easily damaged.

If free-ranging your chickens even for a bit isn’t an option for you, consider putting up moveable fencing. A plastic deer netting will work in a pinch or you can invest in something electric netting which is easy to move, allowing you to rotate your chickens’ pasture.

Welcome-to-the-Garden Pollinator Collection

Wildflowers

Some studies (like this one from 2015), have indicated that wildflower plantings can increase insect biodiversity and the number of beneficial insects in gardens and reduce pest issues.

Floating Row Cover

While not necessarily the easiest solution, adult Japanese beetles can also be kept at bay with floating row cover.

Neem Oil

Some folks have also had success using neem oil to protect plants from adult beetles. It’s an organic pesticide and fungicide that’s used for a variety of garden problems and is available in many garden supply stores. It’s generally sprayed directly onto the plant. Multiple applications may be necessary throughout the season.

Crop Rotation & Cover Cropping

As always we recommend keeping your soil and therefore plants healthy by employing crop rotation and cover crops. Healthy plants are much less susceptible to pest problems. Fall is the perfect time of year for a soil test as well.

Sources

Let’s Talk About Swales

Let’s talk about swales. These landscape features have become a quintessential part of permaculture. They’re touted for their productive ability; saving water and reducing erosion while providing a bounty. But do you really need a swale? 

Swales are basically ditches with mounded beds in front of them. They do work extremely well to prevent erosion and are the perfect way to turn hillsides into productive agricultural land. They’re also excellent for preventing water loss. Any rainwater will get caught in the ditch and be slowly absorbed over a long period rather than flowing downhill. This is a key feature for areas without frequent rainfall. 

However, if your property is mostly flat or you don’t see much runoff from your hillside you may not need a swale. Many people create swales only to be disappointed that they never see water in them. A simple hugelkultur mound can be a great alternative if you determine you don’t need a swale.

Contour Swales

While small swales can simply be placed perpendicular to the general slope of a hillside larger, longer swales should be constructed on contour. This simply means that the swale follows the hillside at a single elevation. This keeps it level, preventing water from flowing to one end or part of the swale. 

While some large projects are done with laser levels you can find a contour with a simple homemade A-frame level. This video is a great DIY tutorial on how to make one for cheap or free. 

Once you have a level you can use stakes to mark out your contour. 

Building a Swale

To begin building your swale start with the mound. It sounds backward but to start you should create a mound of organic material like sticks, leaves, compost, and even logs if your swale is going to be large. The mound is basically going to be a hugelkultur mound. Then you can dig the ditch behind it, using the soil that comes out of it to cover the mound. The ditch should be roughly 3 times as wide as it is deep.

Small swales can be dug by hand with shovels and mattocks but larger swales are frequently created using large machinery. Before getting into creating larger swales it’s important to consider how beneficial they’ll be to your property. Starting with a hand-dug swale can be a good test run!

Planting a Swale

What you plant in your swale will largely depend on its size. Large swales are frequently printed with larger perennials like fruit trees. Fruit tree guilds are perfect for planting on swales! In any case, deep-rooted perennials are ideal plants for swales because they help to hold the mound in place. They also use water throughout the year preventing the mound from becoming overly saturated. However, annuals can also be planted in combination with perennials. Here are a few good options for swales:

  • Fruit trees: apple, peach, cherry, etc.
  • Comfrey
  • Strawberries
  • Rhubarb
  • Asparagus
  • Grapes
  • Perennial flowers: bee balm, coneflower, etc.
  • Chives
  • Berry bushes

Creating a swale is hard work. However, if you have erosion problems on your property a swale may be worth the investment. Follow this advice to create a productive swale of your own.

Saving the Past for the Future