Tag Archives: harvest

How to Store Crops Without a Root Cellar

Tan Cheese Pumpkin

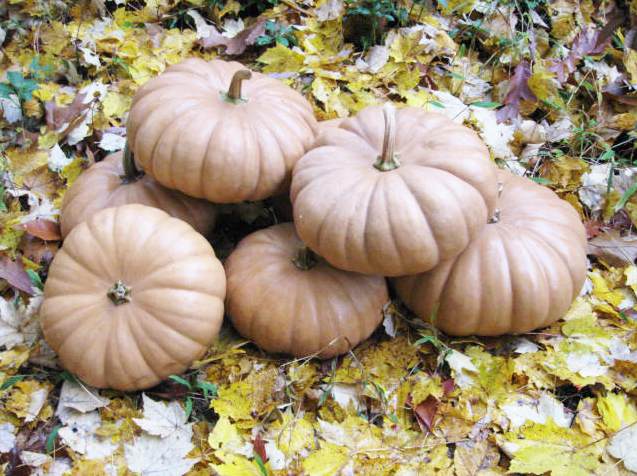
For many crops the preferred storage method negates the need for a root cellar. Anything that is canned, dried, or frozen can be kept right in your kitchen without any change from store bought groceries. However there are some crops that are stored fresh but require specific conditions. Things like winter squash, beets, and cabbages would have traditionally been kept in a root cellar. Unfortunately most modern houses don’t include that feature. Unless you’re ready to invest in building one, a little creativity can help keep your winter produce without a lot of effort.

Make a root clamp.

Root clamps are an old way of storing vegetables underground without an actual root cellar. They’re simple holes in the ground to store cabbages, potatoes, and other root vegetables. The vegetables can be layered with straw or hay, keeping a thick layer between them and the dirt to keep out any frost. On top is an especially thick layer followed by a couple whole bails to cover the top. You also want the straw or hay to be between each individual vegetable.

Today some people add an old cooler or clean trash can as a liner for the root clamp. Coolers however are not deep enough to avoid frost in cold climates.

Keep it in the garden.

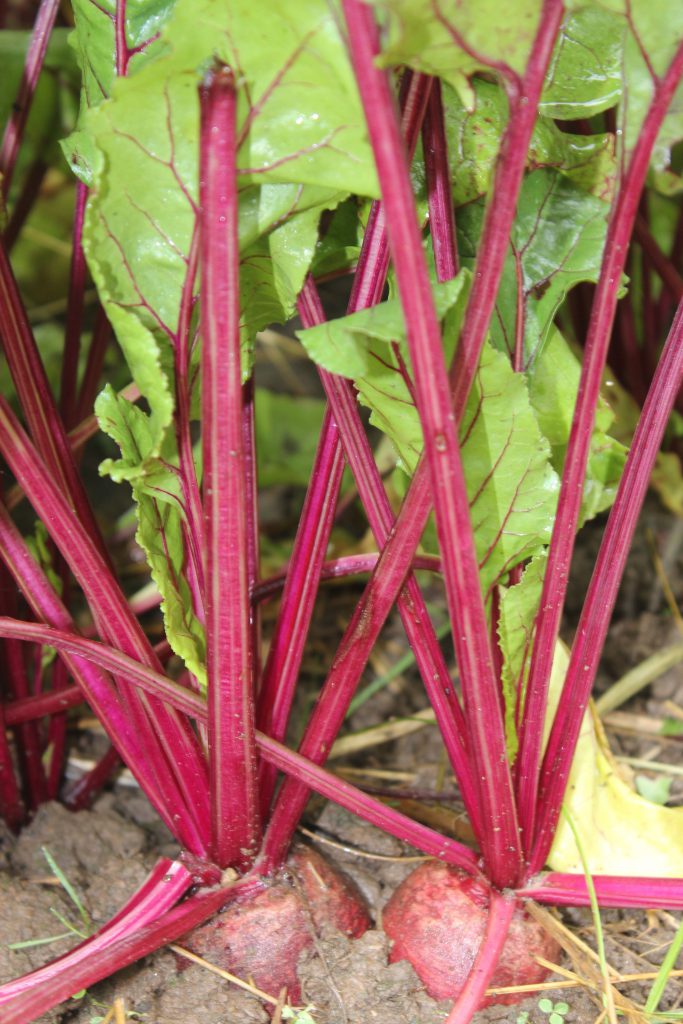
In places where the ground doesn’t freeze very early storing root crops right in the garden can be an excellent choice. For crops like beets, carrots, turnips, potatoes, and radishes just leave them in their bed and cover them with a good amount of hay or straw. They can then be dug as needed.

You can also grow greens and brassicas through the winter by using cold frames, row cover, or backyard hoop or green houses.

Utilize cool places in your home.

Whether it’s a garage, a basement, under a bed, a certain cabinet, or a closet many of us have a spot in our home which stays rather cool. Crops like sweet potatoes, onions, and squashes that prefer cool, dry storage can just be stuck in baskets in these places. They will last longer if they aren’t piled up too much and have good air circulation.

Fruit crops like storage apples and pears can also be stored in this manner. However many people advise wrapping each individual fruit in newspaper to help them keep longer and discourage any rot from spreading.

Crops like potatoes, carrots, beets, and other roots that need damper conditions can also be stored in these same places. For these crops you’ll need containers and a packing material like shredded newspaper, straw, or sand. This material should then be kept damp (not wet!). You can use a spray bottle to add moisture as needed. You should trim the tops off the vegetables leaving about 1/2 inch then layer them in your container with your material in between so that none are touching.

Cabbages can be stored with their roots in damp sand or in just a basket like squash. They do better in damper places than squash does though.

Refrigerate root crops.

Root crops can also be refrigerated. For those with leafy tops trim the leaves to 1/2 inch. Potatoes also store well in the refrigerator.

Use them as decor.

Some squash, onions, and soft neck garlic store fairly well at room temperature and can double as some farmhouse type decor. Squash looks great on fall table settings and onions and garlic look gorgeous braided and hung in the kitchen or pantry.

Maintaining your storage crops.

It’s important to note that none of these methods are leave it and forget solutions. Even with a proper root cellar it’s important to periodically go through your produce and check for ones that are starting to rot or mold. If you don’t remove them the rot will spread to the rest hence the saying, “one bad apple can spoil the bunch.” Ideally you can catch them while they’re still useable.

You should also pay attention to your different varieties. From radishes to pumpkins different varieties have different storage capabilities. using varieties in order of how long you can expect them to keep is just another part of gardening and seasonal eating.


While these methods may not be as idyllic as a farmhouse root cellar they can work just as well. Keeping food properly in storage can help you save money on groceries, give you more self-sufficiency, and lessen your environmental impact. So pack your carrots in a container in the closet or store baskets of sweet potatoes under your bed, and stock that winter larder!

Garlic and Perennial (Multiplier) Onions: Harvest and Curing

Lisa Dermer & Ira Wallace

Harvesting and curing garlic and perennial onion bulbs is a balancing act: the crop shouldn’t be harvested too early or too late; the curing (drying) process should not be too fast or too slow. Luckily, with a little know-how it’s easy to hit the sweet spot and maximize your harvest of high-quality bulbs with excellent storage quality.

Preparing for the Harvest

As a guideline, know the estimated harvest time for the varieties you’re growing (this can vary quite a bit by type), but be ready to start checking your bulbs earlier. Warm, sunny weather will bring on maturity sooner, and waiting too long may damage the bulbs. On our Central Virginia farm, the beginning of the harvest has varied by up to 3 weeks (late May to mid-June).

A few weeks before your estimated harvest date, pull off the mulch around the bulbs and irrigate less, or stop watering altogether. This will prevent rotting and toughen the skins for storage.

The Garlic Harvest

Keep an eye on your garlic plants: as soon as one third of the leaves turn yellow or brown the bulbs are probably ready to harvest. If you’re unsure, use this simple test to check: dig up a sample bulb and cut it in half: if the cloves have separated, your garlic is ready. If the bulb is still one undifferentiated mass, you should wait a few more days.

There should be at least 4–6 green leaves remaining at harvest. Do not wait for the tops to turn entirely brown and dry before harvesting your garlic! By then the outer scales will have decayed — the ones that hold all the cloves together in one smooth-skinned bulb. If you wait too long and these leaves die, you’ll have ugly bulbs that are hard to clean and keep poorly in storage. (If your harvest is delayed and all the leaves have turned brown on some of your garlic, use those bulbs first because they won’t last as long in storage.)

If the soil is very dry, lightly irrigate the night before your harvest. Carefully loosen the soil next to and under the bulbs using a digging fork. Don’t just pull garlic out of the ground. Be careful not to bruise or cut the bulbs — give them a wide berth by keeping your digging fork 10-12 inches away from the plants, and inserting straight down before lifting.

Gently remove excess soil from the bulbs using your fingers or a soft brush (don’t bang the bulbs against each other!). The tender freshly-dug bulbs need to be handled carefully to avoid damage. Keep the bulbs out of the sun and rain until you can bring them indoors. Don’t wash them. Curing (see below) is the next step in handling your harvest.

The Perennial (Multiplier) Onion Harvest

Shallots are the best known type of perennial onions, also called multiplier or potato onions. Perennial onions are grown from a bulb rather than seeds or sets: they’re planted in the fall and harvested in late spring, just like garlic.

Prior to harvest, the neck region of multiplier onions weakens and the green tops begin to fall down. When you see the first sign of this, pull off any mulch from around the plants and stop watering: this lets the skins toughen for storage.

When approximately 50% of the tops have fallen, the crop has sufficiently ripened and is ready for harvesting. There is no advantage to breaking over the tops of onions still standing (in fact this may shorten the storage life of certain varieties). Not all the tops fall over at the same time. You can harvest the mature onions every few days. Harvest those with tops still standing after 7–10 days: keep these separate from the rest and eat them first because they will not keep as well.

To harvest multipliers, pull the clusters or gently dig them out. Try to do this during dry weather. Don’t leave the bulbs exposed to hot sun or rain and don’t wash them. Lay the tops over the freshly harvested bulbs until you can bring them under shelter. See below for the next step: curing.

Curing (Drying) Garlic and Perennial Onions

Curing is a fancy word for properly drying your bulbs. A good cure improves the flavor, storage quality, and hardiness of both garlic and perennial onion bulbs. The goal is to dry the outer wrapper layers completely while keeping the bulbs or cloves plump and deliciously aromatic. It takes anywhere from 3 weeks to 2 months to properly cure bulbs.

Many factors influence the rate of curing, including humidity, temperature, air circulation, the size of the bulbs, and the number of green leaves at harvest. High humidity can slow drying, so give your bulbs plenty of space, good ventilation, and complete protection from rain. Drying too quickly can cause shriveled bulbs that don’t store well, so dry bulbs out of direct sunlight and away from extreme heat.

We cure our bulbs on the upper level of our pole barn. We use fans to make sure the area is adequately ventilated and to keep the humidity low. You can make your own low-cost exhaust fan by fitting a box fan tightly in a window frame (fill any gaps around the fan for a tight fit).

We hang our garlic to cure: for soft neck garlic you can make braids, though this can be time-consuming. Otherwise use a slip knot that will tighten with the necks as they dry and shrink. To do this, just fold a string in half, then pull the two free ends through the loop, and cinch this around several necks. Then tie the bunch to the main string (or wire, rafter, rack, etc).

We cure our perennial onions on shelves made with hardware cloth. You could also hang a stretched sheet or other breathable material or mesh. The onion necks may break as they dry, so hanging them can lead to bulbs falling and getting bruised.

Every few days check for and remove any spoiled bulbs, being careful to handle the bulbs gently and as little as possible. The high water content right after harvest lets bulbs bruise easily, making them susceptible to rot. Once curing is complete, the bulbs are much less easily damaged.

Once curing is complete, separate the individual perennial onion bulbs from the clusters. For both garlic and onion bulbs, cut the dried tops 1 inch above the base and trim the roots to ¼ inch. Your bulbs are now ready for eating, storage, or planting.