Tag Archives: sweet potatoes

8 Tips for Success With Sweet Potatoes

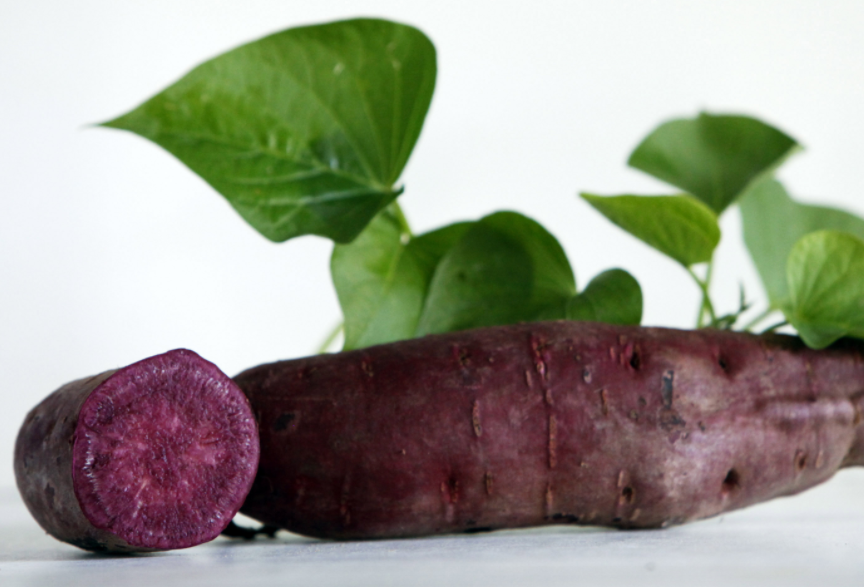
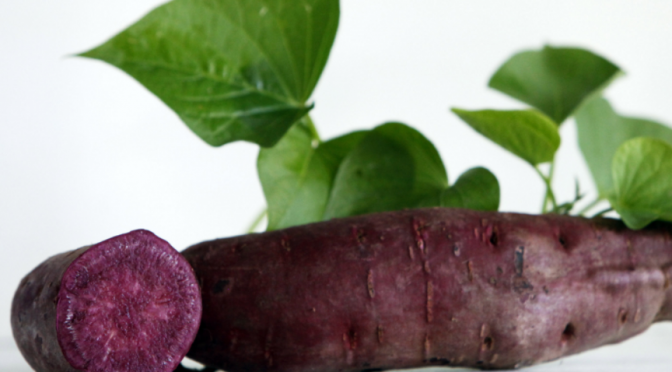
In the Southeast, growing sweet potatoes is an excellent option for filling more of your pantry with homegrown food. While most people grow sweet potatoes for the tubers, you can also eat the leaves as a green! Plus, once established, they’re a low-maintenance crop. Sweet potatoes aren’t difficult to grow, but a few tips we’ll cover below can make your plants much more productive. 

Loosen the soil.

Sweet potatoes thrive in loose, well-drained soil. Especially if you have hard, packed clay soil or drainage issues, improving a bed before planting your slips is essential. It’s a good idea to add a lot of compost and other organic matter. I also like to loosen and lift the soil with a broad fork. 

You can also plant sweet potatoes in raised beds. Raised hills or planting ridges about 8 inches deep also works for areas with poor drainage.

For more information on planting, visit our Sweet Potato Growing Guide or previous blog post, Sweet Potatoes From Order to Plate.

Check your soil temperature and be patient.

Sweet potatoes need warmth to thrive. Waiting until air and soil temperatures are appropriate is key to good production. Plant your sweet potatoes when nighttime temperatures remain over 50°F, and soil temperatures are at least 60°F.

You can lay black plastic over the soil in the spring to help warm it and kill weeds. In a northern area, sweet potatoes can also be grown in greenhouses or low tunnels. These allow the soil to heat up faster and provide consistent warm temperatures for your potatoes.

Water sweet potatoes consistently and often.

Sweet potatoes need consistent soil moisture, especially as they’re getting established. When you plant your slips, water them well and keep the soil moist for at least the first week.

Regular watering throughout the season can improve the size and quality of your harvest. We recommend that plants receive about one inch of water per week throughout the season. Large swings in soil moisture (from very dry to very wet) can lead to splitting and cracking in the potatoes. Cut back on watering three to four weeks before harvest.Growing Sweet Potatoes (sweet potato vines)

Keep up with weeding.

Especially when sweet potatoes are getting established, it’s essential to keep them weed-free so that they’re not competing for space, moisture, and light. Be careful cultivating to avoid damaging shallow roots. 

Thankfully, after about six weeks, your sweet potatoes will take care of the weeds for you. Their vigorous vines will cover the bed and shade out almost all weeds.

Protect your plants from animals.

Deer and rabbits are fond of sweet potatoes. Protect your plants with fencing or other means, especially while they’re still small.

Rotate your sweet potatoes.

Sweet potatoes are susceptible to some fungal diseases. Rotating your crops each year can prevent these diseases from flourishing in your soil.

Don’t over-fertilize.

It can be tempting to add fertilizer or manure to garden beds thinking that the more nutrients, the bigger and more potatoes you’ll get. Unfortunately, excess nitrogen can encourage sweet potatoes to put energy into vines and leaves and little into the tubers, leaving you with a scrawny harvest. Especially if you’re considering adding amendments, you should get a soil test before planting. 

Sweet potatoes generally perform well even with low nutrients, but you can side dress each plant with a shovel full of finished compost for a better harvest. 

Harvest sweet potatoes at the right time.

Harvest your sweet potatoes before soil temperatures dip down to 55°F. Colder temperatures will damage the sweet potatoes’ taste and storage ability. Generally, this is around the week of your first frost. It’s best to harvest on a sunny day when the soil isn’t too wet. 

Sweet potatoes are an excellent low-maintenance crop to add to your garden, especially in the Southeast. Follow these simple tips to ensure you have an awesome sweet potato harvest this year. 

Want to keep learning? Check out:

Sweet Potatoes, Potatoes, or Both? Decide for your garden.

DIY Natural Food Coloring from Garden Vegetables

Many people are starting to turn away from heavily processed foods toward more wholesome natural diets. While whole grains, fruits, and vegetables are great sometimes you just need to make cupcakes with bright pink frosting. Thankfully you don’t need to turn to artificial colors to make fun, colorful food. These easy, natural, DIY food colorings can brighten up a homemade birthday cake or help you craft a colorful smoothies without chemical additives.

Beets (pink/red)

Peel and slice beets as thinly as possible and place on a single layer on a dehydrator tray. You can dry them at about 135°F or on your dehydrator’s fruit or vegetable setting. Dehydrate your beets until they’re fully dry and brittle.

Then it’s time to powder your beets. This can be done with a food processor, blender, or even a mortar and pestle. Whatever you choose you’ll want to get the powder as fine as possible so it blends well with the food you’re trying to color.

As with many vegetable based dyes the color may not be as strong as you’d expect. Beets may give you more of a pink color than darker red. You can use more beet powder however it will be a balance between adding enough for the color and adding too much powder to your recipe.

Unfortunately with beets and many vegetable dyes they can be affected by baking so you may want to stick with non-baked items like frostings.    

Spinach (green)

Winter Bloomsdale Spinach

Spinach should be rinsed and then dehydrated. For the best color it should be dehydrated as soon as possible after harvest. Place it on a single layer on a tray. It won’t take nearly as long to dry as the beets but once again you’ll want to ensure its fully dried so it can be powdered and stored without molding.

Turmeric (yellow)

As many canners and fiber artists will know turmeric can be used to create a vibrant yellow color. It’s often used in bread and butter pickle recipes giving them their yellowish appearance.

Turmeric is not a commonly homegrown spice but it can be done. It is a rhizomatous plant in the ginger family. Check out How to Grow Your Own Turmeric Indoors from Rodale’s Organic Life.

Carrots (orange or purple)

Carrots can be processed almost exactly like beets to offer an orange or purple color depending on the variety. However carrots do not need to be peeled like beets but you’ll want to wash them well before processing.

Sweet Potatoes (orange or purple)

All Purple Sweet Potato

Like carrots sweet potatoes will give you either a purple or orange food coloring depending upon the variety you choose. Unlike carrots and beets you’ll want to use cooked sweet potato puree not powder. Simply peel, chop, boil and then puree your potatoes.

Blue Butterfly Pea (blue or purple)

Like turmeric this plant isn’t super common in backyard vegetable gardens but it is easy enough to grow. It’s commonly grown in Asia and the flowers are used as an herbal tea. The tea can be used to make beverages blue or you can add a touch of lemon juice to turn the tea purple. For other recipes the dried flowers can be powdered and added as food coloring.

Red Cabbage (blue)

Surprisingly red cabbage juice makes a blue food coloring. You can use a juicer or just blend the cabbage up, place all the cabbage into some cheesecloth and squeeze as much juice out as possible (read these Tips on choosing a veggie juicer before you go on about it). For a more vibrant blue baking soda can be mixed into the juice. Start with adding just a little until you see results.

No one eats a perfectly healthy diet but by utilizing your backyard vegetable garden and spice cabinet you can have fun, colorful food while avoiding artificial colors. They may not be perfect matches for artificial food coloring but vegetable food colorings are surprisingly easy to make and use. So try your hand at homemade colorful pasta or add icing to some cookies for Halloween!

Have you ever used a natural food coloring?

Sweet Potatoes From Order to Plate

Sweet potatoes are really underutilized in backyard gardens. They’re so easy to grow, nutritious, and tasty. They’re often overlooked and many believe that the store-bought and homegrown versions are virtually indistinguishable but that couldn’t be farther from the truth. Store-bought sweet potatoes tend to be of a few hardy, orange varieties. While they’re absolutely still delicious there’s so much more variety to be had if you grow your own.

Just like other crops there’s sweet potatoes that are better suited to different growing conditions and cooking methods. The classic orange Beauregard is an excellent baker while the white fleshed O’Henry is one of our favorites for mashed potatoes. The Bunch Porto Rico has compact vines better for small gardens while the All Purple is especially hardy.

There are also dry and moist varieties. Dry varieties tend to be starchier and are more like regular potatoes. Some people consider them to be more versatile. Moist varieties are often sweeter and usually are the ones you find at the grocery store.

Choosing a variety can be tough so it may be wise to try a mix. Southern Exposure has two mixed packages available.

Bed Preparation

Sweet potatoes thrive in loose, well drained soil. If you have heavy soils it’s a good idea to work in a lot of compost and maybe even broad fork your garden bed before planting. To help with drainage you can grow sweet potatoes in raised beds, ridges, or hills.

Sweet potatoes also prefer warm temperatures and a relatively long season. Using black plastic mulch to help heat up the soil may be a good idea for those in cooler climates.

Surprisingly sweet potatoes don’t require especially fertile soil. In fact using chemical fertilizers often leads to tiny potatoes and huge vines. Simply adding some compost before planting is more suitable.

Planting

Unlike regular potatoes, sweet potatoes cannot be planted using seed potatoes. You need to use slips. Slips are the eyes on sweet potatoes. These are grown and then broken off to be replanted.

Note: for information on saving sweet potatoes and growing slips for next year check out our growing guide.

Slips should not be planted until 3-4 weeks after your last frost date. They’re very susceptible to frost. They should be planted 2-3 inches deep with their leaves above the soil. The slips you receive may or may not have grown roots already but they’re fine to plant either way.

Sweet potatoes have large sprawling vines and require quite a bit of space. You can plant sweet potato slips 10-18 inches apart in rows 3 feet apart. Water them the evening after you plant them and be sure to keep them moist for the next few days as they get established.

Care

Sweet potatoes should be mulched soon after planting. If you’re in a warm area where black plastic isn’t required straw or old leaves can be used. This will help keep the soil moist and block out weeds. Until they’re large it’s a good idea to keep them well mulched or weeded occasionally to keep weeds from overtaking them.

While sweet potatoes don’t like to be soaked (too much water can cause rotting) they do better with consistent waterings especially in dry areas. Too little water can lead to splitting and poor yields.

Pests & Diseases

Sweet potatoes can be affected by a number of pests like sweet potato weevils and diseases. The best way to combat them is purchasing healthy disease free slips, using simple crop rotation, and through maintaining healthy soils.

They’re also a favorite of deer so make sure you fence them off or cover them with netting.

Harvest & Curing

Aside from the potato itself the sweet potato shoots can also be harvested for cooking greens throughout the season. Just ensure you don’t take too much and kill the plant. 

Choose a dry, sunny day to harvest your potatoes. It will make both harvesting and curing much easier. Potatoes can be dug whenever they’ve reached an ideal size. It is best to harvest them all before the temperature dips below 55°F. Any lower temperatures can harm their storage capability.

Use a garden fork to lift them from the soil before collecting them by hand. Be careful and try to avoid nicking or damaging the potatoes. You may have to search a bit as they can grow up to 1 ft away from the plant itself. Sweet potatoes should be dried before any excess dirt is shaken off. Do not wash them, they don’t store well when washed.

For the first 7-10 days they should be kept at about 85°F and 90% humidity to cure. Then they can be stored at about 55°F in a dry, dark, well-ventilated area. Colder temperatures will affect their flavor so don’t refrigerate them until they’ve been cooked.

Any sweet potatoes with nicks or bruises will not keep well and should be used up first. You should regularly check you potatoes in storage and remove any bad ones as needed so they don’t spoil the whole crop. Properly cured sweet potatoes stored under the right conditions will keep 5-12 months.

Summertime Sweet Potato Ideas

If you still have have sweet potatoes in storage from last years garden (or are now craving them) there’s a couple simple ways to cook them even in the summer heat. Unlike in the autumn where I don’t mind baking them and heating up the house, in the spring and summer I typically cook sweet potatoes outside.

The simplest method is to clean them, poke a few holes in them, and wrap them whole in tinfoil before popping them onto a grill or into the coals of campfire. Alternatively they can be thinly sliced and wrapped in tinfoil packages with slices of onions, other veggies, and seasonings. All the ingredients should be drizzled in oil oil and the edges of the foil should be rolled or folded tightly to avoid leaking. Then they can be cooked just like the whole potatoes they’ll just cook much quicker.

Sweet potatoes truly are a wonderful crop. They’re high in vitamins and their storage ability makes them great for people looking to lessen their dependence on a global food system. It’s not too late to order slips! Try one of our productive varieties in your garden this summer.

What’s your favorite sweet potato variety?