Growing Garlic From a Clove

Inchelium Red won first place for flavor at the Rodale Food Center.

Growing garlic is a great way to spice up your garden.  And your kitchen!

If you’re a garlic lover, having your own garden is an absolute must.  There are tons of garlic flavors that you just can’t find at a supermarket.  From kid-friendly, mild-flavored Elephant Garlic to intense, fiery-hot Red Toch Garlic (go ahead and try it…I dare you!), there’s a different flavor for every taste.

Selecting Seed and Getting Started

A Note on Garlic Seed

It is best to purchase garlic seed from a source that you trust.  Using cloves that you buy in the supermarket CAN work, but you run the risk of introducing diseases into your garden.  You also run the risk of buying a bulb of garlic that has been chemically treated to never sprout. Is planting supermarket garlic really worth the risk?

A Note on Garlic Types

You have three main options when selecting a garlic variety: Softneck, Hardneck, and Asiatic.

Softnecks include silverskin and artichoke types of garlic.  These varieties are the most domesticated.  They are among the easiest to grow, and are among the highest yielding.  But be aware: Softnecks don’t do too well in extremely cold climates.

Inchelium Red, Italian Softneck, Loiacono, Red Toch, Silver Rose, and Silverwhite Silverskin are a few varieties of Softneck garlic.
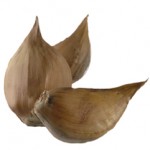
Elephant Garlic cloves

Hardnecks include Rocambole and Topsetting types.  These varieties are enjoying a gourmet renaissance.  The cloves are large and easy to peel.  Hardnecks grow better in colder climates than warmer ones.  For these garlic varieties, it is best to plant large cloves.

Appalachain Red, Music, Persian Star, Chesnok Red, and German Extra Hardy are varieties of Hardneck garlic.

Asiatic or Turban types of garlic are considered a subset of Softnecks.  These are the first to mature in the garden.  In warm climates they act like Softnecks, whereas in cold climates they act more like Hardnecks. Varieties include; Xian, Asian Tempest and Blossom.

When to plant garlic:

You’ll be planting garlic in the fall.  Southern Exposure caters to Mid-Atlantic gardeners. So, we recommend that most of you plant in late autumn, usually this means planting garlic between Columbus Day and Halloween.  However, if you’re a little farther north, your garlic cloves are better planted earlier in the season.
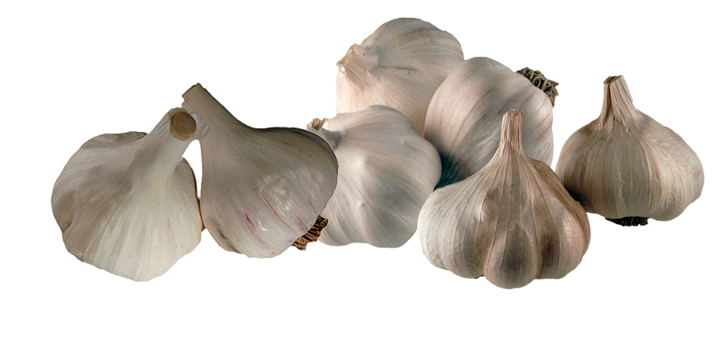
Left to right: Persian Star (Hardneck), Blossom (Asiatic), Red Toch (Softneck)

Preparing Garlic for Planting

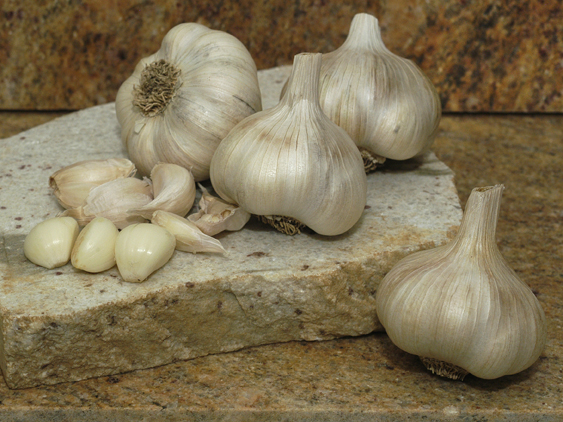
The first thing you’ll need to do is separate the individual cloves from the bulb. This only takes about a minute or so. Be sure to leave the paper (the thin, papery skin) on the individual cloves!

Preparing the Bed
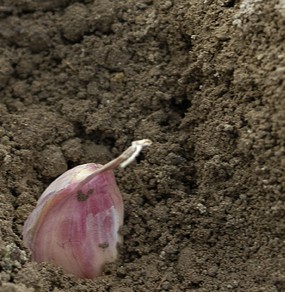
Garlic cloves come to a point at the top

Garden bed prep is going to take somewhat longer.  Garlic really benefits from compost early in its development, so you’ll want to be sure your garlic beds have a good, thick layer of compost when you first plant.  Adding nutrients later would not be as helpful.

If you have a rototiller, toss some compost on there and go for it!  If not, you can aerate and mix the nutrient-rich compost into your soil with a broadfork.

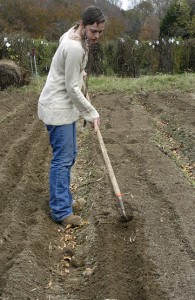
Next, dig your furrows with a warren hoe.
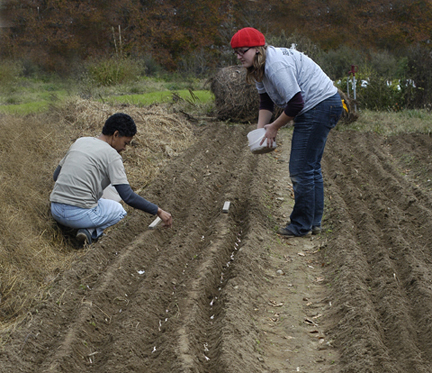
Planting garlic in fall
Dig three inch trenches

Mark the line you’ll be planting along by dragging the tip of the hoe down the length of the bed.  Then, using more pressure, dig your trenches.  A couple of inches deep will do.  Place the garlic cloves upright (with the paper still on) into the deepest part of the trench.  The bottom of the clove will put down the roots, and the pointy top will sprout the leaves.

Plant the cloves  about six inches apart.  If your beds are three feet wide, you can usually fit four rows.

After the garlic is in the ground, use a paddle hoe to cover the garlic and level the trenches. The next crucial step is to LABEL your newly-planted garlic, as it will be some time before harvest.
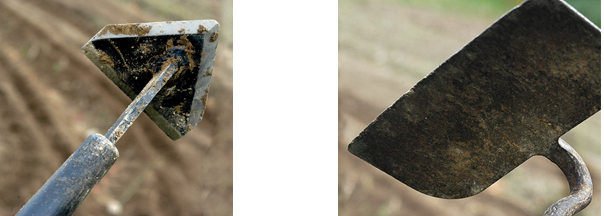
A Warren hoe and Paddle hoe

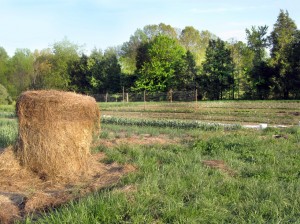
Now, mulch away!  Don’t be shy–cover the garlic beds with about six inches of hay or straw mulch.  This way, you will get far fewer weeds.  (You’ll still get weeds… but at least not nearly as many!)

Maintenance

After about a month, it’s time to join the garlic liberation front.  Your garlic should be starting to sprout, so help the new leaves find light by making a hole in the mulch for them.

The Waiting Game

What’s next?  Learn a foreign language, rebuild a hot rod, or clean out the attic…you’ll have months before your garlic needs attention again.

Scapes and Weeding

In late spring, it’s time to weed.  If you mulched like a champion, this shouldn’t take too long.
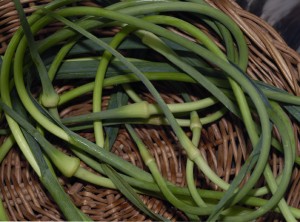
Garlic scapes harvested from Hardneck varieties

Now, depending on the type of garlic that you are growing, harvest the garlic scapes.  These are the long shoots growing up from the middle of the leaves.  The leaves are going to look like giant blades of grass, while the scapes will be round.  You’ll know it’s time to harvest the scapes when they curl over. To harvest, pull the scape upwards slowly but firmly.  You’ll want to pull the scape completely free without pulling the garlic out of the ground. (That comes later!)

Harvesting Garlic

When early summer arrives, but later than the Fourth of July -for the Mid-Atlantic it will be time to harvest your garlic.  When garlic is ready, there will typically be only six leaves left on the plant.  Get your pitchfork and dig about three inches in front of the stem.  You’ll want to give your garlic a nice, wide berth.  After all this work, it would be a shame to impale your plants!

Loosen the soil around the garlic and pull it carefully out of the ground.  If you want to make sure that the garlic is ready to be harvested, cut the bulb down the center to see if the cloves are fully formed.  If so, continue digging.  If not, try again in about a week.

At this stage, garlic looks like it’s ready to try out for the Steelers.  The bulb will be big, burly, and tough-looking. But it’s not actually that tough! The bulb is easily bruised and damaged, so handle gently.  And no tossing!
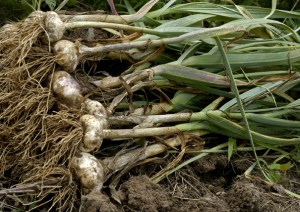
Harvested garlic in a pyramid

Place each dug-up plant–with the roots and leaves still attached to the garlic bulb–in a pyramid formation. (Instead of going out for football, they should really consider cheerleading.) There should be space between the bulbs on each row. Now, tie up your garlic and hang it out to dry.

Reap What You Sow!

By mid-summer, your garlic should be cured.  Cut off the roots and stem, and store your garlic in a cool, dry and dark place. Finally, it’s ready for consumption!

Bon Appétit!

Garlic hung to cure

If your garlic grows well and you get a bountiful harvest, save some of the cured bulbs to plant the next year.  Replanting garlic that has grown well in your garden will only make it even better next year.  In time, selectively saving your own garlic seed will produce garlic that is custom-designed to grow fabulously in your garden, year after year!

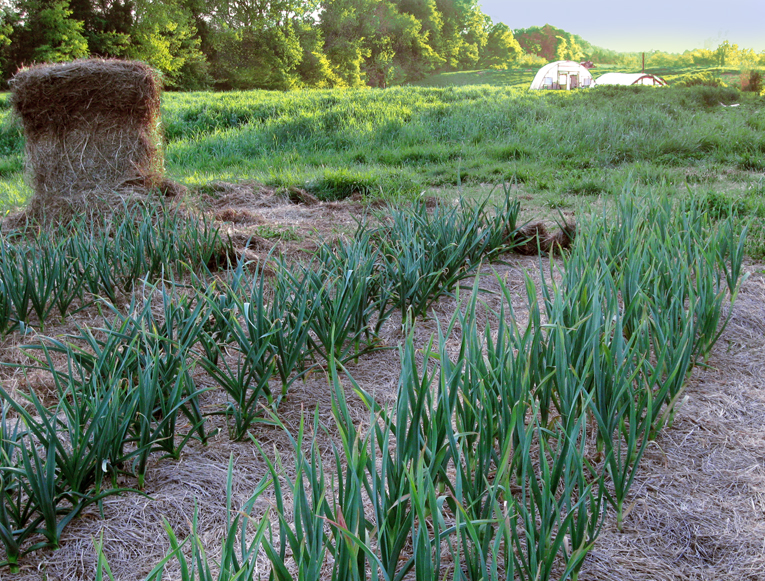
Mulch Ado…

Not all mulch is created equal.  Types of mulch range from great to not-something-you’d-want-in your-garden.

The Compost Solution

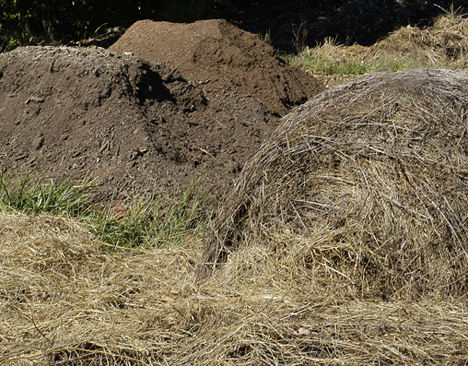
If you’re looking for a rich, black mulch containing ample nutrients for your plants, the answer is simple—use garden or kitchen compost!

Hay and compost used for mulch

If you’re going to compost organic materials yourself, make sure to have just the right balance of brown (carbon-rich) and green (nitrogen-rich) materials, so that your compost will break down efficiently. If you don’t have a lot of material to work with and if quick-and-easy composting is of the utmost importance to you, you might want to invest in a compost tumbler. But here at Southern Exposure, we do it the old-fashioned way! If you, too, have an open-style bin, make sure to turn it with a garden fork every two weeks to aerate the pile and to move dry material from the outer edges to the center.

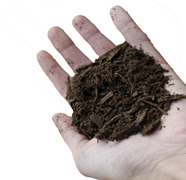
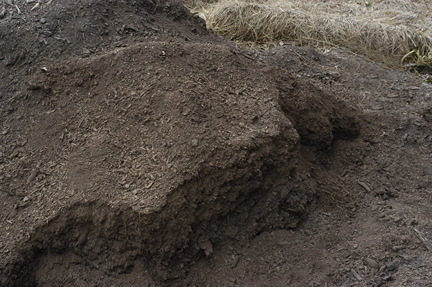
Compost has a dark crumbly texture

You’ll know when your compost is ready because it will look beautifully dark and crumbly, and should smell earthy. Still see an orange peel? It’s not done! You definitely should not be able to pick out any original ingredients.  If you don’t have the time or means to make compost yourself, give your township a call. Many municipalities compost the yard waste they collect and then offer the finished product back to their residents.

Hay: Not Just for Horses…

…it’s also for your garden! Here at Southern Exposure, we often use hay and straw to mulch our crops.

Hay comes from grasses and legumes such as alfalfa or clover that are cut, dried, and used to feed farm animals. Straw, on the other hand, has little to no nutritional value for animals–it is made from dried, mostly-hollow stalks of grain. Straw and hay make for different mulching experiences.

Hay Mulch

Hay is nice and heavy, so it is likely to stay put once placed in your garden. However, when mulching with hay, be aware that it could contain weed or grain seeds that may eventually sprout. This is not really an issue with straw, but straw is much lighter than hay, which means that you’ll have to use a lot more of it to get it to stick around come wind and rain.

Oak’s No Joke

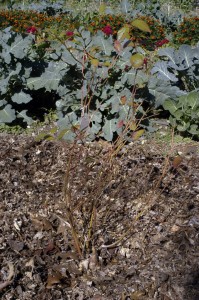
Blueberries growing in oak leaf mulch

If you’re a fellow resident of Virginia, where live oaks are commonplace, you might want to try using oak leaves as mulch. Live oaks are classified as evergreens because they hold onto their leaves all winter long…but come springtime, keep your eyes peeled! You won’t have to look very hard to find fallen oak leaves in abundance, as live oaks drop their leaves over a two-week period each spring.

Oak leaves add acidity to soil, so make sure you’re using them on plants that can tolerate this. You can either directly mulch your garden with oak leaves, or compost them first (chopping them up with a lawn mower or other tool will help them to decompose faster, as will mixing them with nitrogen-rich materials).

The Electric Pine Needle Acid Test

Using pine needles as mulch, which is often called pine straw, is a good idea when you are looking to increase the acidity of your soil. Garlic, mint, onion, blueberry and tomato plants would appreciate this, as would azaleas, chrysanthemum, rhododendron, and roses.

And besides giving certain plants their acid fix, pine needles bind together to provide a weed-suppressing blanket that is unlikely to wash away with heavy rains.

Another great thing about using pine needles as mulch is that you can easily collect it yourself. Even if you don’t have pine trees on your property, neighbors with pines might happily agree to let you scoop needles off their grass—the needles’ high acidity makes for splotchy lawns, just make sure to consult with your arborist first.


Coulda Shoulda Wooda

Wood mulch is a common type of mulch because it’s good at suppressing weed growth. But if you’re planning on buying commercially produced wood mulch, be aware that it may be made out of trashed wood, which could add arsenic and other chemicals to your soil.

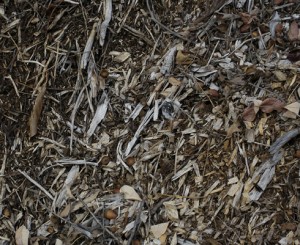
Wood chips for mulching a path

Also, if you want to avoid moldy mulch, using wood chips as mulch might not be the best choice. Now, some molds and fungi—natural aspects of the decomposition process for all organic material—are benign or even beneficial for plants. But others are nuisances. Case in point: wood mulch can breed a nasty mold called “shotgun” or “artillery” fungus, which leaves impossible-to-remove spores that look like balls of tar on homes and cars.

If you’re still into the idea of using wood mulch, why don’t you try sawdust? The founder of Southern Exposure originally used sawdust as mulch in his garden, and he had no problems with it.

Rubber Mulch: Old Tire Chunks on Your Plants?!

For instance, did you know that many types of mulch you can buy in the store are thickened with ground rubber, potentially from used tires? Though rubber mulch might be good for playgrounds (if you don’t mind exposing your kids to the chemicals components of artificial rubber, but hey—we’re not talking child rearing here), it simply does not belong in your garden.

The cons of using rubber as a mulch ingredient far outweigh the fact that rubber contains a small amount of nitrogen. Zinc, cadmium and other heavy metals from rubber mulch could seep into your soil. Plus, it stinks in the heat!

What’s Mulch Got To Do With It?

In conclusion, we just want to reiterate something you’ve hopefully already figured out—mulch is very important! All mulch types help soil and root health by retaining moisture, managing temperature, and preventing weed growth.

Finished compost

Let’s Talk Tomatoes!

Choosing tomatoes to plant in your garden can be a bit tricky if you don’t know a few key terms.  Since there are so many different tomato varieties out there, it can be hard to figure out which one is right for your garden.  Some varieties are perfect for making sauce, while others are great for tossing into salads all summer long.

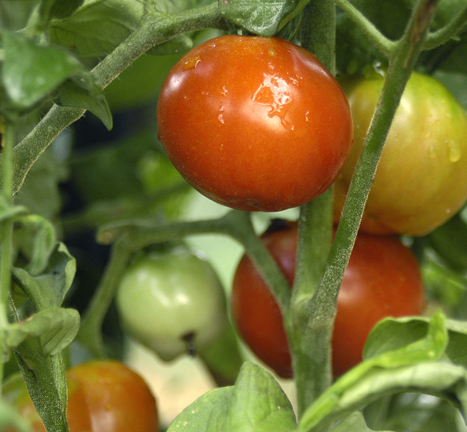
Certified organic tomatoes grown at Southern Exposure

All of the tomato seeds Southern Exposure offers are non-GMO and non-hybrid.  Most varieties are heirloom tomato seeds.  People often debate about what “heirloom” means, but to us, an heirloom variety is generally one that was introduced before the widespread use of hybrid varieties in industrial agriculture. This began around 1940. The integrity of our heirloom tomato seeds has been preserved thanks to open pollination. Most of our tomato seeds are also certified organic, which means the seed was collected from plants grown without exposure to petrol chemicals.

Determinate vs. Indeterminate Tomatoes

The distinction between determinate and indeterminate tomatoes sometimes leaves people baffled, so here’s a little tutorial.

Determinate tomatoes will stop growing at a certain point, and generally they are shorter in height than indeterminate varieties. Here in Virginia, if a determinate tomato plant grows to be five feet tall, the same plant could be three feet tall in a colder climate. Either way, there is a limit to how tall a determinate tomato plant will get.

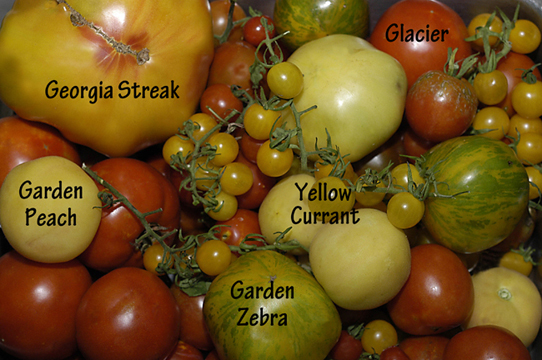
Determinate tomatoes include: Glacier, Roma VF Virginia Select, Marglobe VF, Neptune

Glacier Tomatoes are one of the first to ripen

Indeterminate tomatoes, on the other hand, will just keep growing and growing! Factors that affect height are climate/length of season, trellis size, and plant health. In tropical areas, indeterminate varieties can be like perennials and grow for a few years. Most tomato varieties, especially cherries, are indeterminate. One of our customers who planted our Matt’s Wild Cherry seeds in her greenhouse told us that the vine grew to be 17 feet long! (Please keep in mind that this is very unusual.)

Indeterminate tomatoes include: Yellow Brandywine, Georgia Streak, Abraham Lincoln

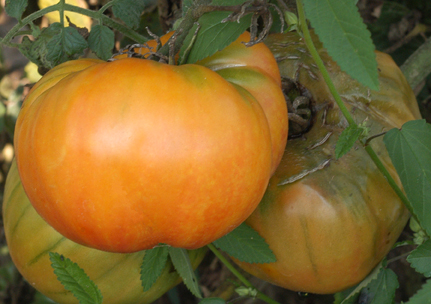
Georgia Streak- heirloom tomato introduced by Southern Exposure

An advantage of growing determinate tomatoes is that there is less trellising work involved. Also, if you are going to be canning fresh tomatoes, you will probably want to go with a determinate variety as most of the fruit will need to be harvested over a short period of time. The disadvantage of determinate tomatoes is that they have fewer leaves than indeterminate varieties, meaning that the plant is less likely to receive nutrients. More leaves = more nutrients = tastier fruit. So, if you are hoping for a tomato plant that will consistently bear smaller amounts of tomatoes for snacking, sandwiches and salads, you’ll want to go with an indeterminate variety.

Cage-free Tomatoes?

We’ve been asked if it’s absolutely necessary to trellis tomatoes. In other words, is it OK to let them sprawl on the ground? The short answer is yes. But it’s not the greatest idea! Cage-less tomatoes will bear less fruit than trellised tomatoes, and the fruit you will get

Newly caged tomato plants

could be more vulnerable to rot and critters. If you really don’t have the funds for trellising materials, make sure to mulch the ground heavily to protect the tomatoes. If the mulch

gets wet, however, the ripe tomatoes sitting on the ground will certainly rot, so I’d recommend only trying cage-free tomatoes in hot, dry weather.

Although tomato trellising requires both time and money, it’s a worthy investment! You can reuse your tomato cages year after year. At Southern

Exposure, we use five-foot-tall cages made with concrete-reinforced wire cut into pieces that measure two to three feet in diameter. Also, we make sure to secure our cages with sturdy posts so that they don’t fall over.

Husk Tomatoes

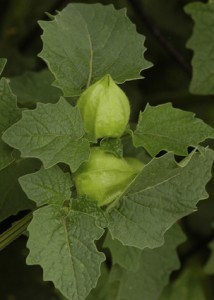
Thanks to some of our seed growers just up the road, we now carry fives types of tomatillos! Our most recent addition is called Purple Tomatillo. In honor of this, I’d like to briefly explore the world of husk tomatoes with you.

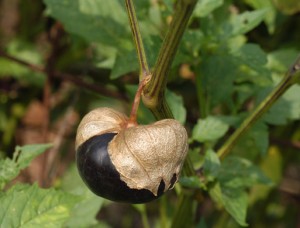
Purple Tomatillo - ripening

Husk tomatoes, as our catalog describes, “are distinguished from tomatoes by the light-brown, papery husk which enlarges and covers the maturing berries.” Picture Chinese lanterns with goodies inside of them, and you’ve got husk tomatoes!

Cossack Pineapple - ground cherry

Ground cherries and tomatillos are the two most commonly cultivated species of husk tomatoes.  Tomatillos are commonly used for salsa and other Mexican foods, and they are often cooked to bring out their full flavor. Ground cherries, on the other hand, can be eaten raw. They are deliciously sweet, so you could also try them in sauces, preserves, pies and other desserts!

Lastly, Some All-Time Favorites!

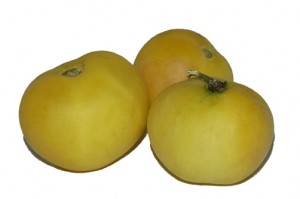
Garden Peach- bears fruit until frost

For storage –  Garden Peach*

For sauce – Hungarian Italian Paste

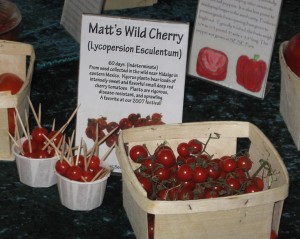
Cherry tomatoes – Matt’s Wild Cherry

All-around good – Eva Purple Ball

*Personally, I’d say that Garden Peach is the most scrumptious tomato I’ve ever tasted. These little pinkish-yellow bulbs make the perfect snack, and if you pick them when light green, they’ll store well without splitting.

Matt's Wild Cherry Tomatoes were a favorite at Mother Earth News Fair and the Heritage Harvest Festival!