
If you’ve got a little extra room or are willing to get creative, staple crops can help fill your pantry and lower you’re grocery bill. They’re the types of food that provide a lot of calories and can help make up the bulk of a diet. Many of them are easy to grow, use, and store at home.
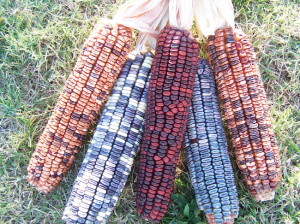 Flour (Grain) Corn
Flour corns are generally easy to grow and store. They’re great for making your own cornmeal and grits and can really stretch the family pantry. Popcorns and gourdseed corns can also be used in the same way.
In order for your corn to store well, you should wait to harvest until your its fully mature rather than harvesting at milk stage (like for sweet corn). When the husk is papery and brown, harvest on a dry day before your first fall frost.
To dry your corn for storage, pull back the husk and hang your corn somewhere out of direct sunlight. Some folks braid the husks to create small bundles. You can also remove the husk completely and hang your corn to dry in mesh bags. Just be sure to check on them occasionally, make sure they’re getting good airflow, and remove any moldy ears.
In order to get all the available nutrition from your corn it needs to be nixtamalized. This is a simple process but an essential step if corn is going to be a large part of your diet. Check out our post, Processing Flour Corn at Home for directions.
After that you can use your corn whole or grind it for cornmeal or grits.

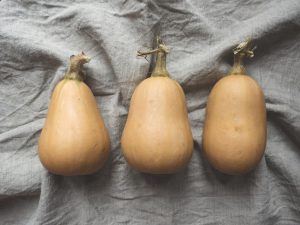
Sweet Potatoes
Sweet potatoes grow best in warm southern climates as they have a relatively long season and are very susceptible to frost. Some people do manage to grow them in New England though!
There are many varieties of sweet potatoes that range from “dry” and starchy, more like a regular potato, to syrupy and sweet.
Sweet potato slips should be planted 3-4 weeks after your last frost. They should be mulched soon after planting and watered consistently.
Harvest your potatoes on a dry sunny day when they’ve reached an ideal size and before temperatures dip below 55°F. Cure your sweet potatoes in a warm space for 7-10 days before storing in a cool, dry place.
For more information about growing, curing, and storing sweet potatoes check out our post, Sweet Potatoes From Order to Plate.
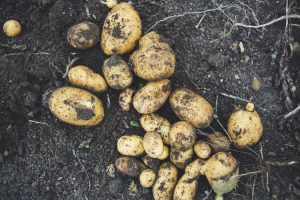 Potatoes
To plant potatoes, cut them into pieces about the size of an egg with at least two eyes. Plant pieces about 12 inches apart in wide rows. They do best in rich soil. Adding compost before planting can improve productivity.
When the plants reach 6 inches tall side dress them with compost and mulch so only the tips of the plants are showing. Repeat this process when they’ve grown another 6 inches.
Harvest potatoes by lifting them gently with a garden fork when plants have died back and dried to ground level.
Potatoes should be cured before storage. Place them in a single layer somewhere cool and humid if possible for a couple weeks before storing. This allows the skins to thicken and harden.
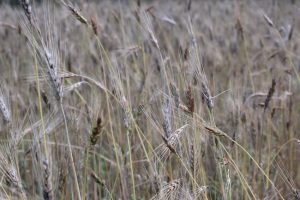 Wheat
Wheat
You don’t need acres of fields to produce some of your own wheat. A small patch can be surprisingly productive.
If you’re planting this spring, select a spring wheat. Winter wheats perform best when sown in the fall. Wheat requires full sun but isn’t a particularly heavy feeder. You can add a couple inches of compost before sowing if in doubt.
To plant you can sow by hand, use a seed spreader, or even sow in rows. Your wheat should come with a sowing rate, approximately how many pounds per 1000 square feet.
After sowing, you should lightly rake your wheat in and water it. Adding a thin layer of straw mulch can help keep the soil moist and encourage germination. Water whenever the soil surface appears dry, until the wheat is established.
Harvest with a hand scythe or other sharp tool when the stalks are beginning to dry from green to brown. Tie them in small bundles and keep them out of the rain to dry for a few weeks where they’ll get airflow around them.
When the grain is crunchy, lay your stalks on a tarp or sheet and beat them with a stick to release the grains. Remove the stalks (they make great mulch) and winnow out the chaff. This can easily be done with two buckets and a fan. Set an empty bucket in front of the fan and gently pour the wheat into it. The chaff will blow away while the grain falls into the bucket. You may need to repeat this several times.
Note that it’s fine to store wheat on the stalk if you have enough space and is how it was traditionally stored.
Please check out our post, Growing Grain in a Home Garden for more information.
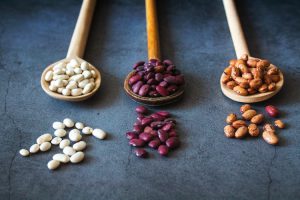 Beans
Beans
Full of protein and easy to grow, beans deserve a place in any garden. Bush varieties are simple to grow because they don’t require trellising. However, pole varieties can save space by being grown along fences or on corn or sunflower stalks. Many beans can be eaten fresh as snap beans and allowed to mature for dry beans.
Fresh beans can be preserved by pressure canning, pickling, or drying. Drying green beans on strings used to be common in Appalachia. Known as leather britches, these strings of beans could be boiled and used throughout the winter. To make them, thread fresh, clean sections of green beans onto a string and hang somewhere warm and dry.
For dry or soup beans, wait until the pods and plants are fully mature and beginning to turn brown. They can be left in the field until fully dry or hung under cover if frost or heavy rain threatens.
When the pods are fully dry you can thresh them by beating them with a stick on a tarp or sheet the way that you would wheat. When they’re fully dried and threshed, they can be stored longterm in airtight containers.
 Winter Squash & Pumpkins
Along with flour corn and beans, winter squash completes the three sisters garden, a productive growing method employed by some Native American tribes. The squash grows under the corn and pole beans shading the soil which helps keep it moist and free of weeds.
Winter squash does best in well-drained soil which is why many people choose to grow it in hills. It’s quite productive and stores well with minimal effort.
Proper harvest and curing is key to longterm storage. Check out our post, Harvesting & Curing Winter Squash & Pumpkins for details.
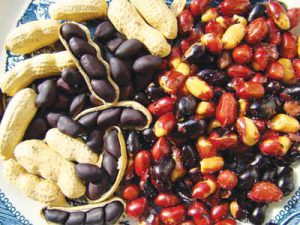 Peanuts
Originally from Brazil, peanuts are a great staple crop for warm, long season areas.
Sow peanuts 1 month after your last frost when the soil has warmed. To plant, shell the seeds and sow them 1-2 inches deep, 6-12 inches apart in wide rows.
Peanuts are slow growing at first so be sure to keep them well weeded. When they reach 12 inches high hill them as you would potatoes. After peanuts flower, they need about 1 inch of rain or irrigation each week for the best harvest.
Harvest during a dry spell in October or right after a light frost. In the deep south they may need to be harvested earlier as too much rain can cause them to sprout. Dig the vines and cure on the vine if possible or remove them and cure for 2-3 weeks before storage.
Other Staple Crops (check back for part 2)
- Rice
- Oats
- Amaranth
- Cabbage
- Cowpeas
- Sorghum
- Rutabaga