The great zucchini flood has started! This time of year you’ll find many gardeners and farmers with tables, counters, and cabinets overflowing with a bounty of zucchini and summer squash. The first few of the year always seem so magical but a few weeks in it’s pretty easy to feel overwhelmed by the sheer volume just a few plants can produce. That’s why we’ve rounded up a few ways to use zucchini this season!
Cook It
Breaded & Fried
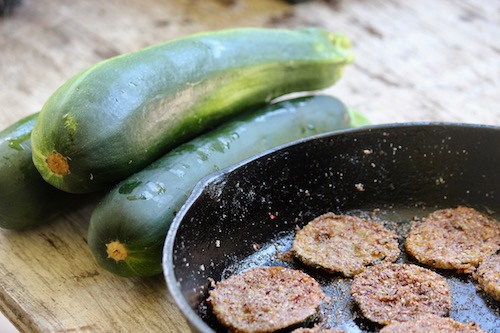
A simple, quick way to make super tasty zucchini is to bread it and fry it. It may not be the healthiest option but it’s definitely delicious. One of my favorite ways to bread it is with a bit of salt and bloody butcher cornmeal as pictured above. *We’re currently out of bloody butcher seed but you can find pungo creek butcher (a bloody butcher descendant) here.
Stuffed Zucchini
For larger zucchini, stuffing them and baking them is a great option. I like to use up any fresh vegetables I have on hand, sauteing up onions, garlic, swiss chard, collards, peppers, and tomatoes and mixing them with rice, beans, and spices like oregano, basil, and chili powder. Scoop out the seeds and add this or your own mixture to the zucchini. Top with marinara sauce and bake, covered at 375°F for about 45 minutes or until zucchini is tender.
Spaghetti Sauce
Spaghetti is a pretty common go-to meal for busy evenings. Next time you make spaghetti use up some of your zucchini by chopping it up into small chunks and sauteing it with onions and garlic before adding it to your spaghetti sauce. Don’t water bath can this type of spaghetti sauce though! The zucchini will decrease the acidity of the sauce making unsafe for canning.
Irena’s squash souffle is also a great option for using up zucchini. Follow the link above for this great recipe.
Bake Something
Zucchini’s mild flavor lends itself easily to a variety of baked goods. You can find recipes online for zucchini cakes, muffins, breads, even cookies! I’ve found it makes delicious and moist chocolate cake that can fool even picky eaters.
Preserve It
Zucchini Pineapple
Yes, it sounds super wierd but zucchini pineapple is actually delicious and easy to put up. Basically, all you do is water bath can zucchini in a mixture of pineapple juice, lemon juice, and sugar. It tastes great and can be eaten right of the jar or tossed on a pizza this winter! You can find a recipe over at the National Center for Home Food Preservation.
Zucchini Chips
Dehydration is a really simple and quick storage tecnique. Zucchini chips are easy to dehydrate and make an excellent snack. All you need to do is slice your zucchini into rounds about 1/4 inch thick, dunk the rounds in apple cider vinegar, and then toss them with spices before dehydrating for 10 hours at about 135°F. Make sure they are fully dry and crisp before moving them to airtight jars for storage.
Fermented Zucchini Pickles
Fermentation is an old and simple way of putting up the harvest. It’s also great for gut health. Fermented foods are full of healthy probiotics. Check out this fermented pickle recipe from Attainable Sustainable to use some of your bounty.
Freeze it
Zucchini is easy to freeze because unlike many vegetables it doesn’t need to be blanched first. For easy use, shred zucchini and freeze in portions for your favorite recipes like zucchini bread.
Other Ideas
Donate it
As a gardener it’s easy to forget how tasty and special fresh, homegrown zucchini is. Even if you’re tired of it there may be people in your area who would love some fresh zucchini. Talk to your neighbors. Maybe there’s someone nearby who’s no longer physically able to garden who would love some. Also, check with local food pantries.
Food waste is a rampant problem in the United States. This season try to make the most of all your garden produce. As a last resort chickens love zucchini if you have them or know someone who does.
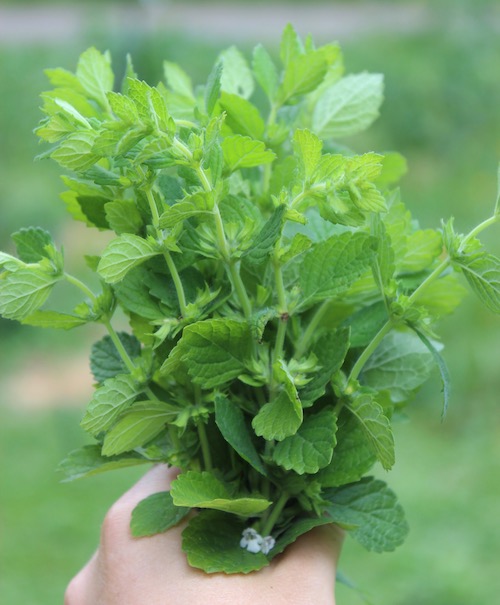 Some herbal teas also make excellent popsicles. Try mixing lavender, lemon balm, mint, or roselle tea with honey or maple syrup and small pieces of fresh fruit to freeze for a refreshing treat.