7 Ways to Start Seeds Without Plastic

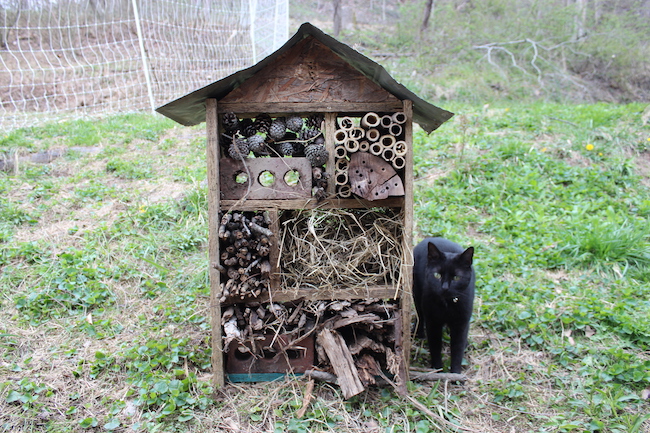
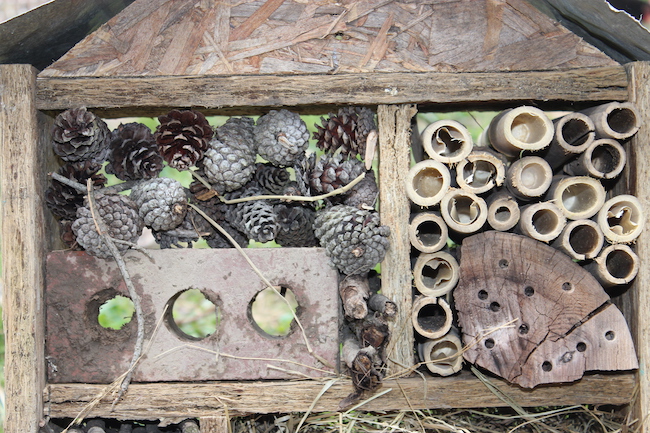
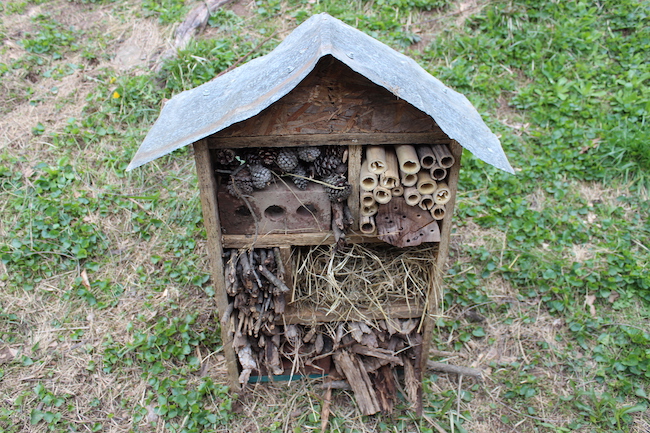
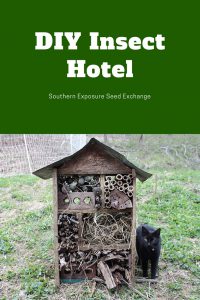
Frequently the line between gardener and environmentalist becomes blurred. We plant pollinator gardens and build insects hotels to give smaller creatures a helping hand. We sow seeds and plan our meals to reduce our food miles and carbon footprint. We opt for organic and heirloom seed or dedicate time to learning to save our own. Each year however, I’m startled to see just how much plastic is used in the making of a modern garden. Hoses, sprinklers, drip tape, pots, flats, tools, greenhouses, you name it and it probably is at least partially made of plastic.

While many of these items drastically increase the productivity of our gardens it’s also common sense that their are non-plastic alternatives for many of them. These alternatives are what our ancestors in the not so distance past once put to use to produce the vast majority of their family’s diet. I’m certainly not saying we should forgo the use of hoses and greenhouses just that we should get a little creative in ways we can. Use old, salvaged windows for cold frames instead of plastic paneling. Opt for tools made of metal and wood where possible. Probably easiest of all, check out some of these non-plastic pot alternatives. 

Terracotta Pots

Terracotta or other ceramic pots can be a beautiful and environmentally friendly way to start seeds. They’re much more expensive than other methods but if you have a small garden they may be worth it because they can be used year after year. You can also sometimes find them at yard sales and thrift stores which may allow you to slowly and cheaply build a collection.

Peat Pots

Peat pots are probably one of these easiest plastic alternatives. They can be purchased at any garden supply store and you can plant the whole thing! It’s quick, easy and doesn’t disturb your seedling. However it should be noted that some believe using peat may not be as environmentally friendly as other options as it is quite slow growing and peat pots are single use.

Gourd Shells

Not the most common choice, gourd shells actually make excellent pots. Gourd shells will break down some as your seedling grows however they should still probably be removed upon transplanting. They can of course be composted after you’re done with them.

Newspaper Pots

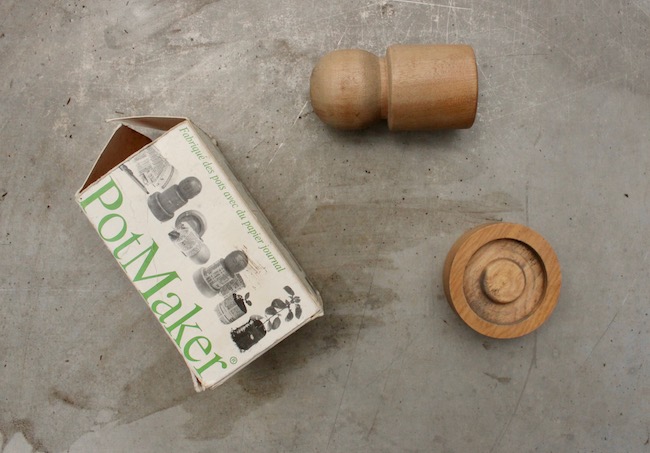
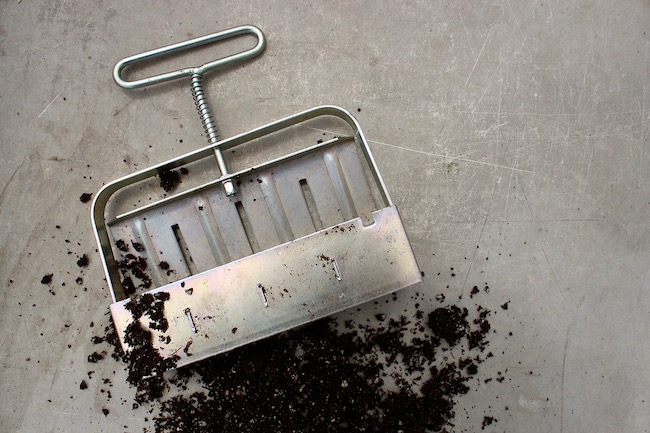
An easy DIY solution is to fold your own newspaper pots. It takes a little time to make them at home but just like peat pots you can plant the whole thing. You can find tutorials on Youtube for folding your own or they sell wooden newspaper pot makers, like the one pictured above, that are cheap and easy to use.

Wooden Flats

Prior to the mass production of plastic, wooden flats were the go to for many farmers and gardeners. Today you probably won’t find them at your garden supply center however there are plans available online to build your own. 

Egg Shells and Egg Cartons

Starting seeds in egg shells and cartons is an excellent way to put some household waste to good use. However it should be noted that they are more suited to plants that grow slowly as plants like to tomatoes will quickly become too large and need to be potted up. 
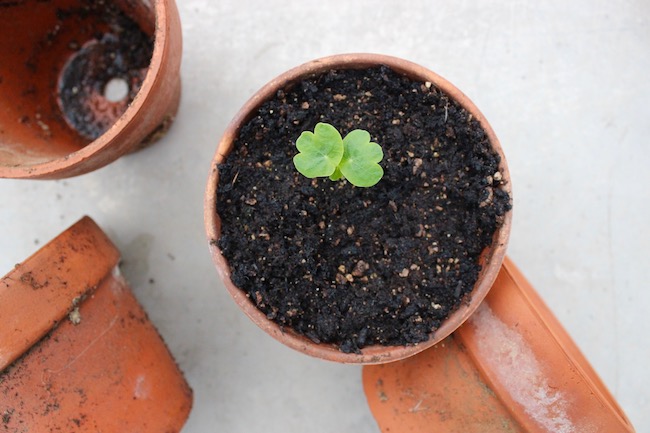
Soil Blocks

One of my favorite plastic free options is using a soil blocker. It takes a little time and practice to make soil blocks and you’ll still need a to find tray to set them in but they’re well worth the time up front. Using soil blocks eliminates the problem of root bound seedlings. This is because roots won’t just grow into open air. They stop at the edge of a soil block instead of growing around the plant like they do in a pot. Soil blocks also make planting easier. There’s no trying to pinch plants out of plastic trays. This minimal handling is faster for you and better for the plants.

**Note**

If you choose to plant in a pot that goes directly into the ground with your seedling it’s important to make sure that the edges are not above the soil. This will wick moisture away from the plants roots. If your pot is too tall just tear off the top edge before planting.

Arguably plastic pots are a relatively small portion of the world’s plastic problem. However for many of us these swaps to more sustainable alternatives are not difficult or costly. In fact they can save you money! So why not? It may seem like a waste of time but when many people make small changes there are big impacts. 

How have you reduced plastic in your garden?

Pin it for later.

DIY Insect Hotel

Insect hotels are an easy way to create habitat for beneficial insects in or near your garden. It’s basically the same concept as a bird house but for bugs instead. You can make yours to help attract solitary bees, wasps, predatory beetles, lacewings, hoverflies and more. These insects play an important role in your garden’s ecosystem, pollinating plants, and feeding on pests. 

To get started I’ll discuss the insect hotel I made as an example. It is made entirely from scrap and natural materials. The outside is scrap plywood and tin and the compartments are filled with bamboo, a log with drilled holes, pine cones, sticks, bark, hay, and bricks. What you make yours from is up to you. You can utilize what you have to create something fairly rustic like I did or get real fancy.

Materials

The bamboo and logs with drilled holes were added with solitary bees and wasps in mind. They both use or create holes, frequently in woody material, to lay their eggs. Predatory beetles and hoverflies can find places to hide and over winter among the pine cones, sticks, and bark. The hay provides good habitat for lacewings and the bricks add larger holes for spiders and other insects to use.

The most important part is add a mix of materials. Think about all the crevices and spaces you normally find insects in and mimic these in your design. If you’d like to attract a specific insect to your garden you can also search for its habitat preferences. Does it like cool damp places close to the ground? Or sunny, dry places up high?

It’s okay if your insect hotel is completely different from the one I created. Just as there’s a wide variety of insects that could use a helping hand there’s a wide variety of habitats you can use your insect hotel to create. A quick Pinterest or Google image search will turn up hundreds of inspiring ideas to help you create something that fits your needs. People have made giant insect towers from stacked pallets and little painted boxes that hang on the wall or fence. You can use hollow logs, stacked cinder blocks, or old terra-cotta pots to stuff with material. 

Construction

To put mine together I measured and then cut the plywood using a circular saw. From there I screwed the plywood together to form a box using some screws leftover from another project. Then I decided to add more plywood to create small compartments or shelves so I could easily add different types of material. I found a perfect size scrap piece of tin that I hand for the roof and screwed that on as well. I haven’t yet, but I need to staple on some scrap chicken wire I have to hold in loose materials like the pine cones. This will also allow me to stuff the materials in tighter.

If you don’t have access to power tools think about ready made containers you could use rather than building a box like I did. Maybe you have an old wooden crate handy or could use an old pot, block, or hollow log like I mentioned above.

Tips

There are a few general ideas that can help you make the most of your insect hotel. First while some insects like damp conditions you might still consider putting something that sheds water on the top. That way your materials will last longer and even if it sits directly on the ground you can keep the upper layers dry for certain species. 

Secondly it’s best to use compostable or recyclable materials. Your insect hotel probably won’t last forever. Building one that can easily be recycled or returned to the earth at the end of it’s use is good planning. Just because straws and pvc pipe have the same shape as bamboo doesn’t mean that they’re good alternatives. 

Consider your hotel’s location carefully. If you have a small space you might have limited choices. However if possible it’s best to place your hotel where it’s sheltered from some of the prevailing winds. If you like bees you may also want to look for a sunny location as they rely heavily on the sun for warmth.  

Lastly don’t stop with just your insect hotel’s structure include some “landscaping” for it too. Insects are more likely to utilize your hotel if you add features around it they like. You can plant a flower mix around it, add a lot of mulch to that area of your garden, let the nearby grass grow tall, or add a place for them to access water.

Insect hotels are a great weekend project. They’re a quick and easy way to help your garden and the natural world. They’re also an excellent project to get kids involved with. Remember that you can make an insect hotel with anything you have on hand, there’s no right or wrong way to make one, and even if it comes out a little wonky it’s okay. The bugs don’t care if you measured everything perfectly!

Pin it for later.

Bloody Butcher Cornbread

If you browse seasonal recipes you probably won’t find cornbread listed as a springtime favorite. It’s typically associated with corn’s fall harvest season. However corn is easy to store year round and cornbread makes a delicious side for any spring cookout, especially when you grew the corn yourself.

This bloody butcher cornbread is simple, easily made vegan, and offers a unique purple/blue hue. This recipe assumes that you already own and know how to operate some sort of grain mill to process your corn. If you don’t own one there are many affordable, home scale options available.

Ingredients:

1 1/2 cups all purpose flour

1 cup bloody butcher cornmeal

2 Tbs. baking powder

1/2 tsp salt

3/4 cups vegetable oil

1 1/3 cups milk

1 egg or 1/4 cup applesauce

Note: if you’re someone who like sweet cornbread 1/4 cup of white sugar may be added to this recipe.

First prepare a pan. While you can use a small cake pan or even muffin tins, this recipe comes out best baked in a preheated cast iron frying pan. The center stays soft but it gives the cornbread delicious, crispy edges.

To prepare the pan make sure it is well seasoned and coat it with a little vegetable oil. Then place it in the oven and preheat the oven to 350°F. Once the oven preheats leave it in for an additional 5 minutes before adding the batter.

While your oven and pan are preheating stir together all the dry ingredients then add the oil, milk and applesauce or egg and stir until well combined.

Pour the batter into your preheated pan and place in the oven and bake at 350°F for 20-25 minutes or until a butter knife or toothpick come out clean. It’s best served warm with a little butter. Enjoy!


Saving the Past for the Future