How to Choose Plant Varieties

It’s so easy to flip through the seed catalog each winter circling varieties you want to plant only to flip back through and realize there’s more circled than not.

Despite the fact that common advice for the new gardener is, “start small.” There’s not a whole lot of good advice about how to make the tough calls when it comes around to seed order time. Hopefully these ideas will make the decisions a little less difficult.

Location, location, location.

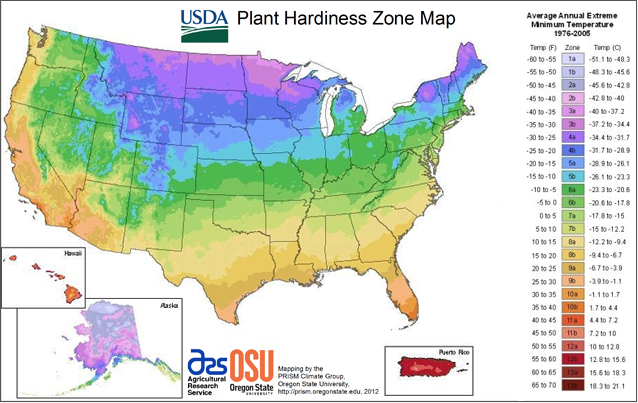
While some varieties do well almost anywhere others need a little special consideration. If you’re from Vermont you’ll probably have better luck with a watermelon like Blacktail Mountain (73 days) than Amish Moon and Stars (100 days). This is not to say it’s impossible just that it’s easier and having some successes will inspire you to keep growing.

Grow what brings you joy.

Amy’s Apricot Mix Cherry Tomato

Another classic tidbit of advice is “grow what you know your family will eat” but sometimes I think that’s a bit over-rated. Don’t feel obligated to grow a ton of paste tomatoes just because your family eats a lot of spaghetti sauce if you hate canning so much you won’t be invested in the plants. If you’ve only got space for a few varieties and seeing a rainbow of cherry tomatoes or slicers is what inspires you and your kids to get out in the garden opt for them instead!

Consider your how much room you have.

If you want to try a ton of varieties but only have a small garden just make sure you select space saving varities. Opt for a bush type squash like Table Queen instead of letting Burgess Buttercups sprawl all over your garden. If you have a fence you may want to grow pole beans up it instead of growing rows of bush beans.

Plan out your space.

On the same note if you have at least a general plan of what your garden will look like this year you can write down a general idea of what you need before opening the catalog to help you stay on track. For example you’ll know how much space you have dedicated to carrots and therefore a better idea about how many varieties you may want to try. You can find Southern Exposure’s garden planner here.

Ask local gardeners and farmers.

Other growers in your area will know about certain varieties that work well or don’t in your specific location. They’ll also have ideas about their personal favorite varieties that you might want to try.

Grow what’s hard to get.

If you’re short on space or time you may want to pick varieties that aren’t readily available in your area. For example if you know there’s a lot of organic spring greens and radishes available at your farmers market you may want to use an area of your garden for snap peas instead.

Fall in love with a story.

Belle Isle Cress

Not every variety comes with a really cool history but some do. If there’s a story that really stands out in your mind like how “Radiator Charlie” paid off his house after developing the Mortgage Lifter Tomato or how shipwrecked Portuguese sailors survived a Canadian winter on Belle Isle Cress pick that variety. Your excitement will help keep heirlooms alive everytime you share that story with someone visiting your garden.

Try to find a variety that connects you with your heritage and culture.

Not that far in the past everyone had a garden and cooked from scratch. If you can find out what your grandparents favorite varieties were or more generally what varieties you share some heritage with you can help re-awaken cultural food ways. You may even find yourself more inspired to maintain family gardens and recipes.


Above all else choose what you love. Don’t let worry about having a “good” garden control your choices. If you love spending time in your garden with the varieties you’ve chosen that’s really all that matters.


Pin it for later.

DIY Pumpkin Puree & Pumpkin Spice Waffles

Connecticut Field Pumpkin

Whoever decided that pumpkin spice food is just for autumn got it wrong. Now is when I scrambling to pack all the winter squash and pumpkins we put up this summer into our meals. Before long it will be spring and as much as I love the stuff I don’t want the house to still be overflowing with winter squash. Come spring I’ll be ready for greens, snap peas, and rhubarb! So for now it’s pumpkin spice, tasy, warm, filling and sweet.

DIY Pumpkin Puree

***for those who are ready for the waffle recipe keep scrolling****

Any local foodie will tell you pumpkin puree doesn’t come in a can! It’s actually super easy to make and nearly any winter squash or pumpkin will do. If you’ve got a Waltham Butternut or Table Queen on hand there’s no need to go search the farmers market for a pie pumpkin.

Split your squash or pumpkin in half and scoop out all the seeds. Place the pumpkin opening down in a shallow baking pan with about 1 inch of water. This will keep it from drying out.

Bake at 350°F for 30 minutes to 2 hours or until tender depending on the size of your pumpkin.

*Optional: clean the seeds and bake in a single layer on a cookie sheet with a little vegetable oil and salt while your pumpkin is baking. Bake until golden brown. Alternatively save them for next year!

On to the good stuff.

Pumpkin Spice Waffles

These waffles are a great breakfast or treat on a cold winter days and they’re an awesome way to cook with local, healthy ingredients. I bet you can get all the veggie haters in your life to eat some winter squash hidden in these little gems.

Another great thing about these waffles is that the squash takes the place of the egg in the recipe so they’re great for people with allergies or those who are vegan. I promise you’ll love them even if you’re not!

These waffles are that perfect mixture of crispy on the outside and soft and fluffy on the inside.

Here’s what you’ll need:

  • 1 cup of flour (all purpose or whole wheat)
  • 1/2 tsp baking powder
  • 1/4 tsp baking soda
  • 1/2 tsp cinnamon
  • 1/8 tsp nutmeg
  • 1 TBS sugar
  • 1/2 cup of pumpkin puree
  • 6 TBS vegetable oil
  • 1 tsp vanilla extract
  • 1 cup milk (for dairy free replace with nut milk or water)

Option toppings:

  • maple syrup, butter, molasses, or powdered sugar

First combine all dry ingredients in a mixing bowl then add the pumpkin or squash puree, vanilla extract, and vegetable oil. Next, slowly stir in the milk. If you’re puree was watery you may need less of the milk. The batter should be easy to pour but not thin.

While you’re mixing up your batter you can pre-heat your waffle iron. A hot waffle iron makes better waffles that stick less.

Cook your waffle using the normal directions for your waffle iron and enjoy! Then promise your family you’ll make a double batch next time when they keep coming back for more.

Pin it for later.

Putting Up Produce the Old Ways: Fermenting, Drying, and Cellaring

For the modern gardener keeping a surplus harvest means blanching and freezing or canning. These methods certainly have their virtues but it’s important to remember they’re not your only options. For hundreds of years humans put up their harvests without the aid of modern canning jars or electricity.

For some in areas with frequent power outages or off grid houses freezing produce may not be the best option. Canning, especially pressure canning, can be relatively time and energy intensive. Plus fermenting, drying, and cellaring all have their own benefits.

Fermenting

It sounds a little weird but fermented food may be some of your healthiest preserves. Fermented food has lacto-bacteria that has been shown to improve gut flora. Your gut flora is important to your digestion but new studies have also shown gut flora to be an important facet of your overall health.

Easy fermented foods include pickles, kraut, and kimchi but nearly any vegetable can be fermented. Check out this post for a more in depth look at fermenting vegetables.   

Drying

Drying or dehydrating produce is probably one of the easiest methods of preserving produce and it can be much less energy intensive than canning or freezing but still keep for a very long time. Dried produce can be eaten as snacks or rehydrated for use in soups and stews during the winter months. It’s also great lightweight food for families who enjoy camping or backpacking.

Before electricity was available drying food was mostly used a preservation method in warm, arid climates where food could be quickly dried outside before it rotted. Today you can find many plans online for solar dehydrators which will help those in more humid climates achieve the same effect. Thankfully for those in really humid areas or without a passion for DIY projects there are tons of electric dehydrators available on the market and most are very affordable.

Cellaring

Don’t skip this section just because you don’t have a root cellar! There’s many ways to store produce fresh even if you live in a small apartment. Check out this post, How to Store Crops Without a Root Cellar for our best ideas.

A lot of produce can be kept fresh in storage including onions, carrots, beets, turnips, winter squash, even cabbage and brussels sprouts! Cellaring is a method in which heirlooms will often have the advantage. As many were bred when people put up all or much their own food heirlooms often have some of the best storage abilities. Keep this in mind this winter as you’re choosing varieties.

Succession Planting

For anyone who dreads spending time preserving a great way to avoid a lot of food preservation altogether is to use succession planting. This is when you start plants at different intervals so that they’re ready at different times. Rather than planting all your green beans in one day plant a row or two (depending on your family’s size) one day and then plant again in a few weeks. This will spread your harvest out over a longer period of time ensuring you can enjoy more of it fresh!

For more tips check out, Succession Planting 101.

These methods may be old but they’re still awesome! Fermenting, drying, and cellaring can help you avoid food waste and keep healthy, local food continuously available.

Pin it for later.

Saving the Past for the Future