Tag Archives: beets

Fall Harvest: Storing & Preserving Root Crops

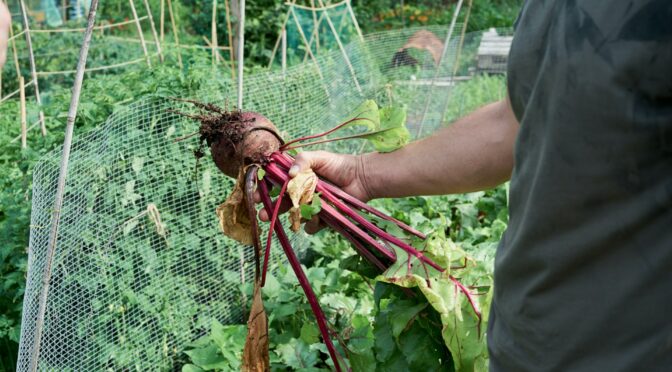
Whether you’re on a mission to grow as much of your own food as possible or just love cooking with homegrown vegetables, putting up root crops for winter can be an easy way to keep the winter pantry full. Beets, carrots, fall radishes, rutabagas, and turnips can last several months if stored properly. 

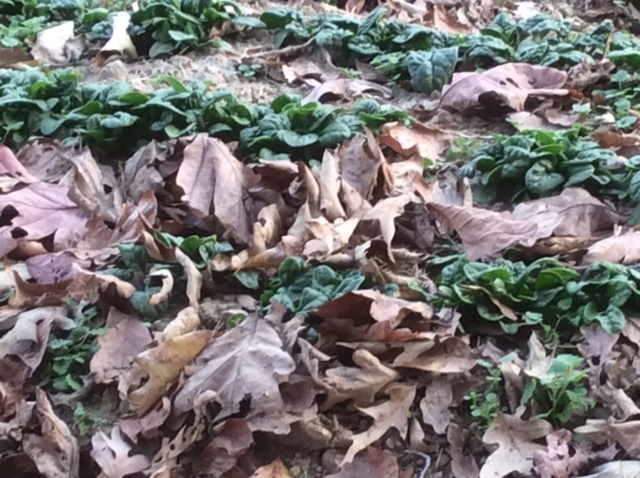
In some cases, root crops can be stored right in the ground. In areas where the ground doesn’t freeze, crops that are maturing just as the growing season ends can be mulched in and harvested throughout the winter. However, this isn’t always possible, and there are other ways to store and keep your root vegetables fresh. To begin:

  1. Harvest carefully.

    It’s best to harvest root crops during a dry period and before any hard frosts. To avoid damaging root crops, you may need to use a garden fork to help loosen the soil.

  2. Brush them off.

    You don’t want to scrub the skin off but you should try to gently rub off as much soil as possible. It’s best not to wash them.

    Any damaged or bruised roots that you find should be set aside to be eaten immediately.

  3. Trim the tops.

    Rotting tops can quickly spread rot to your root vegetables so it’s best to trim them. Using a sharp knife or shears to trim leafy tops to 1/4 to 1/2 inch about the root. Don’t trim root ends or hairs, this invites rot!

  4. Find a place to store them.

    Root vegetables should ideally be stored somewhere cold and moist. Temperatures between 33° and 40°F are preferred. If you’re fortunate enough to have one, a root cellar is ideal, but other options exist. 

    If you don’t have too many roots, you can use the crisper drawer of your refrigerator. Alternatively, a cool corner of a basement or garage will work. You can also use an outbuilding or storage shed in parts of the Southeast as long as you can keep out rodents and you don’t have temperatures below freezing. 

    If you need to store many vegetables and are interested in a DIY project, you can create a root clamp

  5. Place them in appropriate containers.

    If you’re storing roots in your refrigerator, it’s best to use perforated plastic bags. Try to set the bags in so that the roots in each bag are in a single layer.

     Roots being stored in a root cellar or other cold room can be stored in various containers, including plastic totes, waxed cardboard boxes, 5-gallon buckets, and or even an old cooler. It’s best if there’s some airflow, so avoid putting the lid on tight, and you may even want to drill some additional holes in the container. 

    In these containers you want to keep your roots from touching the container or each other. To do this you can layer them in damp sand, sawdust, or even old leaves.

  6. Check on and eat your roots!

    You should check all the root crops you have in storage every week or two and remove any that are beginning to soften or rot. The smallest roots generally don’t store as well and should be eaten first. 
Amber Globe (Yellow Globe) Turnips

Other Preservation Methods

If you don’t want to store your root vegetables fresh or are short on space, there are many other ways to preserve them. These include fermentation, pickling, canning, and freezing. These generally take more time and effort upfront but are great for having vegetables that are quick to prepare or even ready to snack on throughout the winter. 

Fermentation

Lacto-fermentation is a simple, safe, and ancient method of food preservation. All you need is clean, sliced vegetables, a mason jar and lid, a clean rock or weight, salt, and water. You simply ferment your vegetables and any desired spices in saltwater brine. You can substitute sliced root vegetables for the cucumbers in this recipe.

You can also grate them up and add them to other ferments like kimchi. The book Wild Fermentation by Sandor Katz is an excellent resource for those looking to get started or expand their fermentation techniques. 

Pickling

Pickling is a bit more involved than fermenting, but it’s still a safe, easy to preserve root vegetables, even for beginners. Pickled vegetables are canned in highly acidic vinegar, so they can be safely processed in a simple water bath canner. 

There are many recipes available online if you’d like to browse others. Note that any labeled as “quick pickles” are designed to be refrigerated not canned.

Pressure Canning

Without the addition of vinegar, root vegetables are not acidic enough to be safely water bath canned. This means if you’d like to can plain root vegetables you’ll need to use a pressure canner. It’s not as scary as many people think!

PennState Extension has instructions for pressure canning vegetables here. Always follow the instructions that came with your canner.

Freezing

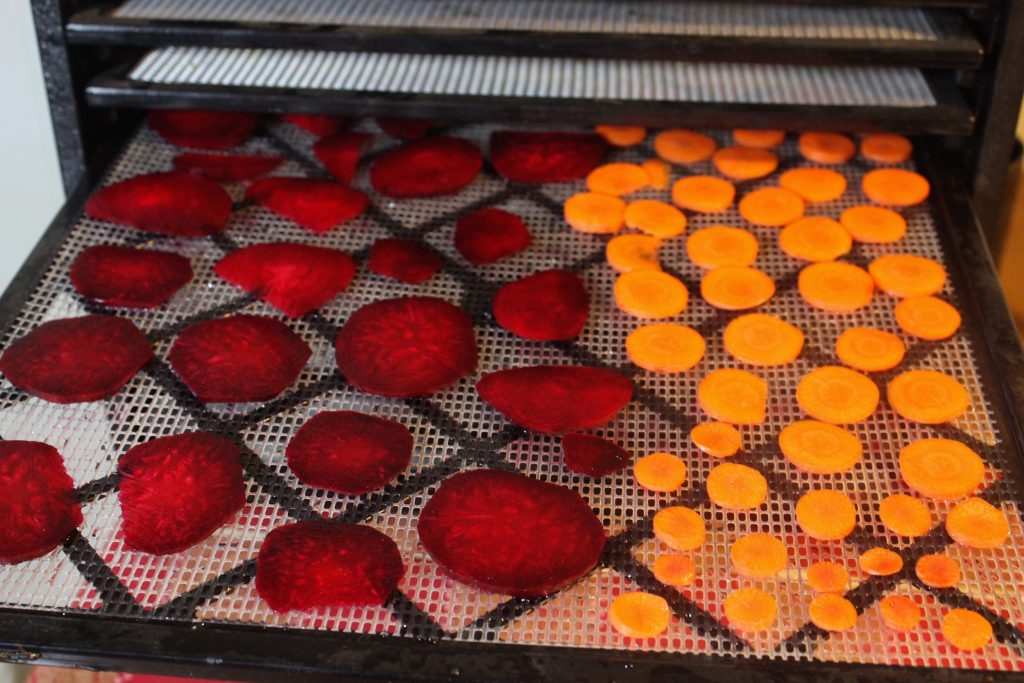
If you have room in your freezer, this can be a great way to keep root vegetables. They generally freeze well and maintain good texture and flavor. 

Like other vegetables, you must blanch root veggies before freezing; otherwise, they will get mushy. You can find directions for freezing all kinds of vegetables over at the Pick Your Own website. 

DIY Natural Food Coloring from Garden Vegetables

Many people are starting to turn away from heavily processed foods toward more wholesome natural diets. While whole grains, fruits, and vegetables are great sometimes you just need to make cupcakes with bright pink frosting. Thankfully you don’t need to turn to artificial colors to make fun, colorful food. These easy, natural, DIY food colorings can brighten up a homemade birthday cake or help you craft a colorful smoothies without chemical additives.

Beets (pink/red)

Peel and slice beets as thinly as possible and place on a single layer on a dehydrator tray. You can dry them at about 135°F or on your dehydrator’s fruit or vegetable setting. Dehydrate your beets until they’re fully dry and brittle.

Then it’s time to powder your beets. This can be done with a food processor, blender, or even a mortar and pestle. Whatever you choose you’ll want to get the powder as fine as possible so it blends well with the food you’re trying to color.

As with many vegetable based dyes the color may not be as strong as you’d expect. Beets may give you more of a pink color than darker red. You can use more beet powder however it will be a balance between adding enough for the color and adding too much powder to your recipe.

Unfortunately with beets and many vegetable dyes they can be affected by baking so you may want to stick with non-baked items like frostings.    

Spinach (green)

Winter Bloomsdale Spinach

Spinach should be rinsed and then dehydrated. For the best color it should be dehydrated as soon as possible after harvest. Place it on a single layer on a tray. It won’t take nearly as long to dry as the beets but once again you’ll want to ensure its fully dried so it can be powdered and stored without molding.

Turmeric (yellow)

As many canners and fiber artists will know turmeric can be used to create a vibrant yellow color. It’s often used in bread and butter pickle recipes giving them their yellowish appearance.

Turmeric is not a commonly homegrown spice but it can be done. It is a rhizomatous plant in the ginger family. Check out How to Grow Your Own Turmeric Indoors from Rodale’s Organic Life.

Carrots (orange or purple)

Carrots can be processed almost exactly like beets to offer an orange or purple color depending on the variety. However carrots do not need to be peeled like beets but you’ll want to wash them well before processing.

Sweet Potatoes (orange or purple)

All Purple Sweet Potato

Like carrots sweet potatoes will give you either a purple or orange food coloring depending upon the variety you choose. Unlike carrots and beets you’ll want to use cooked sweet potato puree not powder. Simply peel, chop, boil and then puree your potatoes.

Blue Butterfly Pea (blue or purple)

Like turmeric this plant isn’t super common in backyard vegetable gardens but it is easy enough to grow. It’s commonly grown in Asia and the flowers are used as an herbal tea. The tea can be used to make beverages blue or you can add a touch of lemon juice to turn the tea purple. For other recipes the dried flowers can be powdered and added as food coloring.

Red Cabbage (blue)

Surprisingly red cabbage juice makes a blue food coloring. You can use a juicer or just blend the cabbage up, place all the cabbage into some cheesecloth and squeeze as much juice out as possible (read these Tips on choosing a veggie juicer before you go on about it). For a more vibrant blue baking soda can be mixed into the juice. Start with adding just a little until you see results.

No one eats a perfectly healthy diet but by utilizing your backyard vegetable garden and spice cabinet you can have fun, colorful food while avoiding artificial colors. They may not be perfect matches for artificial food coloring but vegetable food colorings are surprisingly easy to make and use. So try your hand at homemade colorful pasta or add icing to some cookies for Halloween!

Have you ever used a natural food coloring?

Fresh Greens to Harvest from Fall through Winter

Spinach with Leaf Mulch

By Ira Wallace

Fall and winter offer a second chance to grow all the delicious greens and wonderful roots we savor in spring. They’re even easier to grow, thanks to decreasing weed pressure and reduced need to water. Many winter greens, like kale, collards, and spinach, even taste sweeter in fall as they concentrate sugars to withstand colder temperatures.

Our garden is brimming with greens ready for harvest now, as well as younger plants that we won’t harvest until early spring when they will grow rapidly as the days begin to lengthen.

Elliot Coleman coined the term “Persephone Days” for the period when there is less than 10 hours a day of sunlight and plant growth slows to a halt. Typically November 21st through January  21st, or a little longer due of outside ground temperatures. So what you see in the garden now is what you get until early February for practical purposes, unless you are growing under cover in a greenhouse, cold frame or low tunnel.

With an extended drought and weeks of record breaking highs, 2016 was a really tough year for establishing our fall crops. In many cases we had to do a third succession planting to get the beds full of thriving plants. In the case of spinach and kale, our last and most successful sowing was in early October. For an idea of what and when we sow most years read our blog post on Summer Sowing: Continuous Harvest All Summer into Fall or look at our Southern Exposure Fall and Winter Growing Guide.

So let’s take a look at some of what we have green and growing in the garden on “Black Friday Weekend 2016”:

vates collards
vates collards

Kale, collards, and spinach are our largest plantings for winter greens because of their versatility in the kitchen and dependable winter hardiness. Because our earliest succession plantings had spotty germination we have a lot more plants from the later sowings. Luckily for us the unusually warm temperatures continued into November so we have nice full beds of Abundant Bloomsdale spinach and Lacinato Rainbow kale going into December. Fortunately half grown ”juvenile” plants often survive the winter and last longer into the spring. In addition to the heat and drought our collards were also attacked by grasshoppers in August so the remaining plants are smaller than usual at this time. Heirloom collards are survivors so I expect they will do well and start vigorous growth again in early spring.

tatsoi rosette
tatsoi rosette

We have already harvested many of our oriental greens for stir-frying and to make Kimchee, but our Tatsoi greens are still looking and tasting great. In winter we enjoy the shiny dark green leaves in salads, stir-frys and soups. One interesting thing with the spotty germination on some of our early sowings is how large the plants can get in fall and still be sweet and tender.

creasy greens
creasy greens

Another favorite green for us and many others in our region are Creasy Greens and their cousin from grower Frank Morton of Wild Garden Seeds in the Northwest, Belle Isle Cress. They are lightly spicy and crisp in winter. Take care as they will naturalize if left in the garden to produce seed.

Let’s not forget Arugula, another winter salad favorite.

lettuce in the hoophouse at Twin Oaks

We also grow a lot of winter lettuce. I especially like red varieties for the deep color they develop in winter. Outredgeous and the Wild Garden Lettuce mix are favorites that have been joined by the heirloom Crawford, a Texas winter salad Lettuce.

We still have some winter roots in the ground: carrots, beets, salsify, parsnip and winter radishes. We have potatoes and sweet potatoes in storage.

Maybe we can look at what we still have canned, dried, fermented and frozen sometime soon. Until then enjoy your garden.